Copying What You’ve Already Drawn
In SketchUp, you can copy geometry by using
- The Copy and Paste commands
- The Move tool (
 )
) - The Rotate tool (
 )
)
When you copy and paste with the Move tool, you can make a single copy or create multiple copies and tell SketchUp where and how to place them in your model. You can even paste the geometry you copy in your current model into another SketchUp model!
Use the Rotate tool when you want one or more copies to circle around a center point, sort of like engineers around a DIY quadcopter kit.
Table of Contents
- Copying and pasting geometry
- Copying and multiplying geometry with the Move tool
- Rotating copies around an axis
Copying and pasting geometry
SketchUp's Copy and Paste commands work much like they do in many other programs. Here's how to copy and paste in SketchUp:
- Using the Select Tool (
 ) or the Lasso Select tool (
 ), select the geometry you want to copy. See Selecting Geometry for tips on making selections.
 - Choose Edit > Copy from the menu bar or use a keyboard shortcut (Ctrl+C for Windows, Command+C for macOS) to copy your selection.
- Select Edit > Paste from the menu bar or use a keyboard shortcut (Ctrl+V for Windows, Command+V for macOS) changing the cursor to the Move tool icon. Your copied geometry floats around as you move the mouse. In the figure, you see a copy of the copied trapezoid-shaped face about to be placed on the red-green plane.
- Click where you want to place the copied geometry.

Copying and multiplying geometry with the Move tool
The Move tool can copy geometry - or make numerous copies - with only a few clicks and keystrokes. Using the Move tool to make a copy also allows for a more precise placement of a copy because you can specify an exact start point for your copy operation.
Copy with the Move tool using the following steps:
- Using the Select tool () or the Lasso Select () tool, select the geometry you want to copy.
- Select the Move tool () from the toolbar or press M. The cursor changes to a four-way arrow.
- To tell SketchUp that you want to duplicate the selected entities, tap the Ctrl (Microsoft Windows) or Option (macOS) key to toggle Copy functionality. A plus sign appears next to the four-way arrow cursor.
- Click the selected entities.
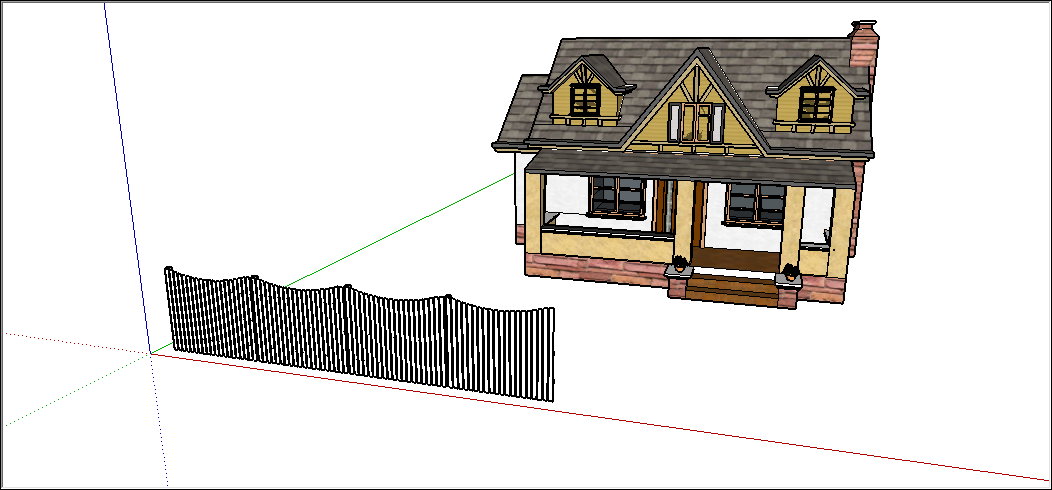
- A copy of your selection follows your cursor around in your model. In the figure below we copied the fence panel and moved the copy to the left.
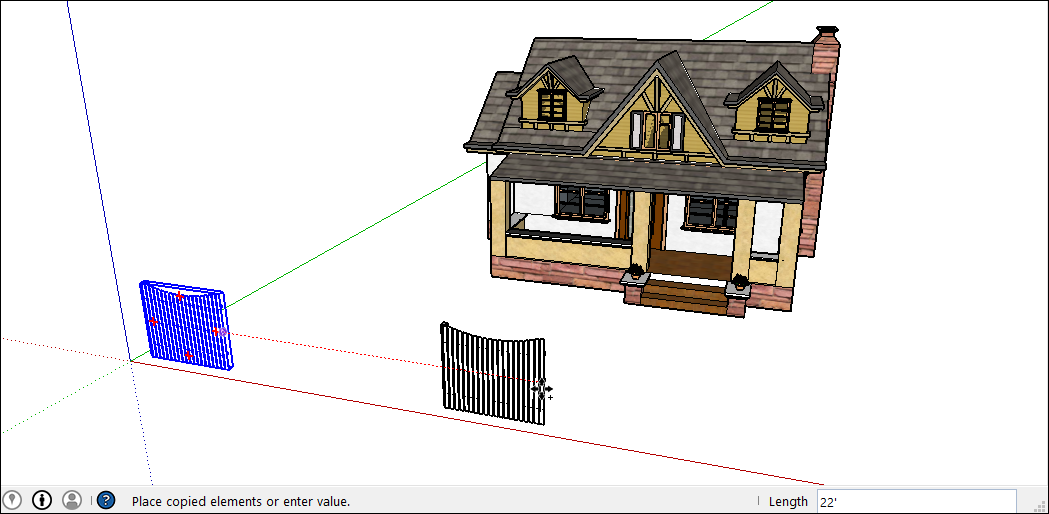
- Click where you want to place your copy. To move your selection a precise distance type a length value, such as 21' or 30m, and then press Enter. The copied geometry appears selected where you clicked. The original geometry is no longer selected.
To create multiple, equally spaced copies type a distance value and a multiplier (seen in the Measurements box). The following table outlines your options.
| To Do This | Type This | Example |
| Create multiple copies. | A number and X, or * and a number | Type 7x (or *7) to make 7 copies. |
| Divide the distance between the copy and the original. | A divisor value | Type 5/ (or /5) to create four copies evenly spaced between the original and the first copy. |
Stamp Copy allows you to make and place multiple copies of the selected geometry in your model with just a few mouse clicks. To activate Stamp Copy, follow steps 1-3 above then tap Ctrl (Microsoft Windows) or Option (macOS) again. A small, stamp-shaped icon appears next to the Move cursor. You can now click anywhere in your model to create a new copy of your selected geometry. If you toggle out of Stamp Copy mode you will need to start again from step 1 to copy the same geometry again. Stamp is only available before you click to start a Move tool operation.
Rotating copies around an axis
Whether you want to model Stonehenge or a backyard fire pit, the Rotate tool simplifies the work of placing copies around a center point.
Tip: If you're not familiar with the Rotate tool, review the basics of rotating geometry in SketchUp.
To rotate copies around a center point, follow these steps:
- With the Select tool () or the Lasso Select tool (), select the geometry you want to copy and rotate.
- Select the Rotate tool () on the toolbar or press Q.
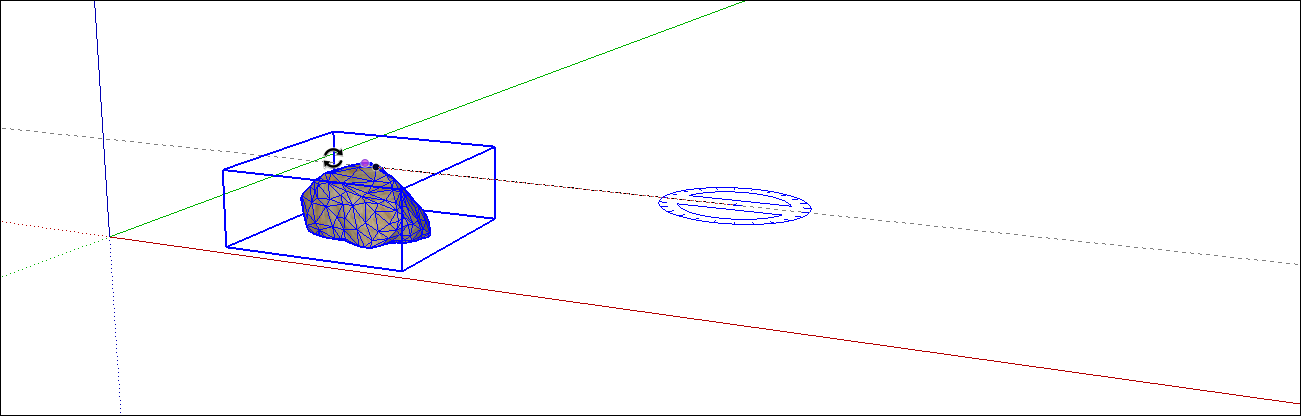
- Click where you want the rotation's center point to be, as shown where the Rotate cursor appears in the figure.
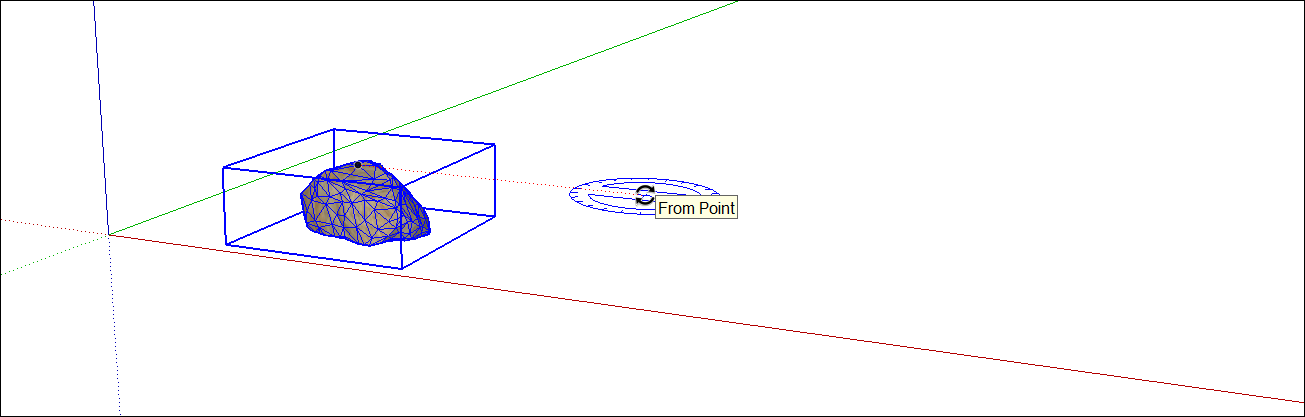
- Click the selection you want to copy and rotate. The following figure shows the inference lines that appear after clicking the rock.
- Tell SketchUp to make copies by tapping the Ctrl key (Microsoft Windows) or the Option key (macOS) to toggle the Copy functionality, this will persist until it's toggled off. A plus sign appears next to the Rotate cursor. (You can actually tell SketchUp to make copies anytime between Steps 3 and 5.)
- Move the cursor to wherever you want to place your rotated copy. As you move the cursor, an inference line shows the angle between your original geometry and the rotated copy, as shown in the figure.
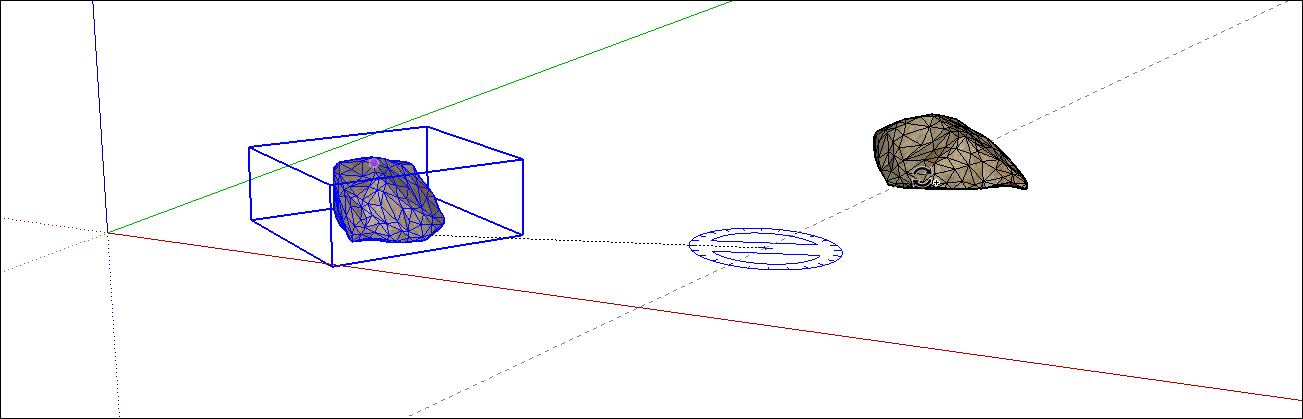
- Click to place your copied geometry.
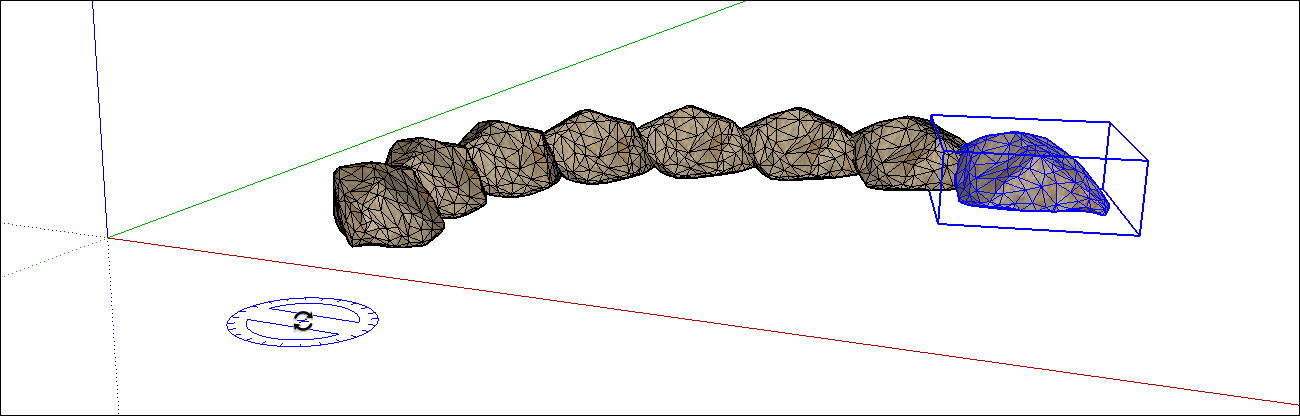
- (Optional) Type a number and the x, *, or / modifier to create multiple copies around the center point. (See the earlier table for details about what each modifier does.) In the figure, typing 7/ created 7 copies of the rock.