Your model is more than just straight lines. SketchUp can help you create curved geometry using arcs. Check out this square one YouTube video to learn the basics of using the arc tool.
Before you begin drawing arcs, here are a few handy details about the way arc entities work:
- An arc contains multiple connected line segments, but exists within your model as a single entity.
- An arc can both define the edge of a face and divide a face.
- Although an arc is one entity, SketchUp's inference engine identifies each segment that makes up an arc and highlights any geometric point if you hover your cursor over one.
- Each arc contains 12 segments by default. You can tell SketchUp how many segments to use in an arc entity. More segments means your arc may appear smoother, but SketchUp needs to work harder to display your model. Fewer than 12 segments keeps your model simple, but the arc may look a bit blocky.
SketchUp offers four tools to help you draw arcs in your model, each with its own unique method of creating an arc to best suit what you want to appear in your model:
- Arc: When this tool is activated a protractor appears to help you set the beginning and ending of the arc based on your desired angle. Your first click defines the center point, the second your endpoint, and the third finishes the arc creating an open arc made of straight-edge segments.
- Pie tool: This tool works just like the Arc tool, but creates a closed pie shape that becomes a face.
- 2 Point Arc tool: Activating this tool changes your cursor to a pencil. Your first click defines one end of the arc, the second the other end. The third click defines the bulge of the arc.
- 3 Point Arc tool: Activating this tool also changes the cursor to a pencil. The first click sets your starting point, the second a pivot point, and the third defines the endpoint.
You can find the arc tools in a few different places:
- The Getting Started or Drawing toolbars.
- The Large Tool Set toolbar
- The Draw > Arcs submenu
- The Tool Palette (macOS only)
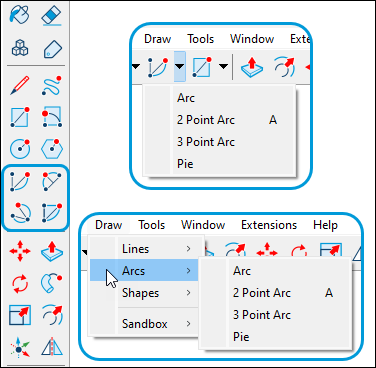
The following video introduces how you draw with the rainbow of arc tools and each tool's golden secrets. Or read on for details about drawing with each arc tool.
Drawing with the Arc and Pie tools
The Arc tool and the Pie tools are handy when you need to know your arc's angle, rather than a bulge or radius. The Arc tool draws an open arc, and the Pie tool draws a closed, pie-shaped arc.
To create an arc with the Arc or Pie tool, follow these steps:
- Select the Arc tool (
 ) or the Pie tool (
 ). The cursor changes to a pencil with an open arc or a closed arc, respectively, and a half-circle protractor indicates the orientation of a drawing plane.
 - Click to place the center of your arc. A full circle protractor appears locking the orientation of the drawing plane.
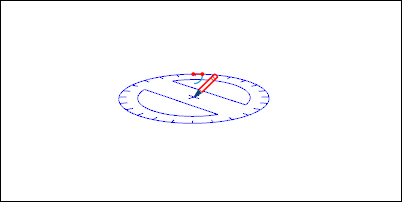
- Move the cursor to the starting point of your arc. Notice that the Radius value in the Measurements box changes dynamically as you move the cursor. If you like, you can type a number and unit and press Enter to set a precise radius value.
- Click to place the starting point of your arc. A straight dotted line representing the radius of your arc appears, as shown in the figure. Notice that the Measurements box changes to accept an Angle value.
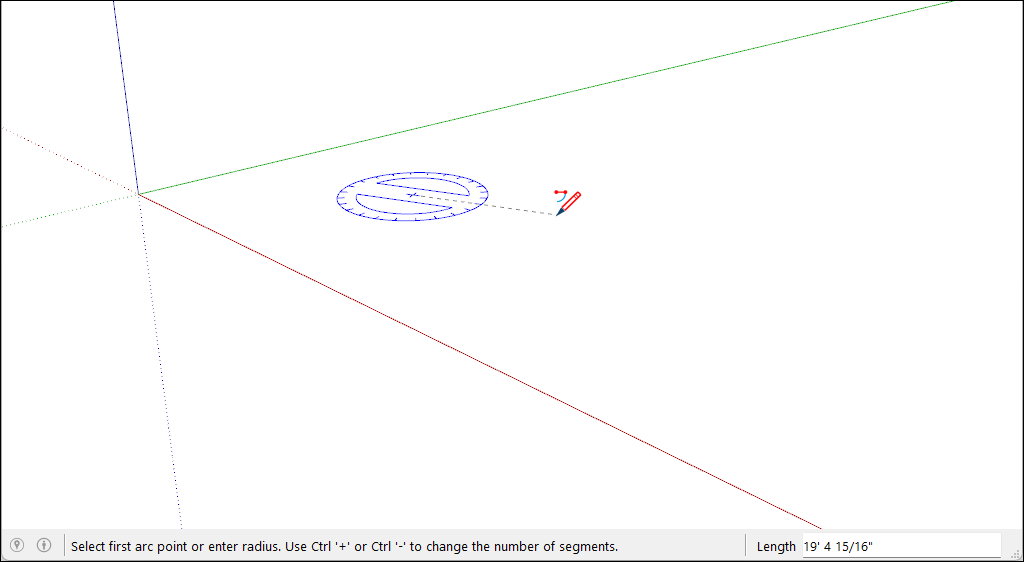
- Move the cursor to the ending point of your arc.
- Click to place the ending point of your arc. You may also type an angle value and press Enter or Return. If you use the Arc tool, SketchUp creates an open arc. If using the pie tool, you will see a pie-shaped face.
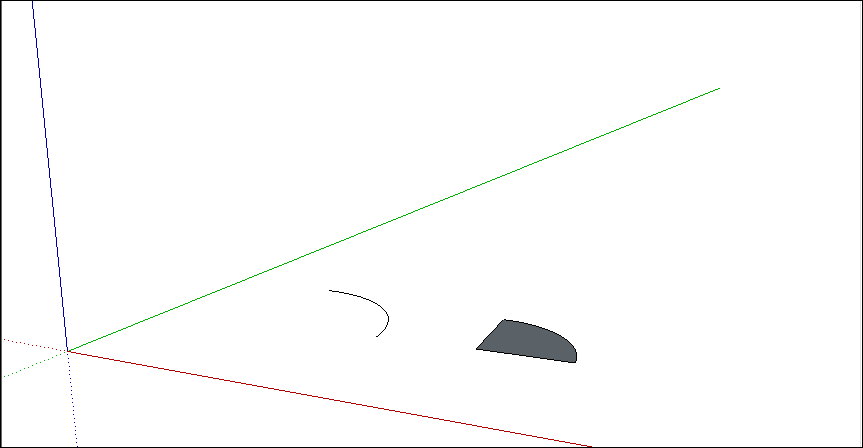
Arcs created with the Arc or Pie tool are drawn with a fixed number of line segments by default. These segments grow or shrink in length depending on the completeness of the arc. You can change the number of line segments or base the arc on circle segments - the number of segments it would take for the arc to form a complete circle - instead. To change the number of segments:
- Immediately after drawing the arc, type the number of sides you want and the letter S for sides then press Enter or Return.
- For example, typing 10s creates an arc with 10 line segments.
- To increase the number of segments press Ctrl + (Microsoft Windows) or Option + (macOS).
- To decrease the number of segments press Ctrl - (Microsoft Windows) or Option - (macOS). Please note, if you're using a French Canadian keyboard, press the Ctrl key (Microsoft Windows) and the +/= key to increase the segments. For macOS, press Command and = to increase segments or - to decrease segments.
To base your arc on circle segments:
- Immediately after drawing the arc, type the number of circle sides and the letter C for circle then press Enter or Return.
- For example, typing 20c tells SketchUp to base your arc on a 20-sided circle.
Drawing with the 2 Point Arc tool
When you draw an arc with the 2 Point Arc tool, you set the starting point, the ending point, and the bulge distance. The distance between the starting point and the ending point is also known as the chord length.
To draw a 2-point arc, follow these steps:
- Select the 2 Point Arc tool (
 ). The cursor changes to a pencil with an arc.
 - Click to place the starting point of your arc. The Measurements box is now ready to accept a Length value.
- Move the cursor to the ending point of your chord. (Press the Esc key at any point during the operation to start over.)
- Click to place the ending point or type a length value and press Enter. A straight line is created. The Measurements box changes to accept a Bulge value.
- Move your cursor perpendicular to the straight line to adjust the bulge distance. If you want to draw a half circle, watch for the half-circle inference, as shown in the figure. The inference tells you when the arc is a half-circle. You can tap the arrow key to lock your movement to that inference; Up for Blue, Left for Green, Right for Red. You'll see a notification at the cursor that the inference is locked.
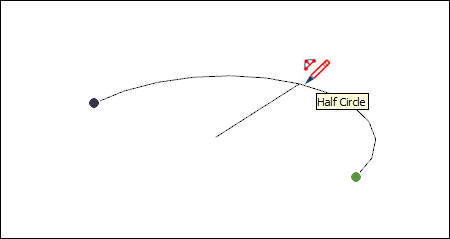
- Click to set the bulge distance or type a value, such as 5' or 7mm, and press Enter or Return.
If you need to repeat the same 2-point arc in your model, you can simply move your cursor to each corner and double-click. This action repeats the previous arc parameters and even cleans out the excess waste. Rounding each corner on a rectangle is an example of when you may need to repeat an arc when drawing.
Immediately after you draw a 2-point arc, you can change the bulge, radius, or number of segments with the Measurements box. Here's how to change each value:
- Bulge distance: After you finish creating a 2-point arc, the Measurements box is ready to accept a Bulge value by default. Simply type the value.
- Radius: You can specify an arc radius instead of a bulge distance. Type the desired radius in the Measurements box and add the letter R for radius. For example: 24r or 3'6"r or 5mr
- Number of segments: Type a number and followed by the letter S for segments. For example: 20s
Drawing with the 3 Point Arc tool
When you use the 3 Point Arc tool, you draw the arc based on a pivot point. Follow these steps to use the 3 Point Arc tool:
- Select the 3 Point Arc tool (
 ). The cursor changes to a pencil with an arc.
 - Click to establish a starting point of the arc.
- Move the cursor away from the starting point.
- Click again to establish the second point. A small dot appears, which is a pivot point for the arc.
- Move the cursor away from the dot. An arc appears as you move the cursor. You can tap the arrow key to lock your movement to that inference; Up for Blue, Left for Green, Right for Red. You'll see a notification at the cursor indicating the inference is locked.
- When you like the shape of your arc, click again to finish creating the arc.
Editing an arc entity
You can edit the radius of an arc entity using the Move tool or in the Entity Info dialog box.
With the Move tool (![]() ) selected, you can edit an arc entity as follows:
) selected, you can edit an arc entity as follows:
- Adjust the midpoint: Hover the Move tool's cursor to locate the midpoint of the arc. Then click and drag to adjust the arc, as shown in the figure.
- Move an end point: Click and drag an arc's endpoint to adjust the arc's length and radius.
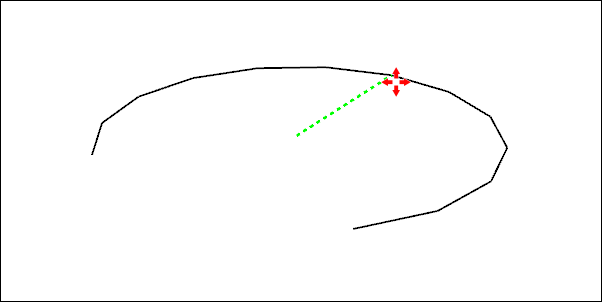
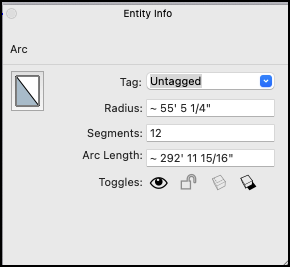
To access your arc's Entity Info panel, context-click the arc you want to edit. From the context menu choose Entity Info. In the Entity Info panel type a new value for the radius or number of segments.
When you use the Push/Pull tool to extrude a 2D face that includes an arc, SketchUp extrudes a special surface entity whose radius can also be edited. Use the Move tool to reposition the midpoint edge, and all the geometry that makes up the extruded arc will move accordingly, as shown in the figure.
