With SketchUp’s Solid tools, you can create new shapes by combining or cutting one shape with another, making it easy to model an outer shell or joinery.
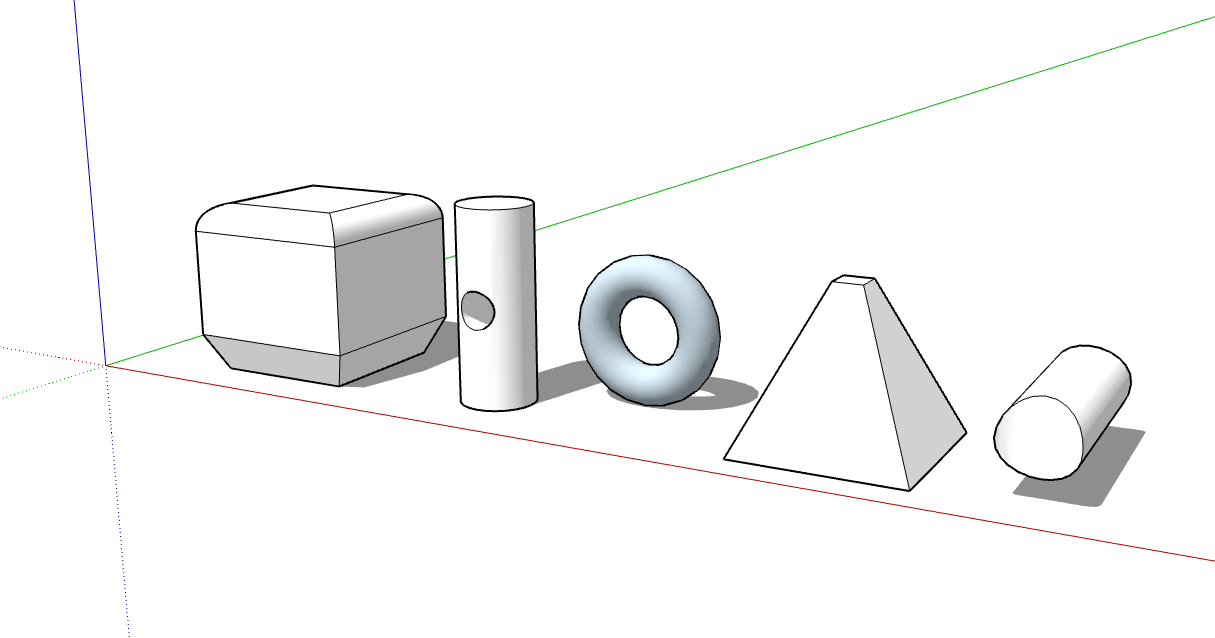
In SketchUp, a solid is any 3D model (component or group) that has a finite closed volume. A SketchUp solid cannot have any leaks (missing faces or faces that do not meet at an edge). The following image contains several solids.
Check out the following table for a quick introduction to the Solid Tools, including what the tool does and whether it’s available in SketchUp Free.
| Tool | Name | What It Does | Included in SketchUp Free? |
|---|---|---|---|
| Outer Shell | Leaves only the outer faces of overlapping solids. | Yes | |
| Union | Combines two or more solids into a single form. | Paid subscriptions only | |
| Subtract | One solid removes part of another and is deleted. | Paid subscriptions only. In SketchUp Free, use Intersect with Model. | |
| Trim | One solid trims another but remains in the model. | Paid subscriptions only | |
| Intersect | Leaves only the intersecting geometry. | Paid subscriptions only | |
| Split | Splits solids along intersecting geometry. | Paid subscriptions only |
To find the Solid Tools, look in the following parts of the SketchUp interface:
SketchUp Pro
- Solids toolbar
- Tools menu (Select Tools > Outer Shell or Select Tools > Solid Tools and select the other tools from a submenu)
- Tool palette (macOS)
SketchUp for Web
- Solids toolbar in the left-hand tray
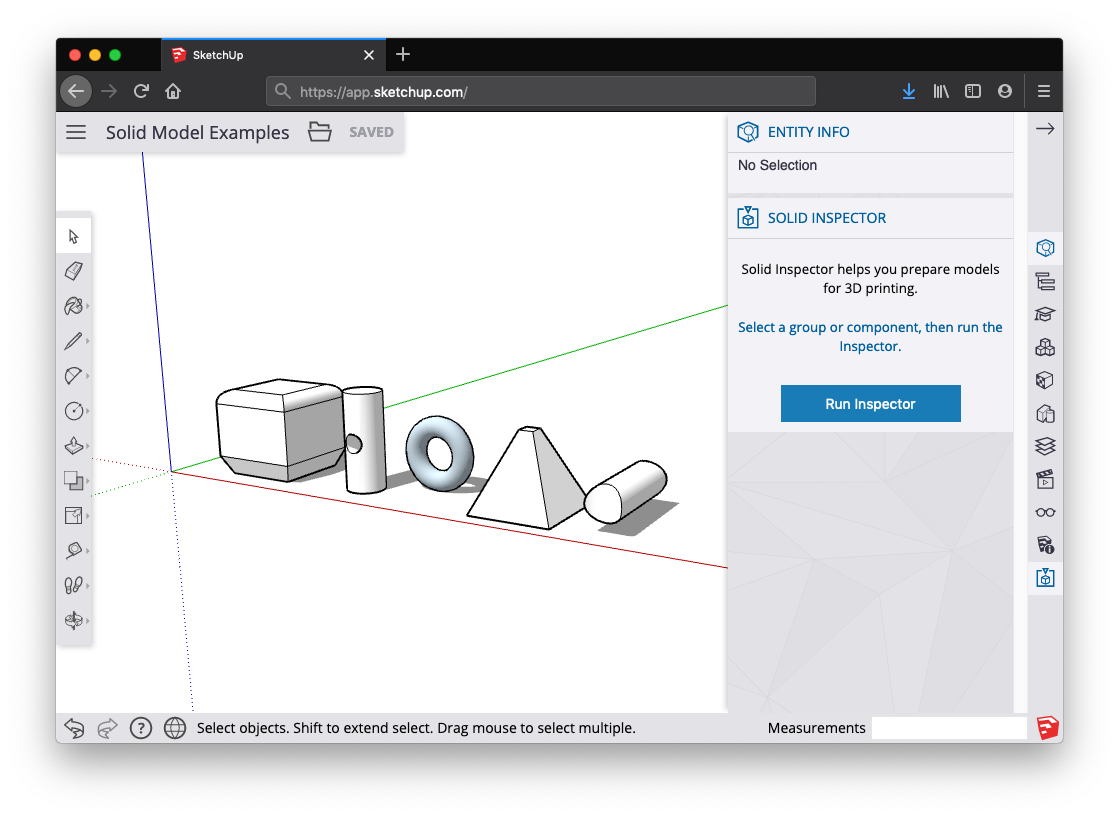
- Solid Inspector utility in the right-hand panel
In the following video, you see examples of the Solid tools in action. In the following sections of this article, you will find steps and details about using each tool. (Note, however, that you can't place SketchUp models in Google Earth anymore.)
Creating an outer shell
The Outer Shell tool (![]() ) removes geometry inside overlapping groups or components, leaving only the outer faces.
) removes geometry inside overlapping groups or components, leaving only the outer faces.
For example, say you have two models: One is a detailed interior and exterior building model. The other model illustrates the building in a street view that shows surrounding buildings, streets, and landscaping. You can import the detailed building model into your street view. However, all that geometry might slow down your street view model and isn’t necessary. In your street view, creating an outer shell of the building eliminates the interior geometry you don’t need so that your street view model is lighter and renders faster as you work on it.
To create an outer shell from overlapping groups or components, follow these steps:
SketchUp Pro
- With the Select tool (
 ), select all the intersecting groups or components you want to include in your outer shell.
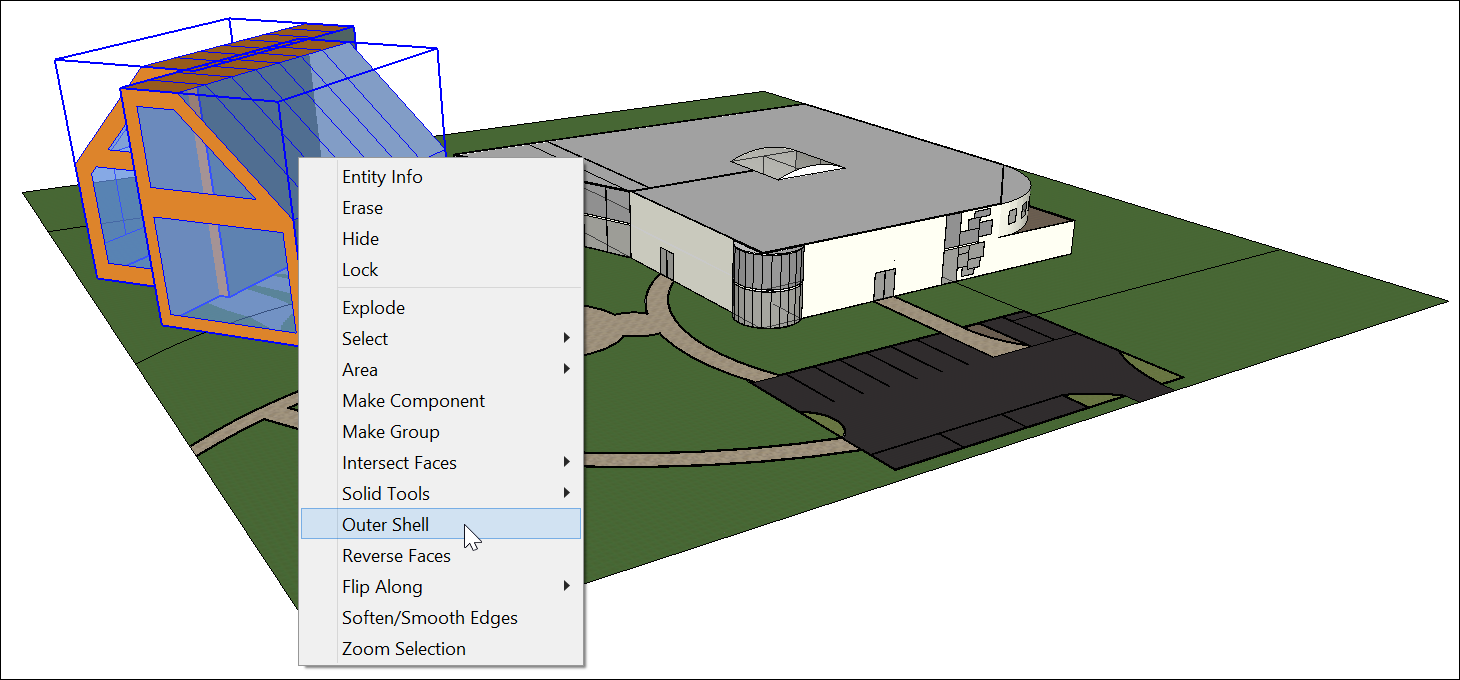
 - Context-click your selection and choose Outer Shell from the menu that appears, as shown in the figure. The outer faces remain.
Or, you can create an outer shell as follows:
Select the Outer Shell tool (
 ).Tip: Until you hover over a solid group or component, you see an arrow cursor with a circle and a slash. When your cursor hovers over a solid group or component, the red circle and slash change to a black 1 inside a circle, and you see a Solid Group or Solid Component ScreenTip.
- Click to select the first group or component in your outer shell.
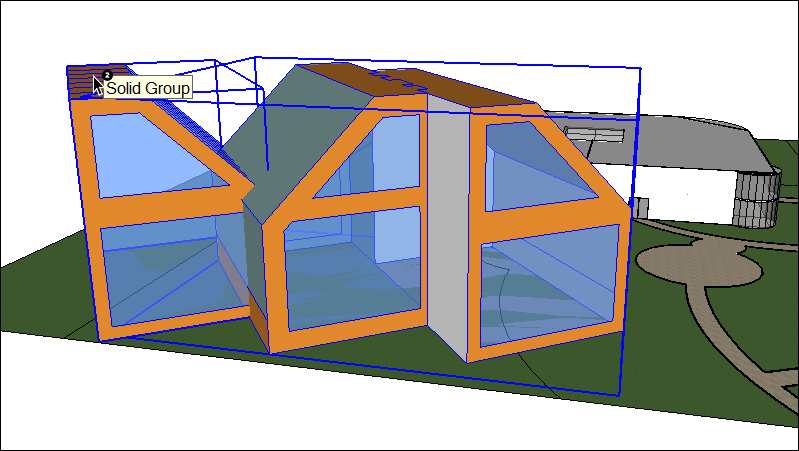
- Click the second group or component. SketchUp combines your selections into an outer shell so that only the outer faces remain.
- (Optional) Continue clicking additional groups or components to add them to your outer shell, as shown in the figure.
SketchUp for Web
Select the Outer Shell tool (
 ) from the left hand tool tray.Tip: Until you hover over a solid group or component, you see an arrow cursor with a circle and a slash. When your cursor hovers over a solid group or component, the red circle and slash change to a black 1 inside a circle, and you see a Solid Group or Solid Component ScreenTip.
- Click to select the first group or component in your outer shell.
- Click the second group or component. SketchUp combines your selections into an outer shell so that only the outer faces remain.
- (Optional) Continue clicking additional groups or components to add them to your outer shell, as shown in the figure.

Uniting solids into a single form
A union merges two or more solid entities into a single solid.
The result of a union is similar to the result of an outer shell. However, the result of a union can contain internal geometry whereas an outer shell contains only external faces. (See the preceding figure for an example.)
Here’s how to use the Union tool to combine solid entities:
Select the Union tool (
 ).Tip: Until you hover over a solid group or component, you see an arrow cursor with a circle and a slash. When your cursor hovers over a solid group or component, the red circle and slash change to a black 1 inside a circle, and you see a Solid Group or Solid Component ScreenTip.
- Click to select the first group or component for the union.
- Click the second group or component. The resulting union of the geometry remains.
- (Optional) Continue clicking additional groups or components to add them to the union, as shown in the figure, which uses X-Ray view so that you can see the geometry within each solid.
Subtracting one solid from another (or use Intersect Faces with Model)
With the Subtract tool, you can use one solid entity to cut another solid entity. Your original solid entity is then subtracted from the model. For the subtraction to work, the two solids need to overlap.
To perform a subtraction, follow these steps:
Select the Subtract tool (
 ).Tip: Until you hover over a solid group or component, you see an arrow cursor with a circle and a slash. When your cursor hovers over a solid group or component, the red circle and slash change to a black 1 inside a circle, and you see a Solid Group or Solid Component ScreenTip.
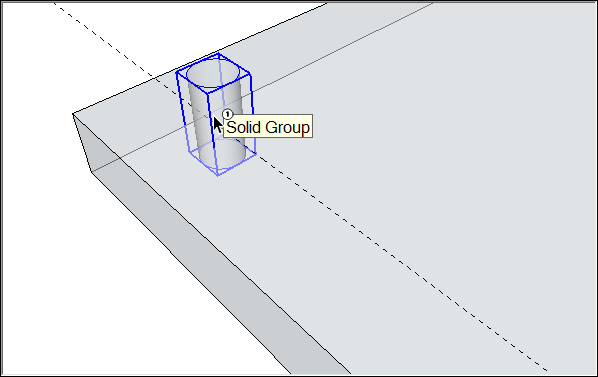
- Click to select the cutting group or component. In the example shown here, select the peg first to make a hole in the board. After you make a selection, the 1 next to the cursor becomes a 2.
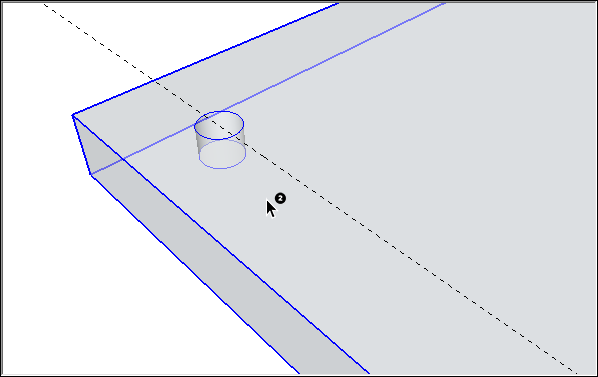
- Click the group or component that you want to cut. The cutting group disappears, but makes a hole in the second selection. In this example, you see a peg-sized hole in the board.
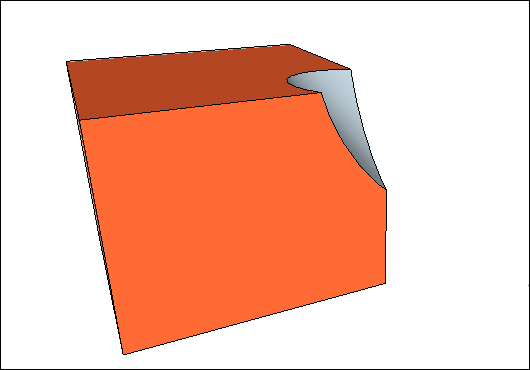
If you’re using SketchUp Free, you can create the effect of a subtraction by using the Intersect with Model command. When you use Intersect with Model, the two shapes don’t need to be solid entities. (In fact, Intersect with Model applies a different effect if your shapes are solids, as explained a little later in this section.) However, when you create a subtraction with the Intersect with Model command, the process requires a few more steps than the process with SketchUp Pro’s Subtract tool.
Here’s how to create a subtraction with the Intersect with Model command:
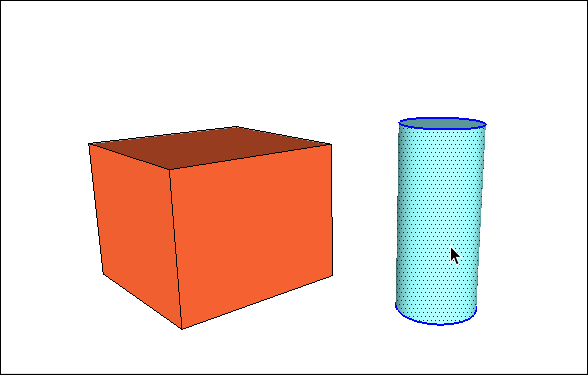
- Create two distinct volumes, such as a box and a cylinder. (See Drawing Basic Shapes and Pushing and Pulling Shapes into 3D for help.)
- With the Select tool (
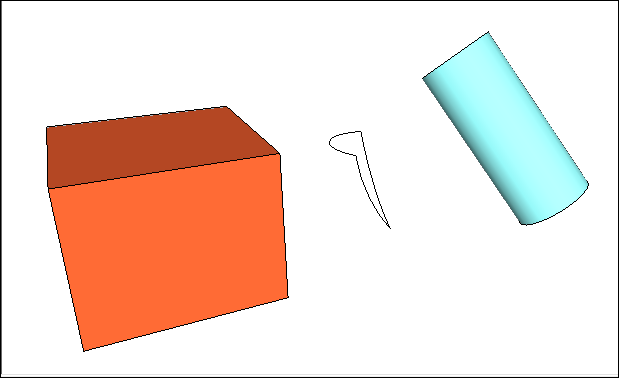
 ), triple-click the first volume, which will be your cutting object. In this example, the cutting object is the cylinder, as shown in the figure.
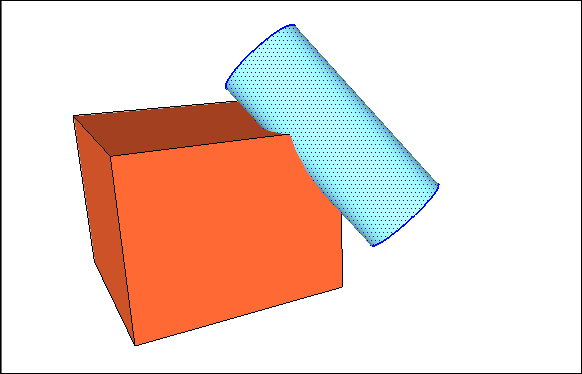
- Move and rotate your cutting shape so that it intersects with the shape you’d like to cut. (See Moving Entities Around and Flipping and Rotating for help.) Leave your cutting shape selected, as shown in the figure.
- Context-click the cutting shape, and choose Intersect Faces > With Model from the menu that appears. The command tells SketchUp to create edges where the two shapes intersect.
With the Eraser tool (
 ), erase or move the geometry that you don’t want to keep. In the following figure, you see how the box shape is changed after the cylinder is erased.Tip: Remember you can hold down the scroll wheel on your mouse to temporarily switch to the Orbit tool, so you can orbit around and find all the geometry you want do delete. (See Erasing and Undoing for details about the Eraser tool.)
Intersect with Model creates edges in the current context. If your shapes are groups or components, you can create the intersecting lines either within the group or outside it. When you create the intersecting lines outside a group’s context, you can easily separate your original shapes from the edges that SketchUp creates, as shown in the following figure. See Organizing a Model for details about groups and Adding Premade Components and Dynamic Components for an introduction to groups and components, respectively.
Trimming one solid with another
With the Trim tool, you cut one solid entity with another, just like a subtraction. However, when you use the Trim tool, the cutting solid remains in the model. So, if you use a peg to trim a board, the peg remains after it cuts the board. Like all the Solid tools, the Trim tool works only if two solid entities overlap.
To perform a trim, follow these steps:
Select the Trim tool (
 ).Tip: Until you hover over a solid group or component, you see an arrow cursor with a circle and a slash. When your cursor hovers over a solid group or component, the red circle and slash change to a black 1 inside a circle, and you see a Solid Group or Solid Component ScreenTip.
- Click to select the cutting group or component. In the example shown here, select the peg first to make a hole in the board. After you make a selection, the 1 next to the cursor becomes a 2.
- Click the group or component that you want to cut. The cutting group remains, but makes a hole in the second selection. The result is hard to see at first (refer to Callout 1). However, move the peg out of the hole, as shown in Callout 2, and you see the hole in the board.

Leaving only the intersecting geometry
With SketchUp Pro’s Intersect tool (![]() ), you select two or more overlapping solid entities, and only the intersecting geometry is left behind.
), you select two or more overlapping solid entities, and only the intersecting geometry is left behind.
To perform an intersection, follow these steps:
Select the Intersect tool (
 ).Tip: Until you hover over a solid group or component, you see an arrow cursor with a circle and a slash. When your cursor hovers over a solid group or component, the red circle and slash change to a black 1 inside a circle, and you see a Solid Group or Solid Component ScreenTip.
- Select a solid entity that you want to use in the intersection.
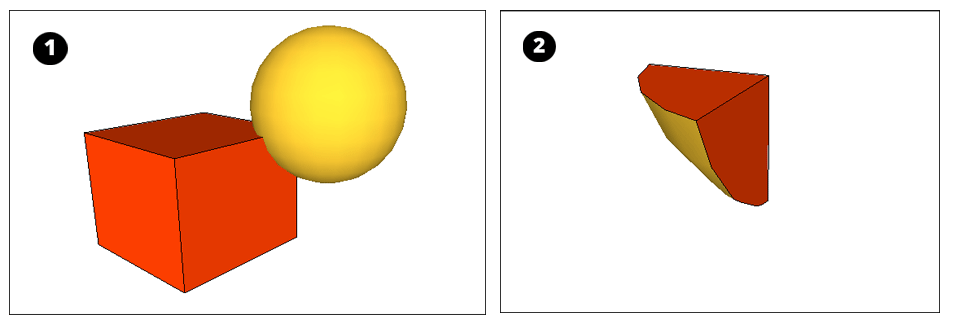
- Select one or more additional solids that overlap your initial selection. The resulting intersecting geometry remains. In this example, the intersection of the box and the sphere (Callout 1) creates a point with a rounded base (Callout 2).
Splitting solids
With the Split tool (![]() ), you can divide overlapping solid entities along their intersecting edges. To perform a split, follow these steps:
), you can divide overlapping solid entities along their intersecting edges. To perform a split, follow these steps:
Select the Split tool (
 ).Tip: Until you hover over a solid group or component, you see an arrow cursor with a circle and a slash. When your cursor hovers over a solid group or component, the red circle and slash change to a black 1 inside a circle, and you see a Solid Group or Solid Component ScreenTip.
- Click a solid entity.
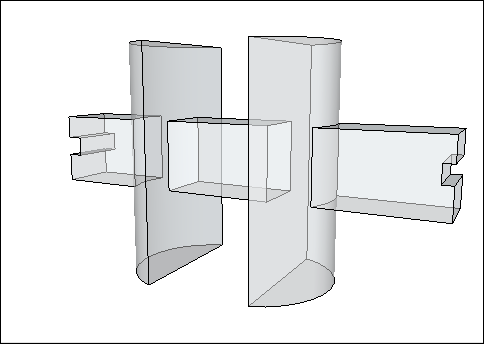
- Click another solid entity that intersects your first selection. SketchUp splits all the geometry along the edges where the selected solids intersect. For example, in the figure, the two groups shown on the left split into 3 groups, as shown on the right.

Fixing models with Solid Inspector in SketchUp Web
As geometry gets more and more complex, small errors may prevent models from being manifold. Solid Inspector in SketchUp for Web is a utility that helps you prepare models for 3D printing by finding and fixing problems that prevent SketchUp from classifying your model as a solid. This inspection is also useful for fixing 3D models for Solid Tool operations.
Activate Solid Inspector
Find the Solid Inspector utility at the bottom of the right-hand panel menu in SketchUp for Web. When you activate the utility, you’ll be prompted to select a group or component. With a selected object, click Run Inspector to proceed. When an error is identified, click on its name to learn more about it; use arrow icons to fly the SketchUp camera to the individual problems in your model.
Automatically Fixable Errors
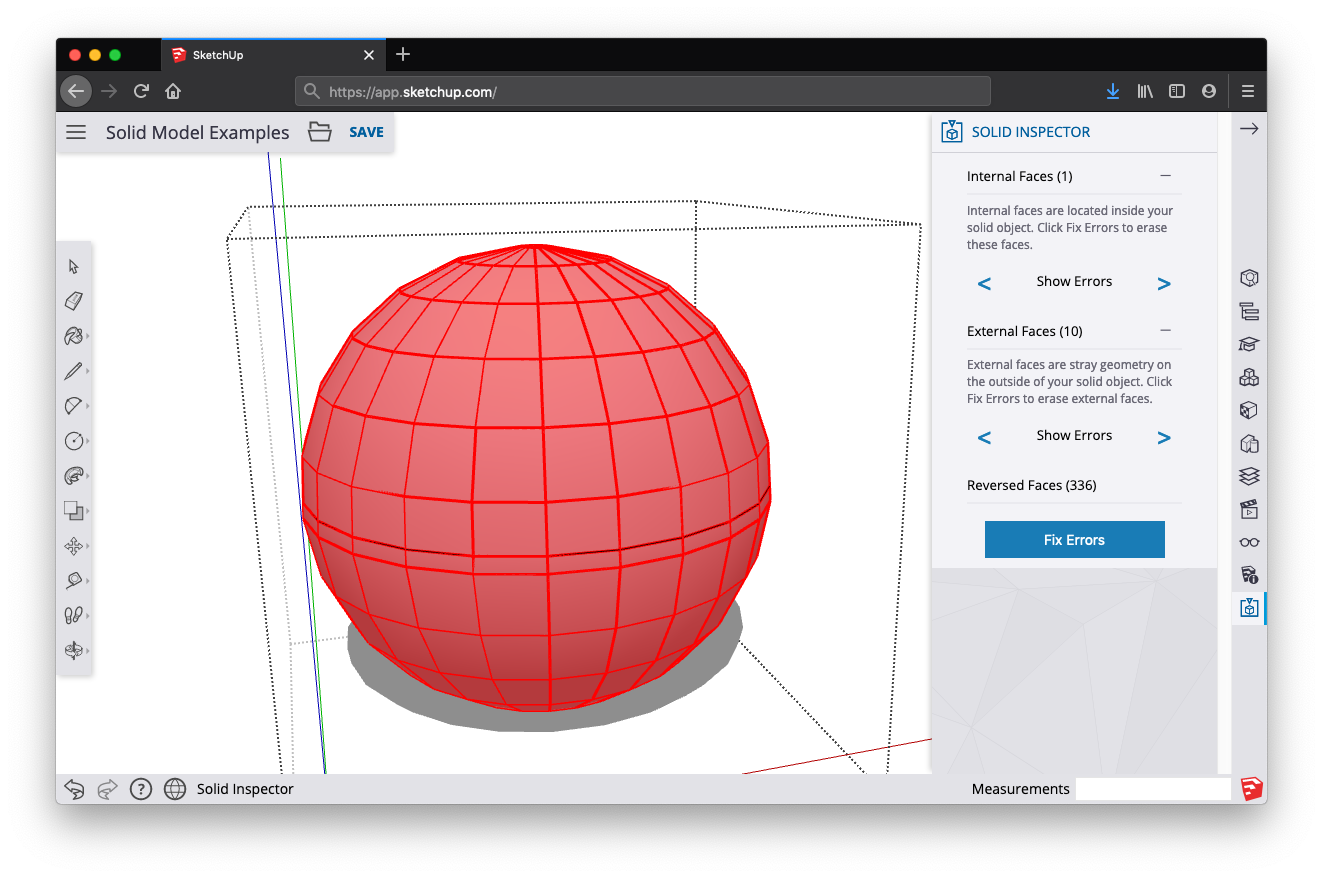
Several errors that Solid Inspector detects can be fixed automatically. Solid Inspector errors are identified by red-highlighted geometry, so that you can take a closer look before giving Solid Inspector the ‘okay’ to automatically fix errors. Automatically fixable errors include:
- Reversed faces: Solid Inspector is also a handy utility for making sure that face normals are facing outwards.
- Stray edges: Surplus edge geometry that does not define any face.
- Internal and external faces: Stray geometry on the inside or outside of your model.
- Face Holes: A hole in an exterior face. Easy fix for Solid Inspector.
Manually Fixable Errors
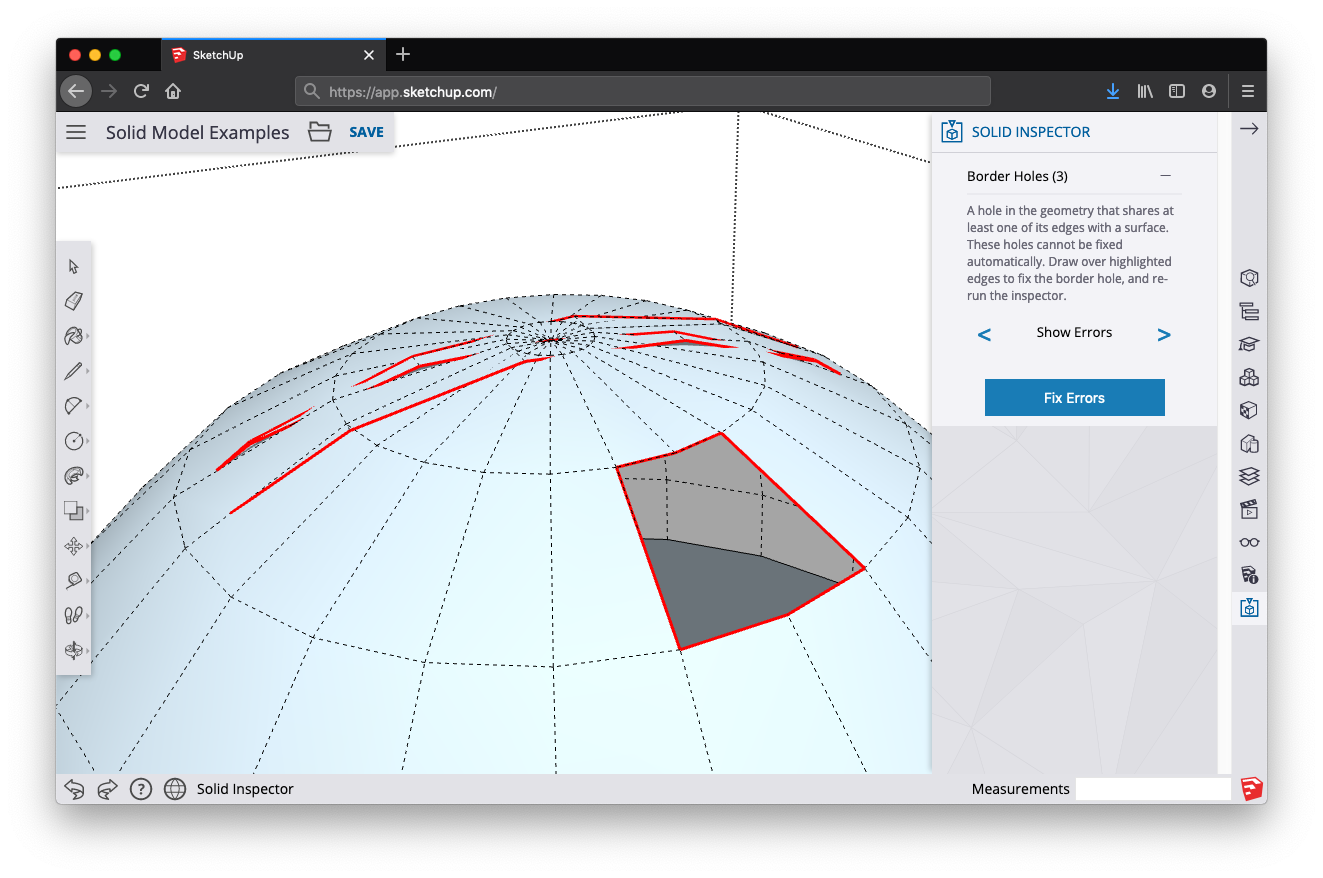
Some errors cannot be automatically fixed by Solid Inspector, and must be manually repaired using SketchUp’s drawing (or Eraser) tools. After fixing a few manual errors, it’s a good idea to re-run the Inspector to see if your changes have cleaned up the model enough for automatic fixing to take over. Manually fixable errors include:
- Border holes: These holes share at least one edge with the surface of a solid. These errors can be manually fixed by drawing over or erasing the highlighted geometry. As you go, try re-running the inspector to see if you’ve done enough repair go for Solid Inspector to automatically fix the rest of the model.
- Nested groups/components: Nested objects in groups or components can lead to confusing STL exports for 3D printers. Solid Inspector won’t fix these automatically, but you can use the Inspector to look at each nested instance and decide whether to delete it or explode the geometry into your model.
- Image entities: Images imported into SketchUp can’t be exported to an STL file and also inhibit Solid Tool operations. Solid Inspector will prompt you about these errors, but you’ll need to delete them manually. Consider making Image entities into components. They are easy to temporarily delete from your model in this respect. Also, painting a face with an image texture doesn’t impact Solid-ness.
- Short edges: Very small geometry can cause problems in 3D prints or solid operations. Since these problems are unpredictable -- and short edges do not disqualify objects as solid in SketchUp -- Solid Inspector will not fix these errors automatically. However, Solid Inspector is a great way to find and evaluate these problem areas.
Show Errors
When you have multiple errors that cannot be fixed automatically, it’s useful to use the “Show Errors” command to navigate between individual problems that you’ll need to manually fix. Use the left and right arrows to cycle through all the errors of a certain type that Solid Inspector has identified; the SketchUp camera will zoom to the problem area.