When you're drawing a model in SketchUp, moving all or parts of your model can be tough, especially when navigating geometry in a three dimensional space. Here's your guide to moving things around in your 3D model, from a simple click-and-move operation to moving precisely with 3D coordinates.
To perform a simple move operation follow these steps:
- With the Select (
 ) tool or the Lasso (
 ) tool, select the item (or items) you want to move.
 - Select the Move tool (
 ) or press the M key.
 - Select the item you want to move.
- Click a point in your model as a reference to line up with other geometry.
- Move your mouse to move your selection. As you move your selection, the inference points and the values in the Measurements box change.
Tip: To lock an inference to an axis as you move, hold down the Shift key when the move line turns the color of your desired axis, Use the arrow keys to manually lock to an axis if necessary.
- Click the destination point to finish the move.
- (Optional) To move your item a precise distance type either of the following during or immediately after the move:
- Distance: The number you type can be positive or negative, such as 20' or -35mm. If you specify a unit of measurement, that unit overrides your template's default units. For example, you can type 3' 6" even if you are using the metric system as your default.
- Coordinates: The Measurements box accepts global or relative coordinates. To enter global coordinates, use square brackets, such as [3', 4', 5'] to designate coordinates from the model origin. To set relative coordinates (from the starting point of the move operation), use angle brackets, such as <3', 4', 5'>.
To see these steps in action, along with a few extra tips for moving, watch the following video.
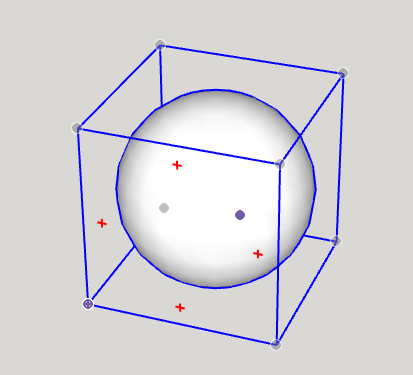
Corner Inference Grips
When selecting or hovering over a component/group, you'll notice there are inference icons at the corners of the component/group's bounding box. These inference points help you move the component/group.
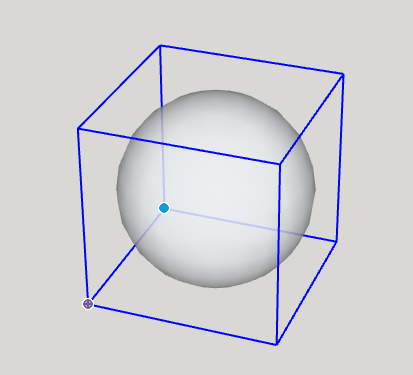
Tip: When a component/group is selected and you are not hovering over a corner grip, you can cycle through visible grips by pressing the CMD (MacOS) or ALT (Windows 10) key, allowing you to switch between: corners of a group, midpoints of a group, side centers of a group, or the center of a group.