With the Push/Pull tool (![]() ), you can create a 3D shape from a face or cut a 3D shape out of your model. You can push/pull any type of face, including circular, rectangular, and abstract faces.
), you can create a 3D shape from a face or cut a 3D shape out of your model. You can push/pull any type of face, including circular, rectangular, and abstract faces.
The video shows you all the tricks you can do with the Push/Pull tool.
Pulling a 3D shape from a face
To pull out a face and add volume to your model, follow these steps:
- Select the Push/Pull tool (
 ) or press the P key.
 With the Push/Pull cursor, click the face that you want to expand. The selected face becomes shaded.
Tip: If you need to push/pull a face that’s difficult to select, try preselecting the face with the Select tool and then push/pulling the face. If you need to start over, press Esc.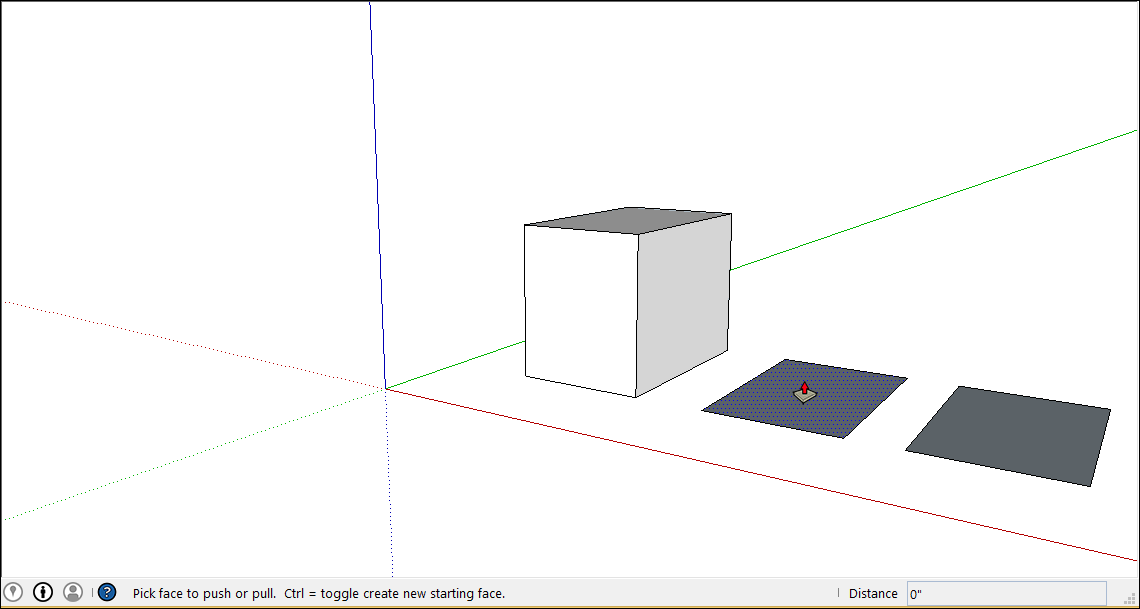
Move the cursor so that the selection expands. The Measurements box displays the depth of the expanded face also called an extrusion.
Tip: If you need to pull a face so that it’s parallel with another face, let the SketchUp inference engine help. Before you pull the face, hover the Push/Pull cursor over the other face, and the inference engine tells you when the two faces are parallel.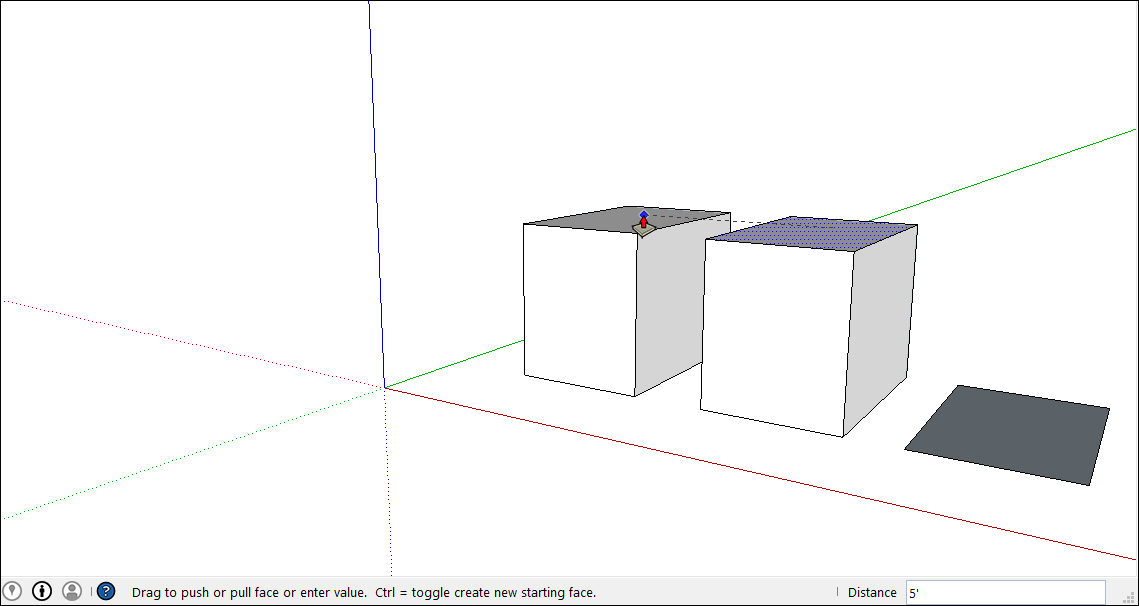
- Clicking again sets the size of your extrusion. Until you select something else, you can enter a precise distance in the Measurements box. Type a number and a value, and then press Enter.
Due to rendering limitations, if you pull up an entity a small amount, less than about an inch or 2.54 cm, edges are visible through the entity. Your entity must be an inch or more thick before this effect goes away. If the edges showing through are an issue, select the edge, context-click it, and choose Hide.
After you push/pull to add volume to your model, you can double the size of the extrusion or create a separate but identical extrusion:
- To duplicate the extrusion on a different face, double-click another face.
- To stack an identical extrusion on top of the existing one, tap Ctrl (Microsoft Windows) or Option (macOS) and then double-click the face.
Cutting a 3D shape out of your model
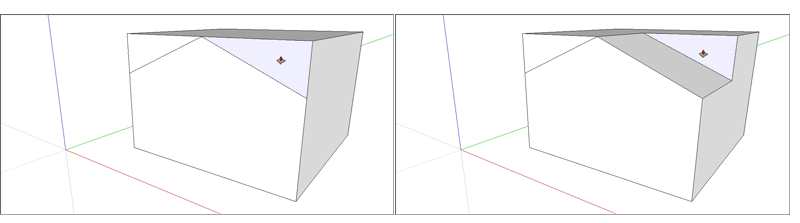
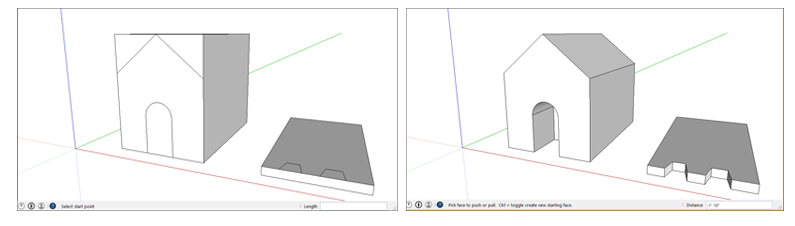
You can also use the Push/Pull tool to cut pieces out of your model. This action is handy in all sorts of instances, like making a doorway, creating an angled roof, or cutting out a notch for a fastener.
Follow these steps to subtract volume with the Push/Pull tool:
- Select the Push/Pull tool () or press the P key.
- Click the face you want to push.
Move the cursor in the direction you want to push. You can push partway into your model to remove only some of it. To completely the remove the content, drag until you see a message that says the offset is limited.
Tip: To completely remove the content, the pushed face must be parallel with the face on the opposite side of your model. If any lines divide the opposite face, you need to erase those lines before you can cut a hole through your model.- Click again to finish the operation. Use the Measurements box to set a precise distance by typing a number and value and press Enter.