In LayOut, you can customize the color, width, style, and end points for lines, arcs, and freehand lines as well as strokes on shapes, text boxes, dimensions, labels, inserted images, and SketchUp model entities. You find all these options in the Stroke settings on the Shape Style panel.
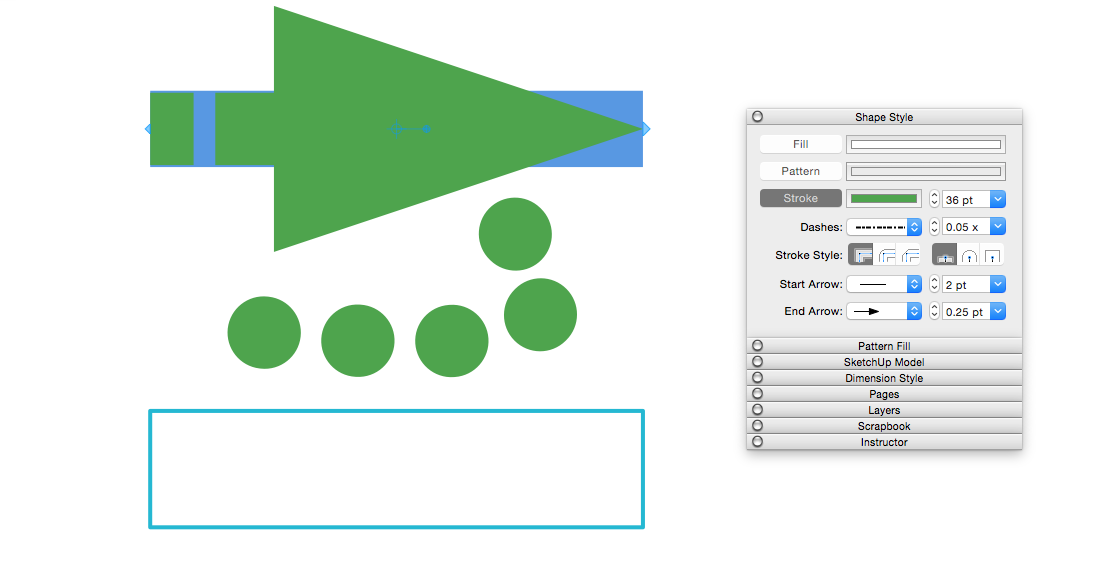
The following figure shows LayOut's Stroke settings for your current operating system.
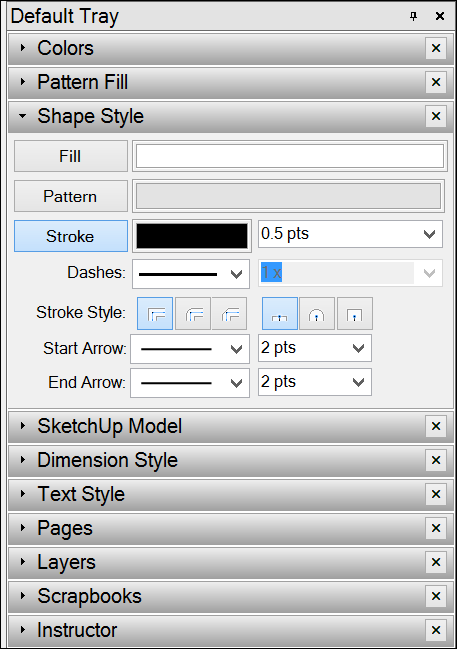
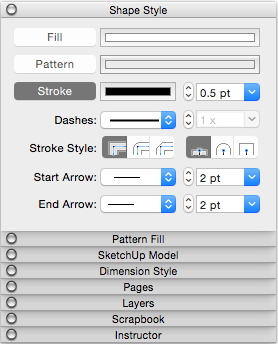
To modify a stroke in LayOut, follow these steps:
- Click the Shape Style panel to open it. If the Shape Style panel doesn't appear in the tray or stack, select Window > Shape Style, and the Shape Style panel appears onscreen.
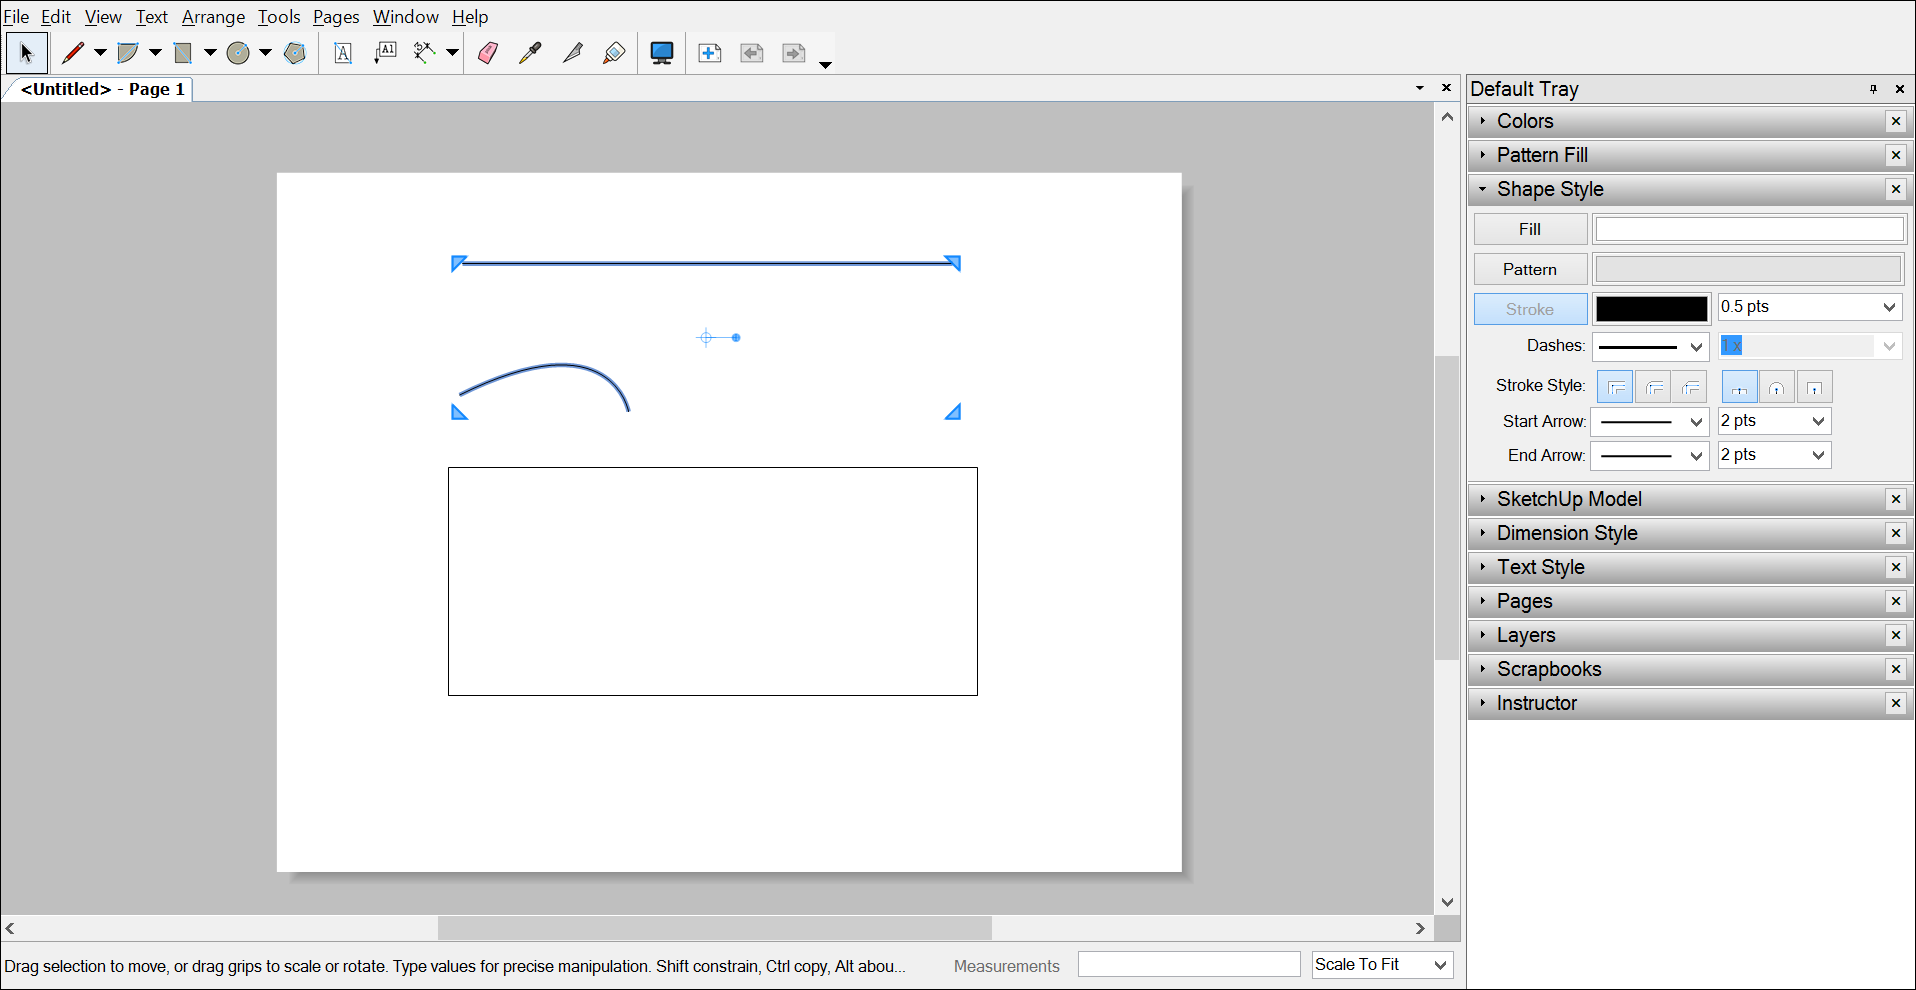
- Select the entity whose stroke you want to modify. You can select more than one entity by holding down the Shift key as you click. In this example, both the line and arc are selected. (See Selecting Things for more selection tips.)
Tip: You can change a document's default Shape Style settings at anytime. Simply select a tool and make the Shape Style changes. Or if you've already created an entity, change its Shape Style settings and then use the Style tool (
 ) to sample that entity.
 - Click the Stroke option to select it. If the option is already selected, it's highlighted, as shown in the following figure.
- Select your desired stroke settings, which are explained in detail in the upcoming list.
As mentioned earlier, LayOut enables you to change the color or width, transform solid lines into dashed ones, select a predefined style, and choose from a selection of start and end points. Here are the details on selecting all your options:
- Color: By default, your stroke is black. Click the color well to open a color picker and select a different color. You can select your color by using the color wheel, choosing specific RGB or HSB codes, and several other methods, all of which are explained in Choosing Colors.
- Width: Strokes have a default width of 0.5 points. In the box next to the color well, you can type a new value in points or a unit of measure (which LayOut automatically converts to points). Or, click the drop-down arrow and select a preset width.
- Dashes: LayOut is set to draw solid strokes. To make a dashed stroke instead, select a dash pattern from the first Dashes drop-down menu. After you select a dash pattern, you can select a dashes scale from the second Dashes menu: Either select a preset from the menu or type a value and press Enter (Microsoft Windows) or Return (Mac OS X).
- Stroke Style: You can choose one of three Stroke Style corner options: Miter corners (the default), Round corners, or Bevel corners. If you select a line or arc with endpoints, you can select one of three Stroke Style end options: Flat ends (the default), Round ends, or Square ends. In the following figure, the straight line has Flat ends, and the arc has Round ends. Hover your cursor over each Stroke Style icon to see a ScreenTip displaying the icon's name.
Tip: The corner stroke styles are subtle, so you may need to zoom in to see the corner effects.
- Start Arrow: You can add an arrow or end point to the start point of a line, arc, or dimension. Simply choose a Start Arrow style from the first drop-down list. To adjust how long or short the arrow is, relative to the line, select a Start Arrow scale from the second drop-down list.
- End Arrow: These options work just like the Start Arrow options, but add and style an arrow or end point on the last point of a line, arc, or dimension.
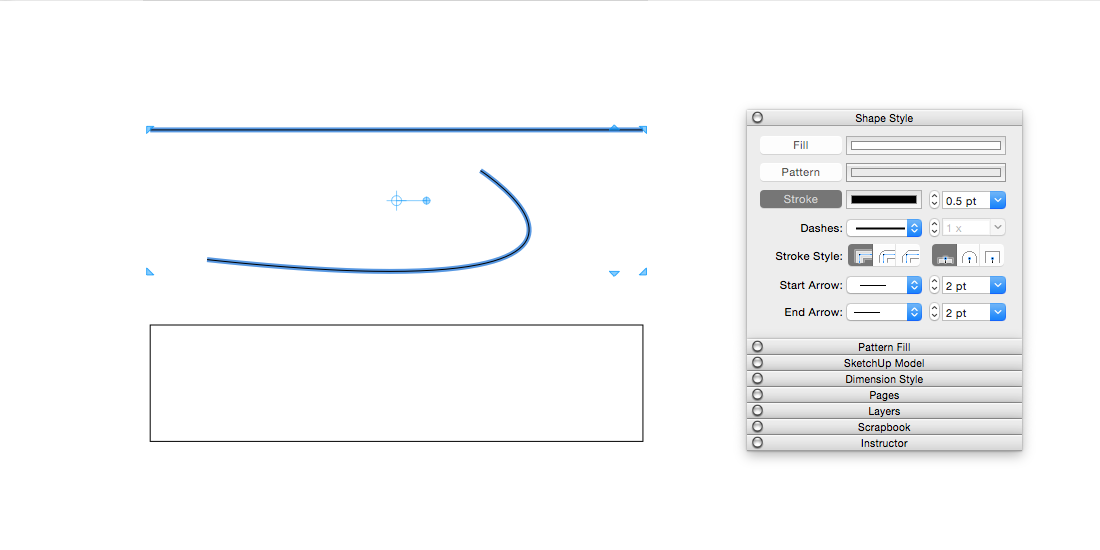
In the following figure, you see a few different combinations of the Stroke settings, and the straight line is selected so you can see the Stroke settings in the Shape Styles pane. The following table outlines the specific settings applied to each item.
). See Applying Styles for details.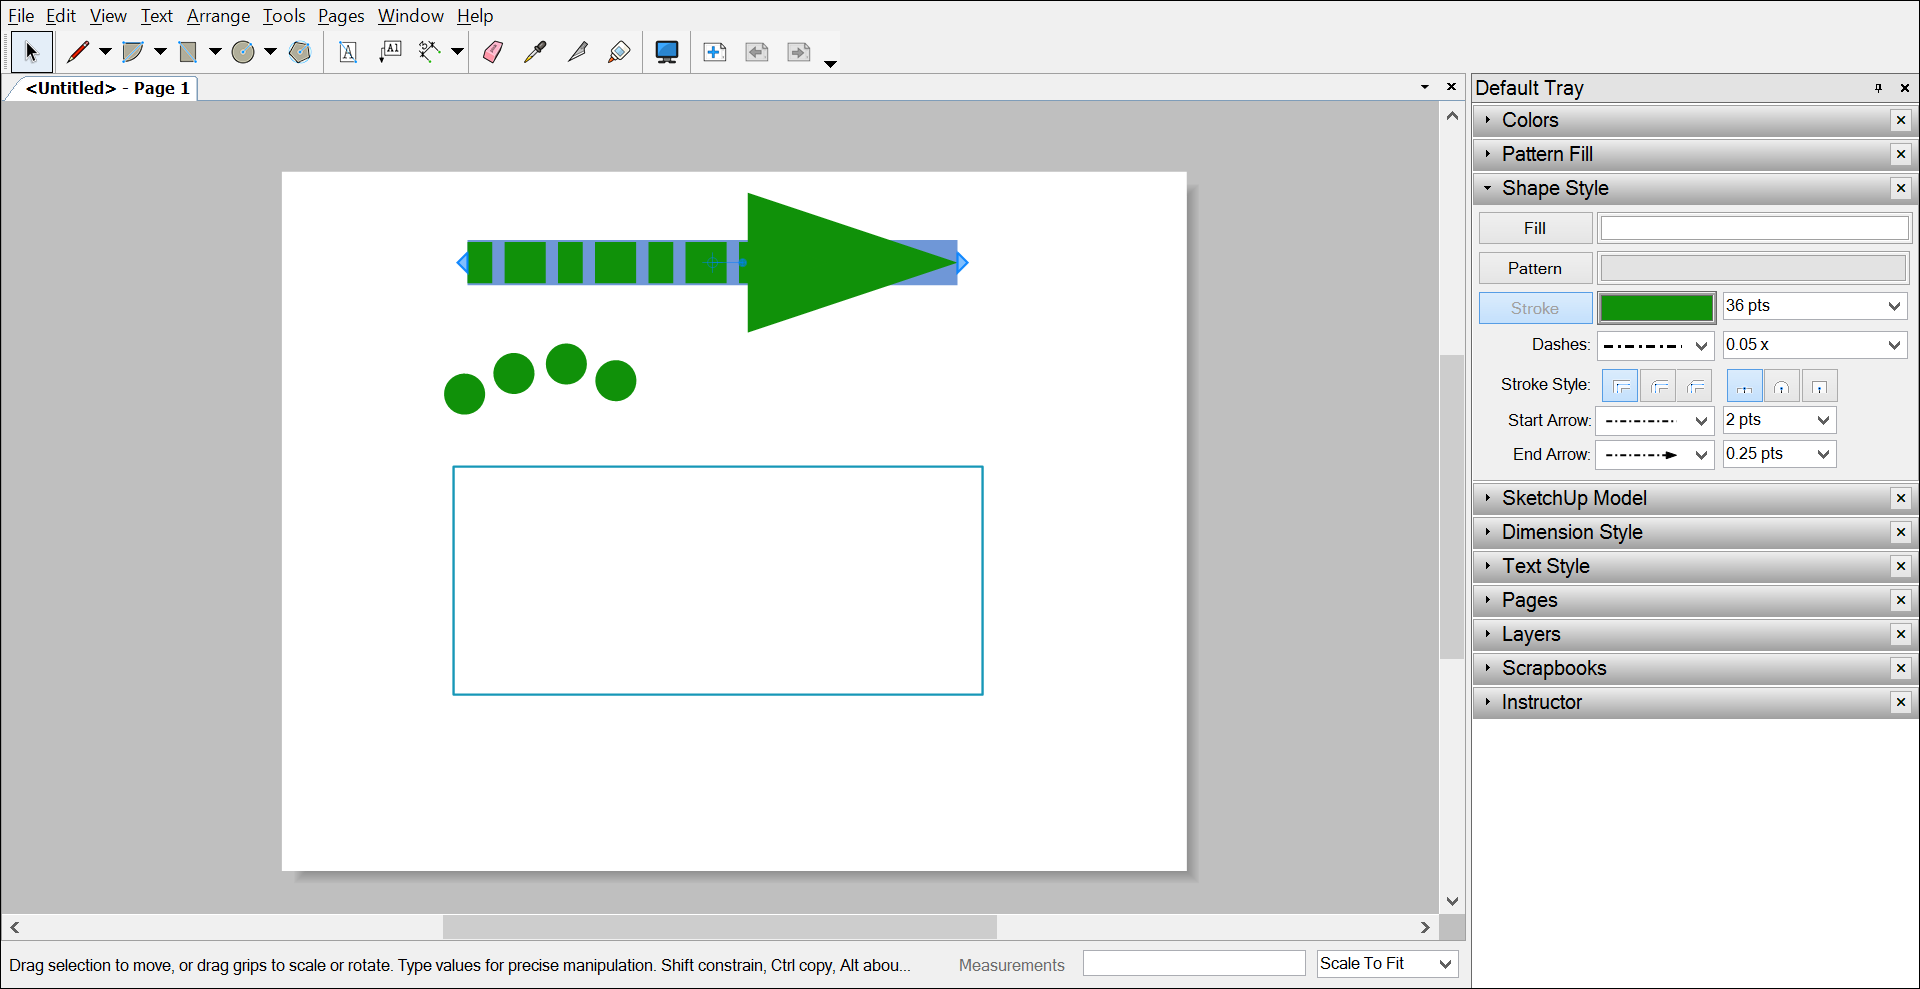
| Straight Line | Arc | Rectangle | |
|---|---|---|---|
| Color | Green | Green | Turquoise |
| Width | 36 points | 36 points | 2 points |
| Dash pattern | Dashed | Dashed | Solid |
| Dash scale | 0.25 points | 0.25 points | n/a |
| Stroke Style | Flat ends | Round ends | Round corners |
| Start Arrow | No | No | n/a |
| End Arrow style | Yes | No | n/a |
| End Arrow scale | 0.25 points | n/a | n/a |