The Offset tool enables you to offset a line or shape quickly and easily.
For example, perhaps you're a graphic designer who needs to outline a complex shape or an architect who needs to offset a footer in a foundation plan. Either way, the Offset tool can create the shape you need in only two clicks.
To create an offset, follow these steps:
- Select the Offset tool (
 ) on the toolbar or from the Tools menu.
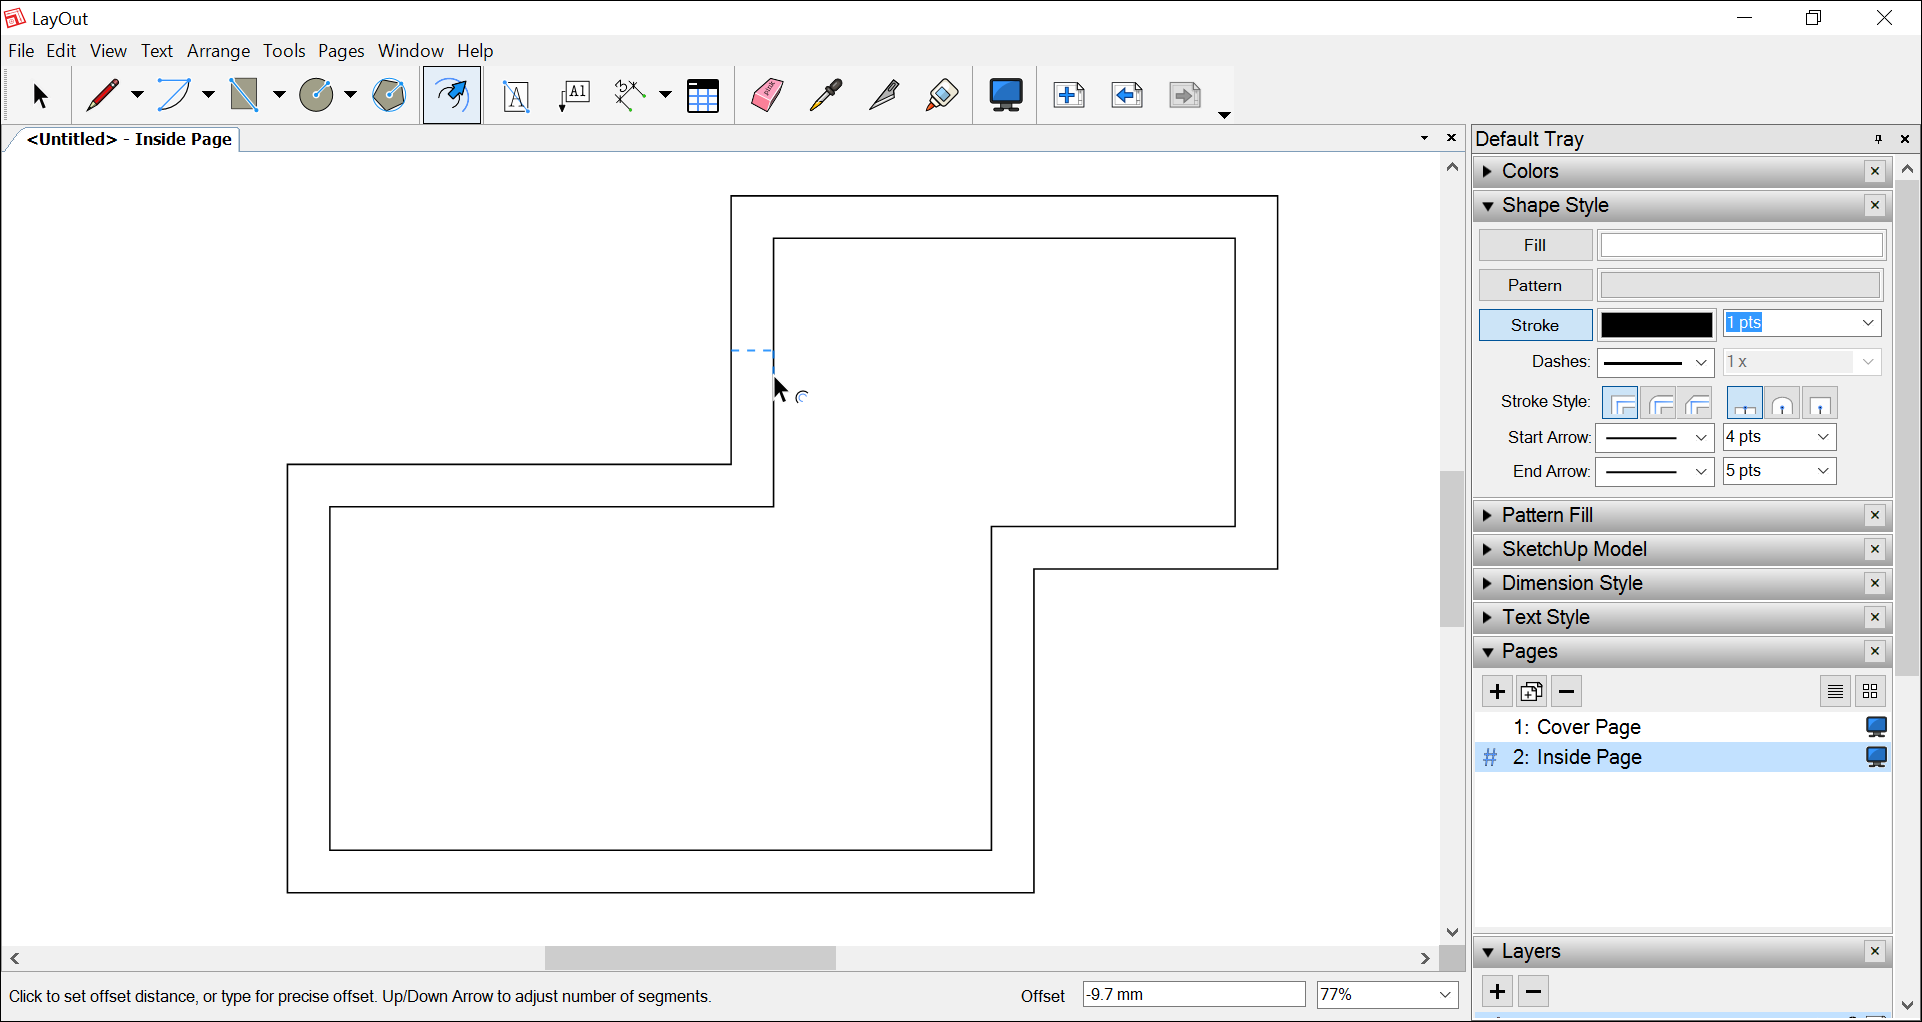
 - Click the entity that you want to offset. A preview of your offset appears, as shown in the following figure.
- Click where you want to place the offset line or shape.
Here are a few tips for creating an offset:
- To set a precise offset, type a measurement, such as 0.5", immediately before or after you complete Step 3. Remember that you don't need to click inside the Measurements box before you begin typing. If you don't specify a unit of measurement, LayOut uses the default unit of measurement in your template.
- In the Measurements box, a negative number places the offset inside a shape or in the opposite direction of the mouse. A positive number places the offset outside a shape or in the direction of the mouse.
- You can't offset an entity that's inside a group.
- To offset both sides of a selected open path at once, hold down the Alt key (Microsoft Windows) or the Command key (Mac OS X).
- To change the offset's line width or style, select it and choose your desired options in the Shape Style panel.
- When offsetting a Bezier curve (which isn't a true Bezier), you can change the number of segments in the curve. After Step 2, simply press the up arrow or down arrow key.
- Type a number and the letter X to create multiple offsets as once. For example, typing 2x creates two instances of the same offset.