You can mask out a portion of a model or image by creating a clipping mask. When you create a clipping mask, you see only the portion of the model or image that appears within a shape.
To create a clipping mask, follow these steps:
- Place a shape over an image or model, as shown in the following figure.
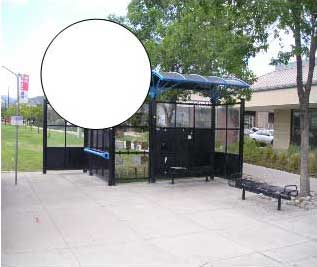
- Select both the shape and the image or model.
- Context-click the selection and choose Create Clipping Mask from the context menu that appears. Your image or model is then masked, as shown in the following figure.

To undo a clipping mask, context-click the clipping mask and select Release Clipping Mask from the menu that appears.
To edit a clipping mask, double-click the masked entity. You can then move, scale, or rotate the image or model in relation to the clipping entity (and vice versa). Click away from the image or model when you're done editing.