Do your shapes seem a little empty inside? To help your ideas stand out on-screen, use LayOut's Fill features to add a pop of color, and use the Pattern features to create hatches, which symbolize materials in architectural drawings, as shown in the following figure.
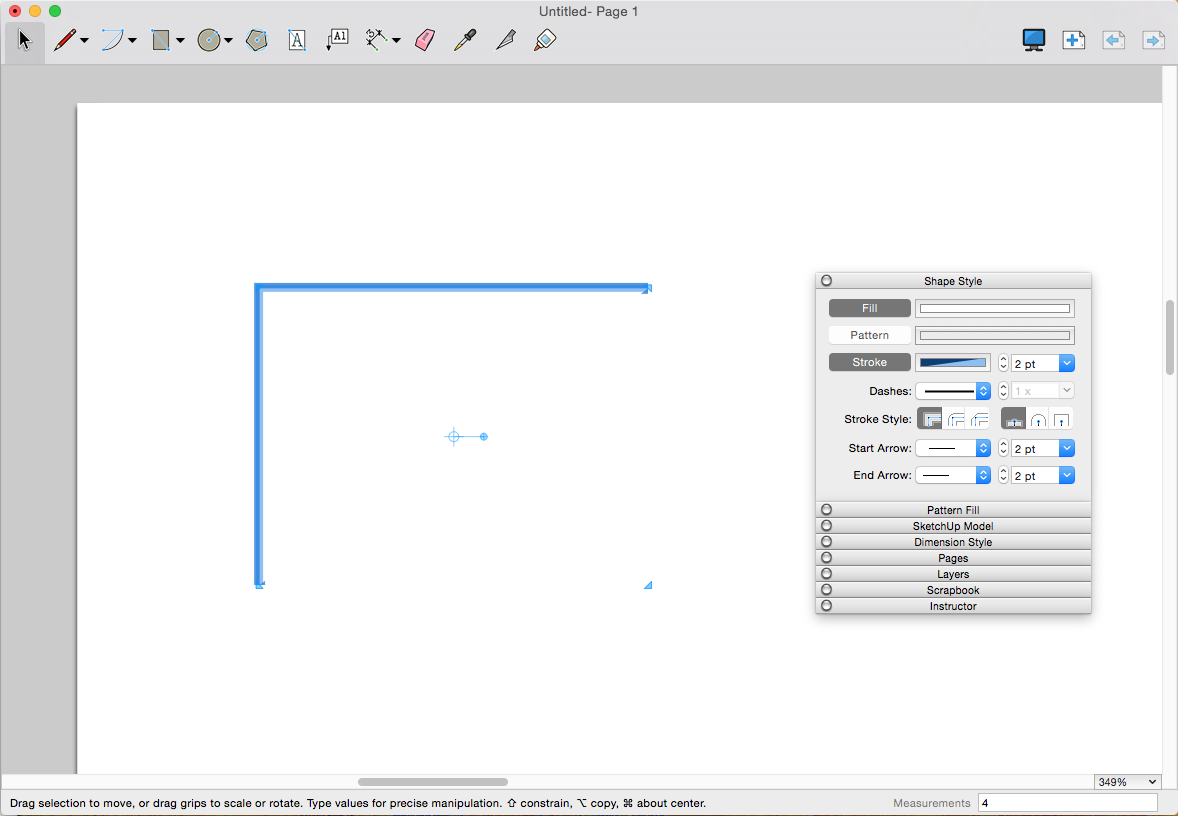
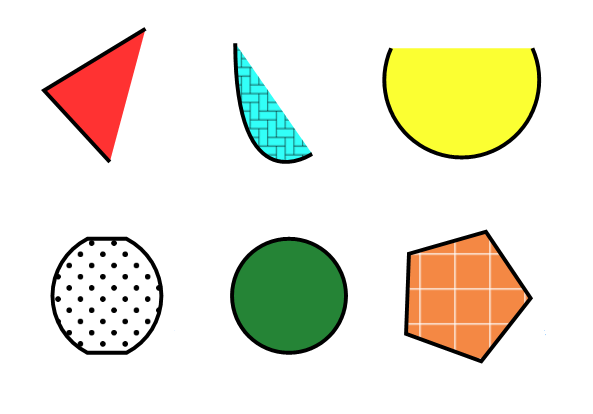
Tip: To add a color or pattern, you need a minimum of two sides or an arc, so that an area can be filled. The area doesn't have to be a closed shape. The following figure illustrates a few basic examples.
To fill a shape with a color, you use the Fill settings on the Shape Style panel. To add a pattern, start with the Pattern settings on the Shape Style panel, and then use the Pattern Fill panel to customize the pattern. LayOut includes a selection of patterns, or you can import an image file into LayOut as a pattern. The following sections walk you through the steps.
Note: The Fill and Pattern settings also affect transparent parts of a PNG image and the background of a SketchUp model entity (if, on the SketchUp Model panel's Style tab, the Background checkbox is deselected).
Tip: To quickly and easily apply an entity's fill and stroke settings to another entity, use the Style tool (). See Applying Styles for details.
Whatever shape you want to fill, simply draw the shape and then follow these steps:
With the Select tool (), select the shape in the drawing area.
Open the Shape Style panel by clicking its title bar. (If you don't see the panel on-screen, select Window > Shape Style from the menu bar.)
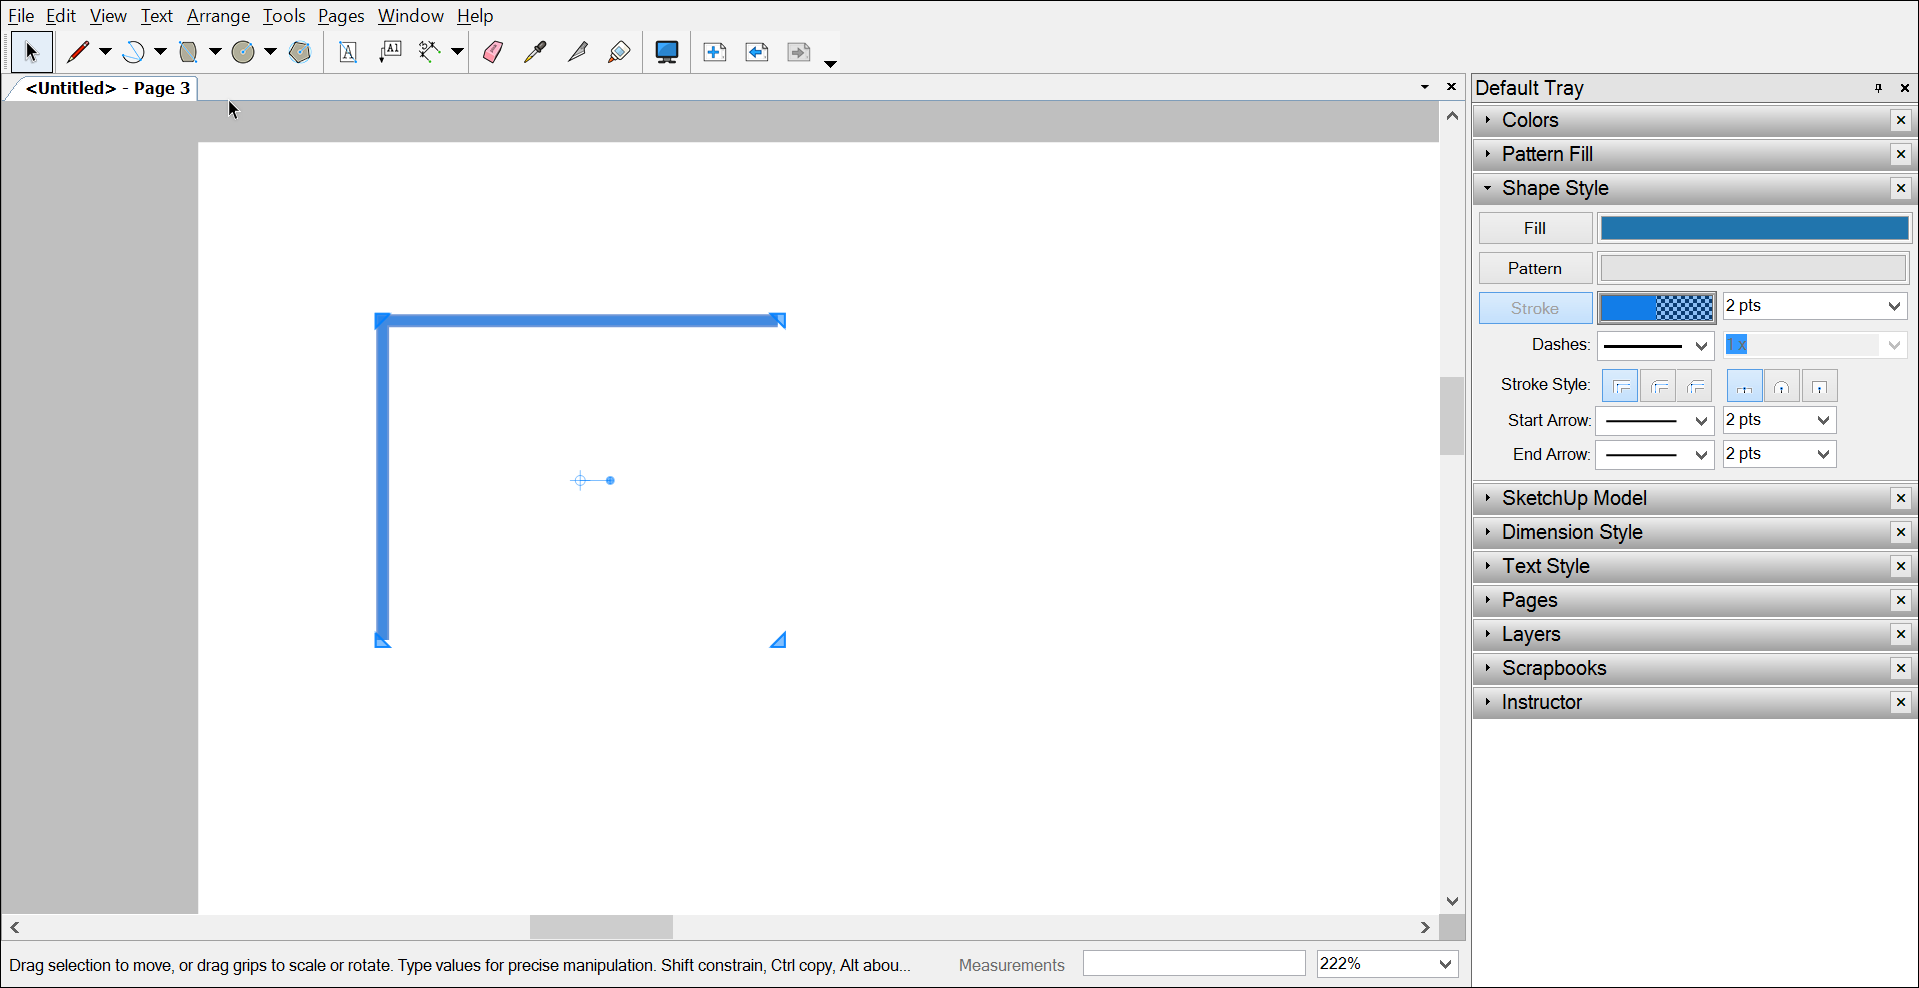
Click the Fill option, which becomes highlighted, as shown in the following figure. Clicking the Fill option tells LayOut you want to apply Fill settings to the selection.
WindowsMacOS Interface>
Click the color well next to the Fill option.
In the Colors panel that appears, select a fill color for your shape. See Choosing Colors for help navigating the options in the Colors panel.
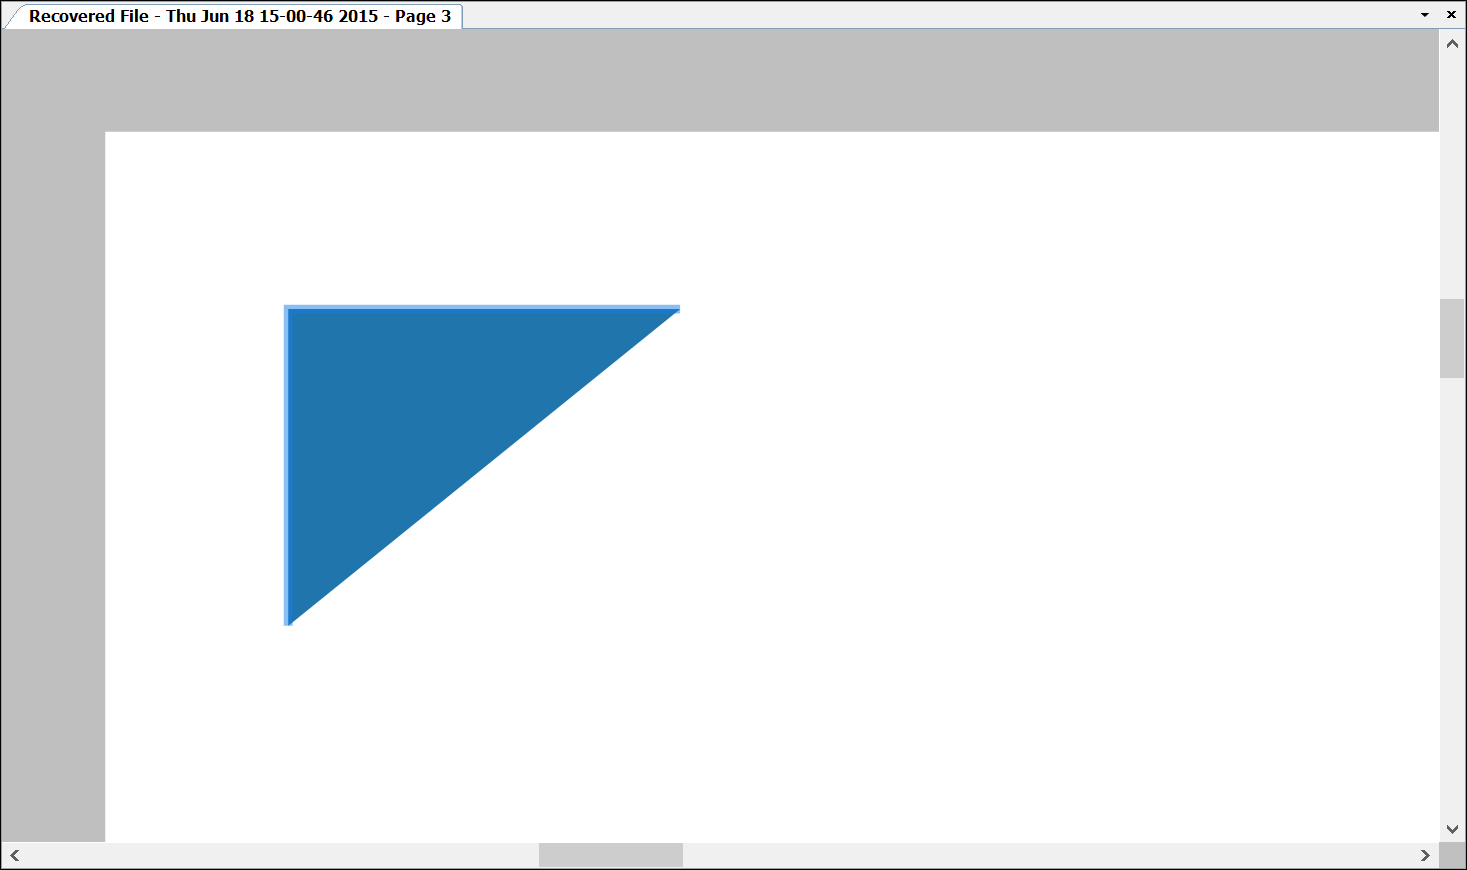
To see the result, click a blank spot in the drawing area so that your shape is deselected. In the following figure, you see that the two lines are filled with dark blue, which will add a little color to the document.
Tip: Want to remove the outline around your shape? You can change the line color to match the fill color, or after you add the fill color, deselect the Stroke option, so only the fill color is visible. As long as your shape is selected, you can continue to modify any of its settings in the Shape Style panel.
Note: To set the default Fill settings, activate a tool and then select your desired settings. Activating the Select, Line, Arc, Rectangle, Circle, or Polygon tool sets the default for all those tools. Activating the Text, Label, or a dimension tool sets the Shape Style settings only for the active tool.
Adding a pattern
To fill a shape with a pattern, follow these steps:
With the Select tool (), select the shape you want to fill with a pattern.
Open the Shape Style panel by clicking its title bar. (If you don't see the panel on-screen, select Window > Shape Style from the menu bar.)
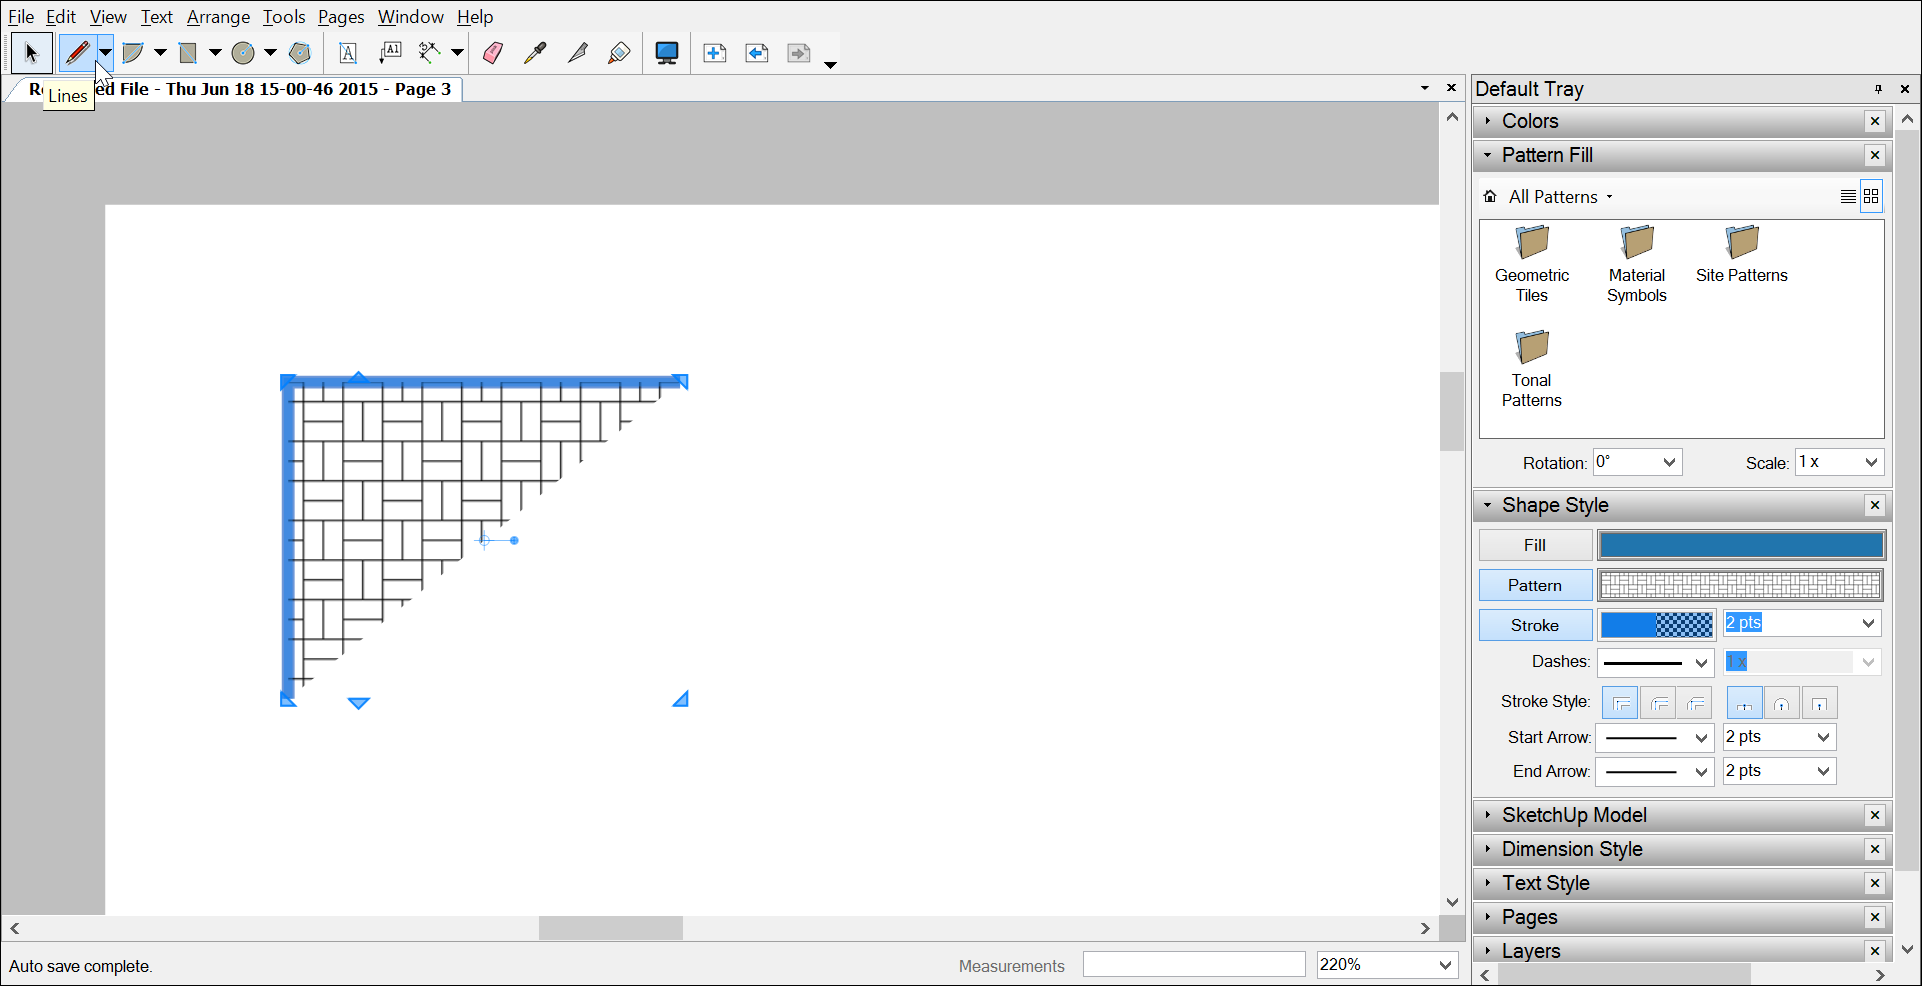
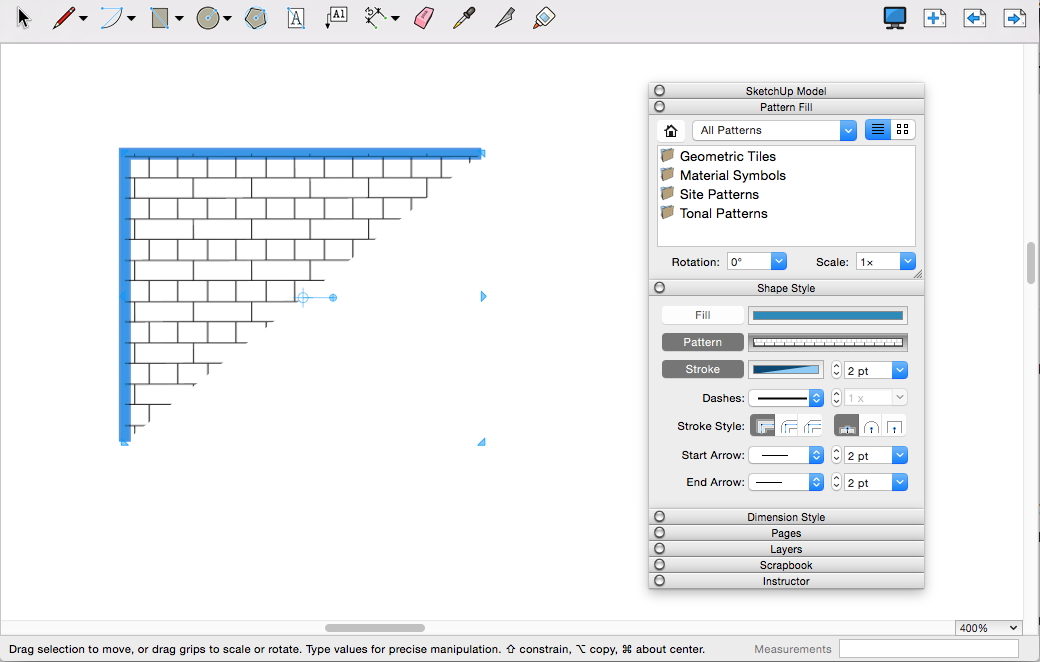
Click the Pattern option, which becomes highlighted. Clicking the Pattern option tells LayOut you want to fill the selected shape with a pattern. Your shape is filled with a default pattern, and the Pattern Fill panel opens, as shown in the following figure.
WindowsMacOS
In the Pattern Fill panel, make sure All Patterns is selected from the drop-down list at the top of the panel.
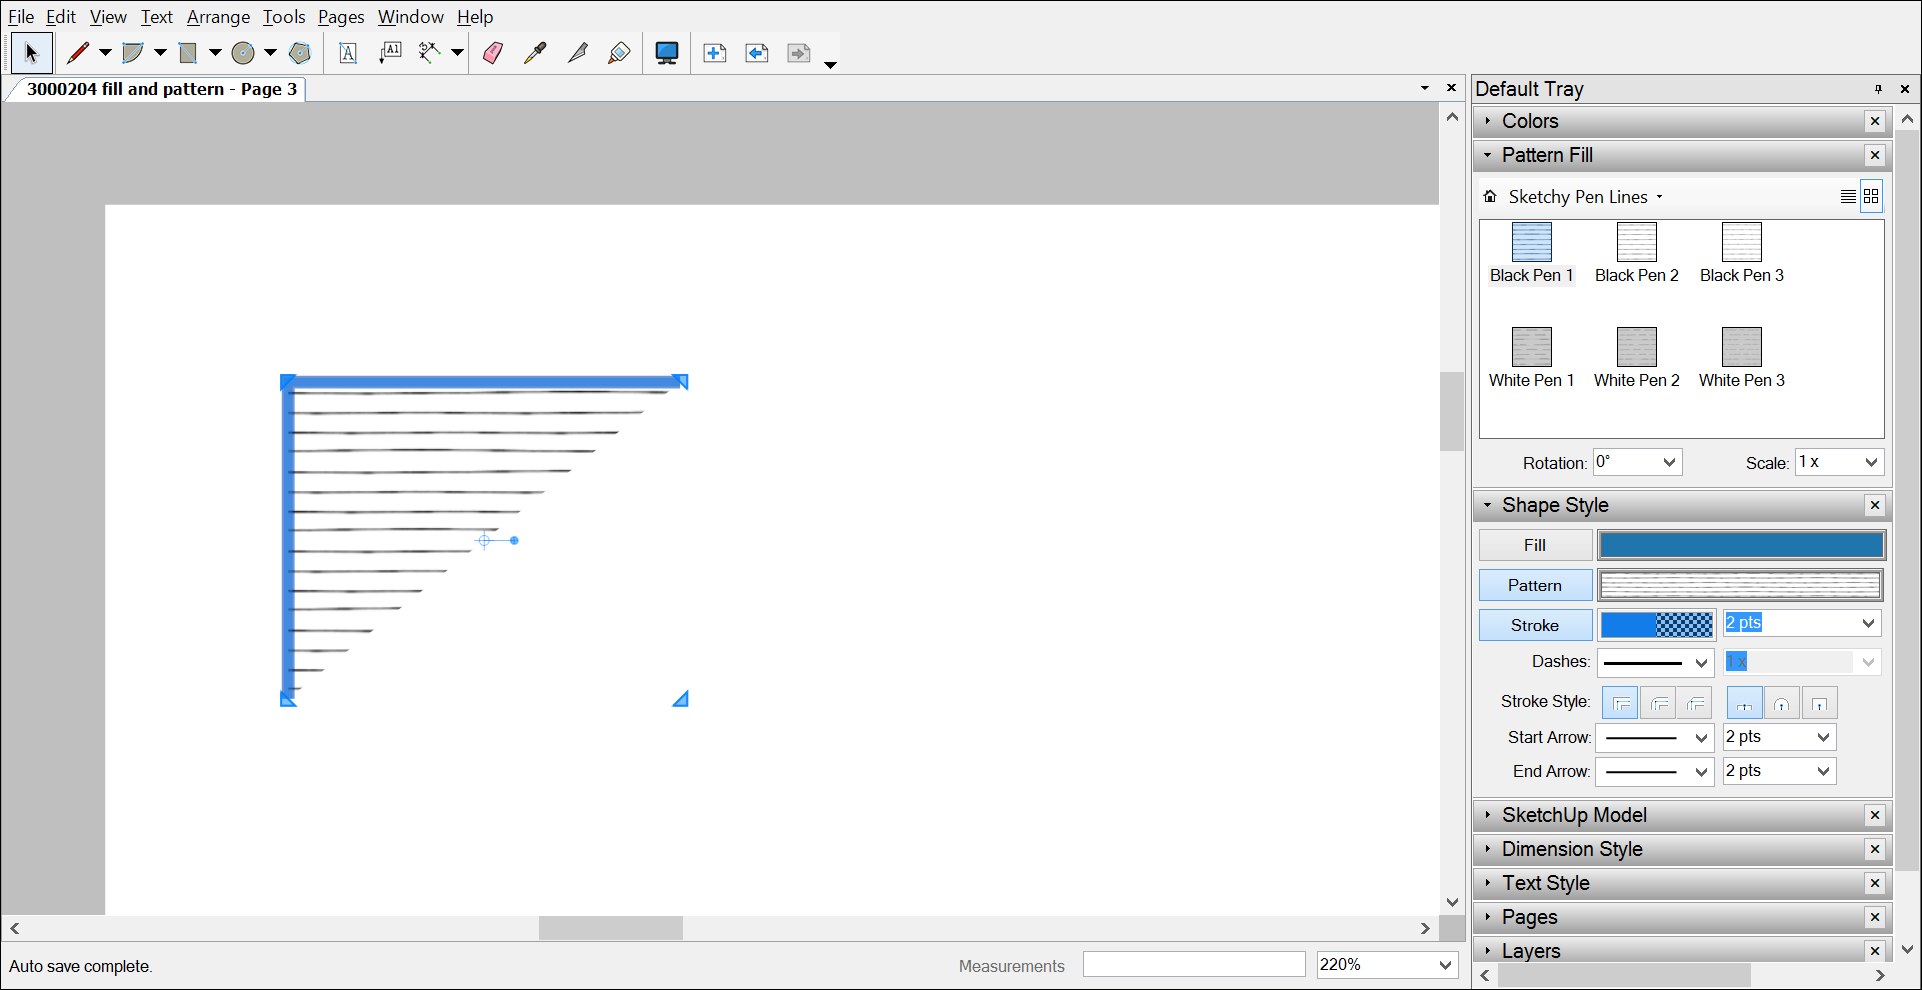
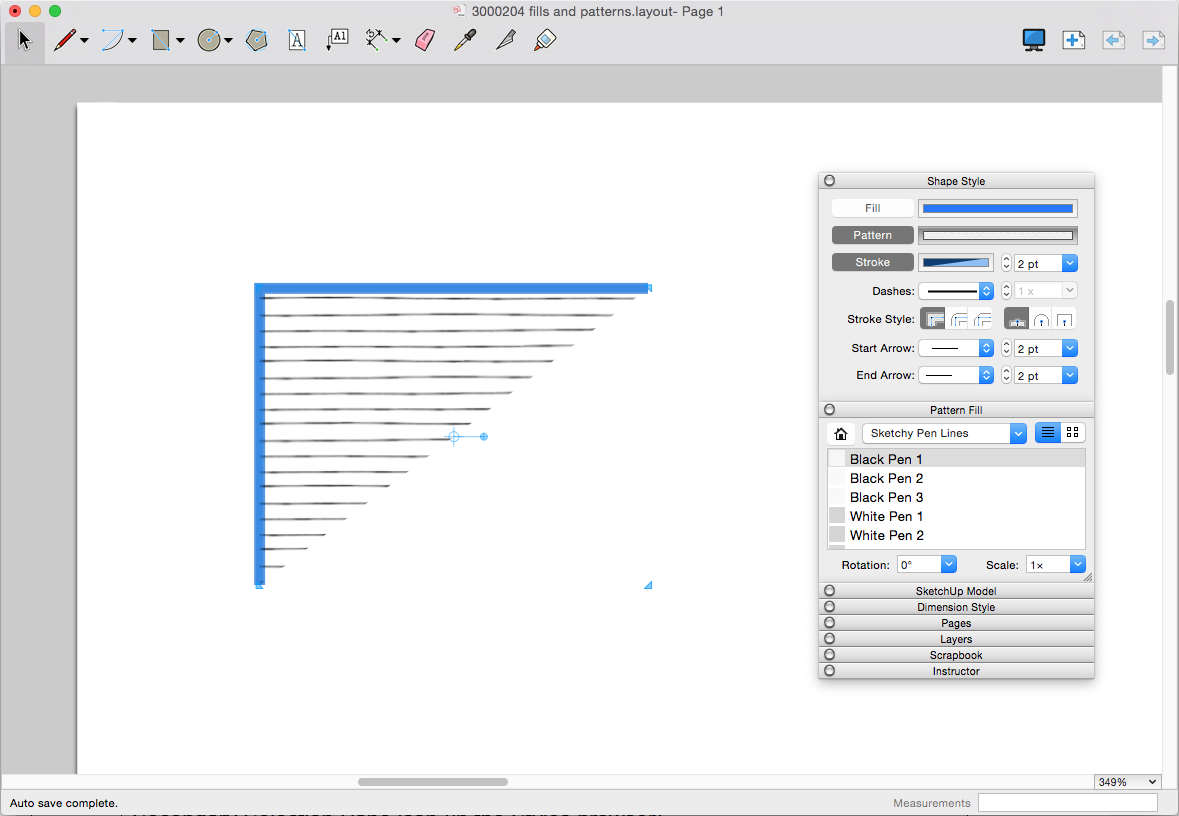
Select a folder from the available options to choose one of LayOut's preset patterns. If you'd like to use a custom pattern, you need to import the pattern image first, as explained in the following section, Importing a custom pattern. In the following figure, you see the Black Pen 1 pattern, which you find by selecting the Tonal Patterns > Sketchy Pen Lines subfolder in the Pattern Fill panel.
Tip: In the upper right of the Pattern Fill panel, you can choose to see the available patterns in Thumbnail View or List View. If you want to choose a pattern that you've applied elsewhere in your document, click the Home icon in the upper left, and a list of all the patterns in your LayOut document appears.
(Optional) To rotate the pattern, select an option from the Rotate drop-down menu. Or type a rotation value in degrees and press Enter.
(Optional) To increase or decrease the pattern's size, select a preset option from the Scale drop-down menu. Or type a value in the Scale box (such as 5x) and press Enter. However, because patterns are raster-based, remember that the higher the scale factor, the more pixelated your image may appear.
Windows InterfaceMacOS Interface
Tip: When you create a shape that's filled with a pattern, the pattern's origin is the first point you click. While the pattern is still active in the Shape Style panel, every shape you draw shares the same pattern origin point. To line up patterns on shapes that already exist, select the Style tool (), click the shape whose origin point you want to sample, and then click the shape whose pattern you want to line up with the first.
Importing a custom pattern
If you have a graphics file that you'd like to use as a pattern, you can import the file into LayOut, which supports the following raster image file formats: .bmp, .dib, .jpg or .jpeg, .jpe, .jfif, .gif, .png, .tif or .tiff
After you save the file to your hard drive, follow these steps:
In your LayOut document, open the Pattern Fill panel by clicking its title bar. If the panel isn't visible on-screen, select Window > Pattern Fill.
From the drop-down list at the top of the panel, select Import Custom Pattern.
In the Open dialog box that appears, navigate to your file, select it, and click Open. The file appears in the In-Document Patterns area of the Pattern Fill panel. Now you can follow the steps in the earlier section, Adding a pattern, to use the image as a pattern in your LayOut document.
Tip: LayOut enables you to organize custom patterns into collections. From the drop-down list at the top of the Pattern Fill panel, select Add Custom Collection. In the LayOut Preferences dialog box that appears, you can add folders that hold custom patterns.
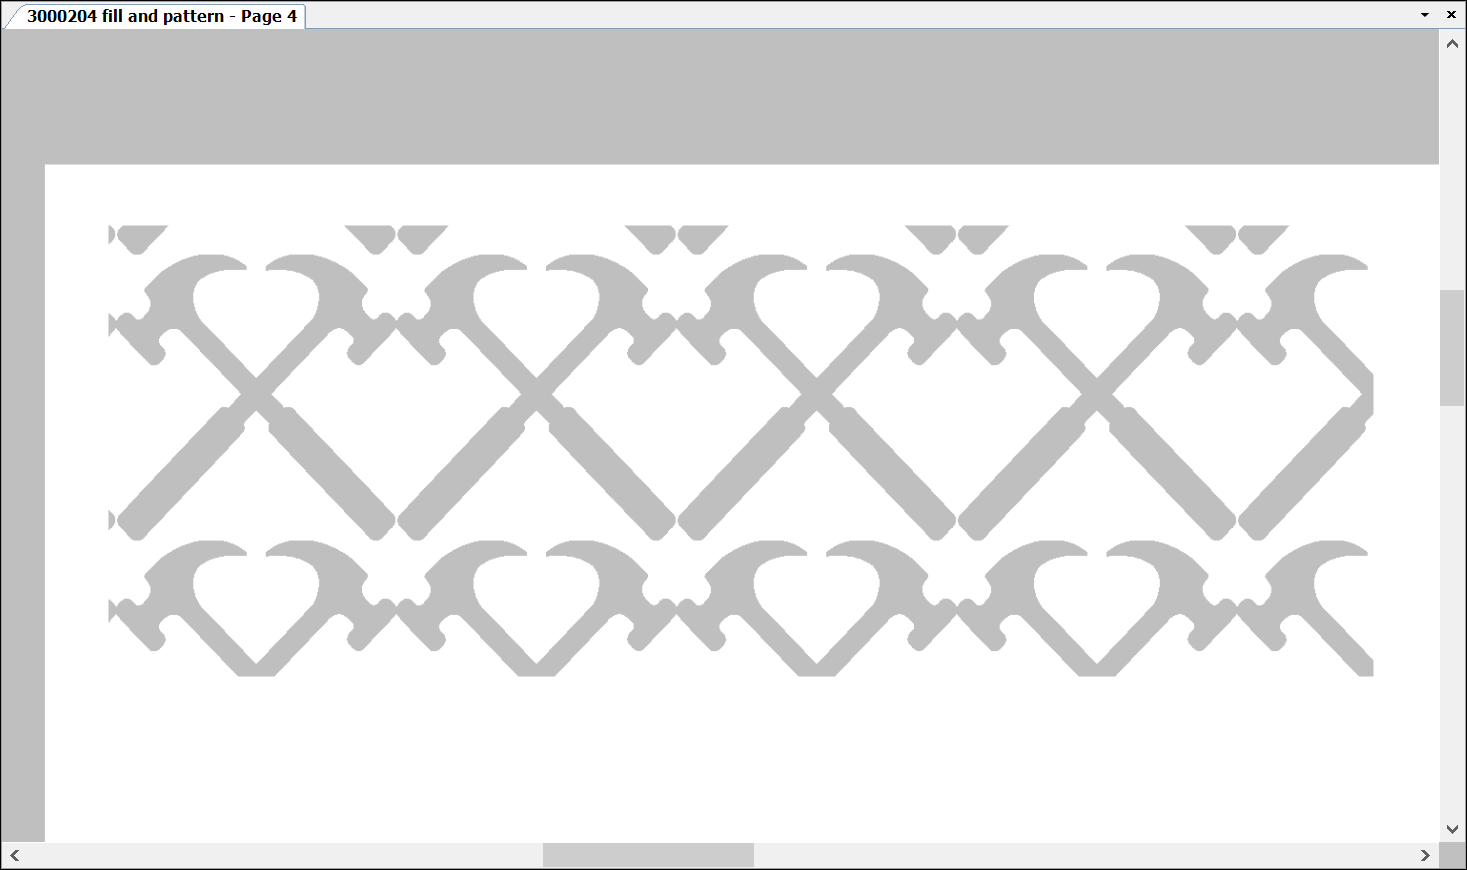
In the following figure, you see a custom hammer graphic that was imported into LayOut and used to fill a rectangle.
Tip: For a more detailed look at how to create a custom pattern, including tips for editing your pattern image in Photoshop, see the SketchUpdate blog post, Making Custom Patterns for LayOut.
To insert a single instance of an image, such as a company or client logo, see Inserting Images.
 ). See Applying Styles for details.
 ), select the shape in the drawing area.