SketchUp offers two tools to help you select what entities you want to modify with SketchUp's other tools and commands - the Select tool (![]() ), and the Lasso tool (
), and the Lasso tool (![]() ). Here's where you find these tools in SketchUp:
). Here's where you find these tools in SketchUp:
- The Getting Started toolbar
- The Large Tool Set toolbar
- The Principal toolbar (Microsoft Windows)
- The Tool Palette (macOS)
- The Tools menu
As you get up to speed in SketchUp, you will find that the best way to activate both of these tools is with their default shortcuts. The Select tool can be activated by pressing Spacebar. The default shortcut for the Lasso tool is Shift+Spacebar.
Selecting a single entity
To select a single entity:
- Activate the Select tool (
 ). The cursor changes to an arrow.
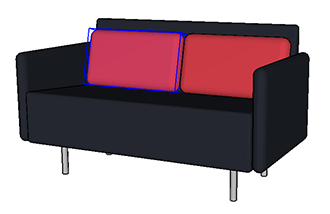
 Click an entity. Whatever you select (edge, face, or component for example) is highlighted, like the sofa cushion shown here.
If you don't select the right thing the first time, just try again. To deselect anything that is highlighted, click any empty space in the drawing window.
Selecting multiple entities
When you need to select more than one thing, SketchUp offers a few different selection options. Keep reading to see how to select multiple entities.
If you want to select everything in your model, use one of the following options:
- Under the Edit menu choose Select All
- Microsoft Windows users can press Ctrl+A
- MacOS users can press Command+A
If you want to make sure nothing is selected use one of the following options:
- Under the Edit menu choose Deselect All
- Microsoft Windows users can press Ctrl+T
- MacOS users can press Shift+Command+A
When the Select tool is active, you can select multiple entities in any of the following ways:
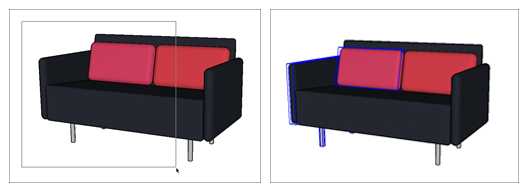
Click and drag to make a temporary selection box around the items you want to select - When you click and drag with the Select tool you create a temporary selection box. Once you release the mouse button, your items become selected. When you click and drag to the left, anything completely or partially inside the box becomes selected. When you click and drag to the right, you select only what's completely inside the box. In the example below, we created a temporary selection box by clicking and dragging right. Even though the second pillow is partially inside the temporary selection box, releasing the mouse button only selects the first pillow.
- Use the Lasso Tool - The Lasso tool (
 ) allows you to draw your own selection area in two different ways:
- Freehand - You can draw freehand to create a temporary selection area and release your mouse button to make your selection. The direction you begin drawing determines what ends up selected. Begin drawing clockwise to include all entities in the area you draw. Begin drawing counterclockwise to include only entities completely in that area.
- Segments - To create line segments to define your selection area click in empty modeling space to start a segmented lasso bounds. Each subsequent click creates a new segment. Double-click to complete your bounds and finalize your selection.
- Double- or triple-click - You can select specific combinations of edges and faces of an entity based on how and where you click:
| Doing This... | ...Selects This... | >...And Looks Like This... |
| Double-clicking a face... | ...selects the face and all bounding edges. | 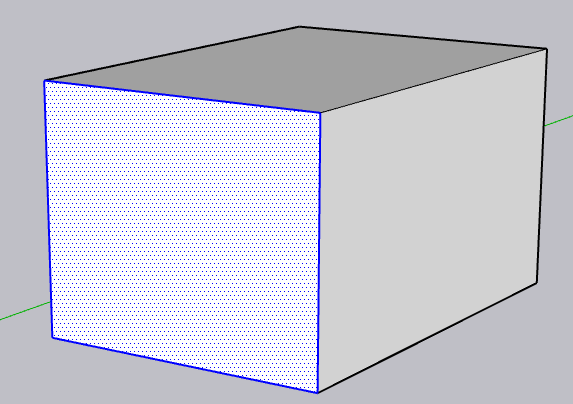 |
| Double-clicking an edge... | ...selects that edge and each connected face. | 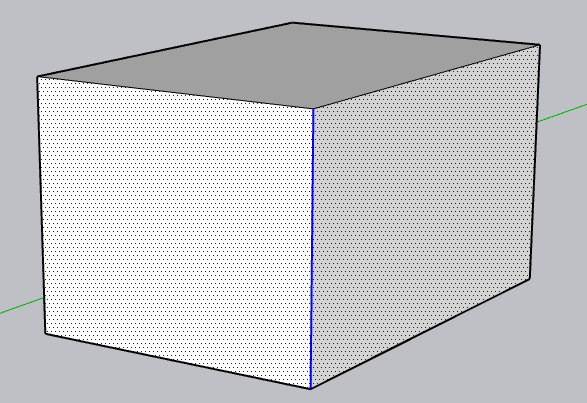 |
| Triple-clicking anywhere on an entity... | ...selects all connected entities. For example, if you triple-click a face in a cube, the entire cube is selected. | 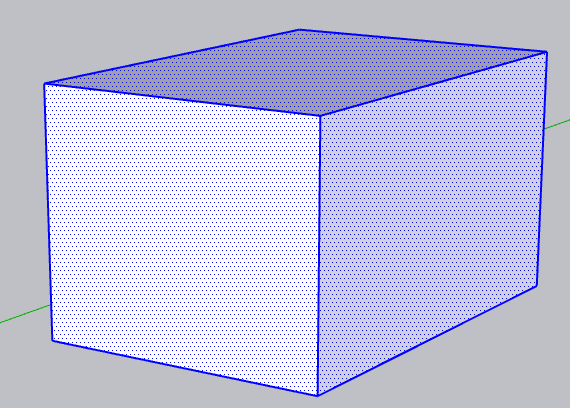 |
Context Menu Options
When you right-click an entity, or perform an equivalent action, you'll see a context menu with a variety of options based on what you've selected.
With one or more edges selected, choosing Select from the context menu offers the following options:
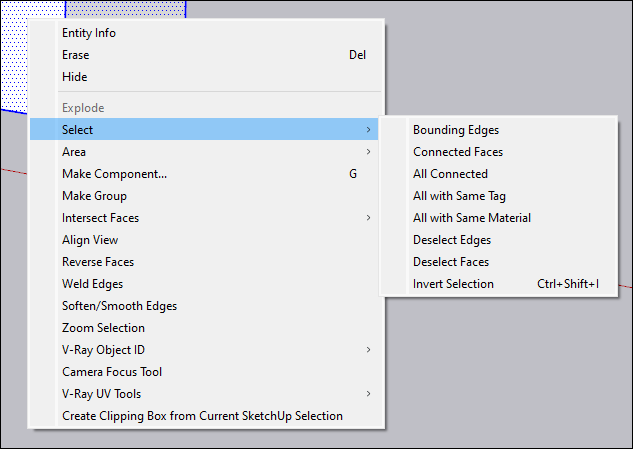
- Connected Faces selects all faces connected to the selected edge.
- All Connected selects all entities connected to the selected edges.
- All with Same Tag selects all entities in your model that share a tag with the selection.
- Deselect Edges removes any edges from your selection set, leaving you with only faces selected.
- Invert Selection selects all other entities in your model and unselects the selected edge.
For selection sets containing both faces and edges, the Select context menu contains the following additional options:
- Bounding Edges selects all edges connected to the selected face.
- All with Same Material selects any entity in the selection set using the same Material.
- Deselect Faces removes all faces from your selection set, leaving you with only edges selected
Adding and subtracting from a selection set
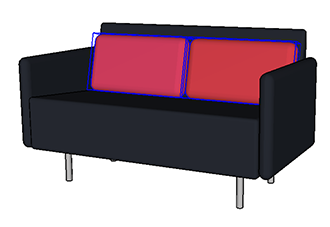
When you're selecting multiple entities, it's easy to grab an entity you didn't want or to miss an entity that you need. To add or remove entities from a selection set, make sure the Select tool is activated; then adjust your selection by using the keyboard modifiers in the following table. For example, to select both red cushions as shown here, select one and then hold down the Ctrl key while selecting the other cushion.
| To Do This... | Press and Hold This Key(s) | While Also... |
| Add to the selection set (either a single entity or a selected group of entities). | Ctrl (Microsoft Windows) or Option (macOS) | Selecting an entity or group of entities. |
| Change an entity's selection status. (Select an unselected entity or clear a selected entity) | Shift | Clicking an entity. |
| Subtract from the selection set | Shift+Ctrl (Microsoft Windows) or Shift+Option (macOS) | Selecting an entity or group of entities. |