Creating and Editing Models in SketchUp for Schools
SketchUp for Schools offers most of the same tools and features you find in the desktop version of SketchUp. However, in SketchUp for Schools, these tools and features are found in slightly different places. If you’re new to creating 3D models in SketchUp, learning where to find the tools and panels is easier than ever!
This article orients you to creating 3D models in the SketchUp for Schools interface. Find out how to create a new model, change its units of measure, and geolocate it. You also find a brief intro to the SketchUp for Schools tools and panels, as well as references to articles that explain how to use them.
Table of Contents
Creating a model from a template
To create a new model in SketchUp for Schools, you start with a template. Follow these steps:
- In SketchUp for Schools, click the Open Model/Preferences icon (
 ).
). - On the panel that appears, click the New Model icon (
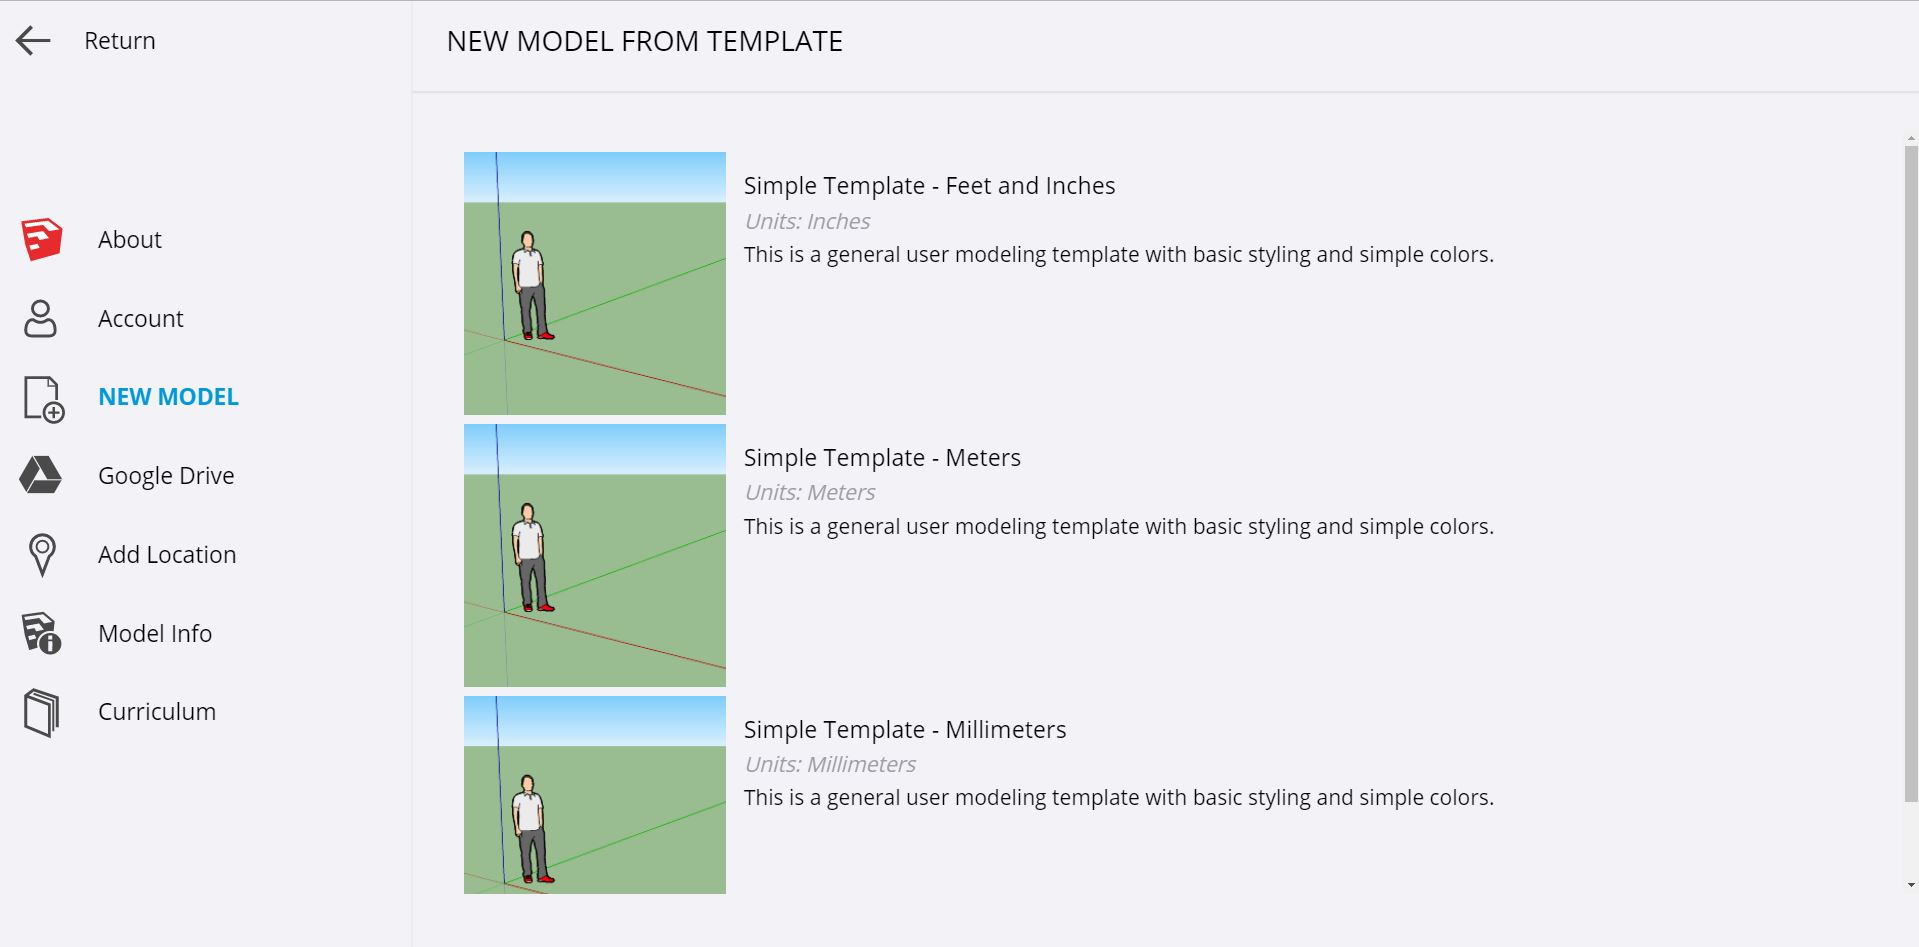
 ). The following figure shows your template options.
 - Select a template that reflects your desired units of measure. Your options include feet and inches, meters, or millimeters. After you click an option, your new model opens in SketchUp for Schools, ready for you to begin 3D-modeling.
Setting a model’s units of measure
If you want to change a model’s units of measure, follow these steps:
- In SketchUp for Schools, click the Open Model/Preferences icon ().
- On the panel that appears, click the Model Info icon (
 ).
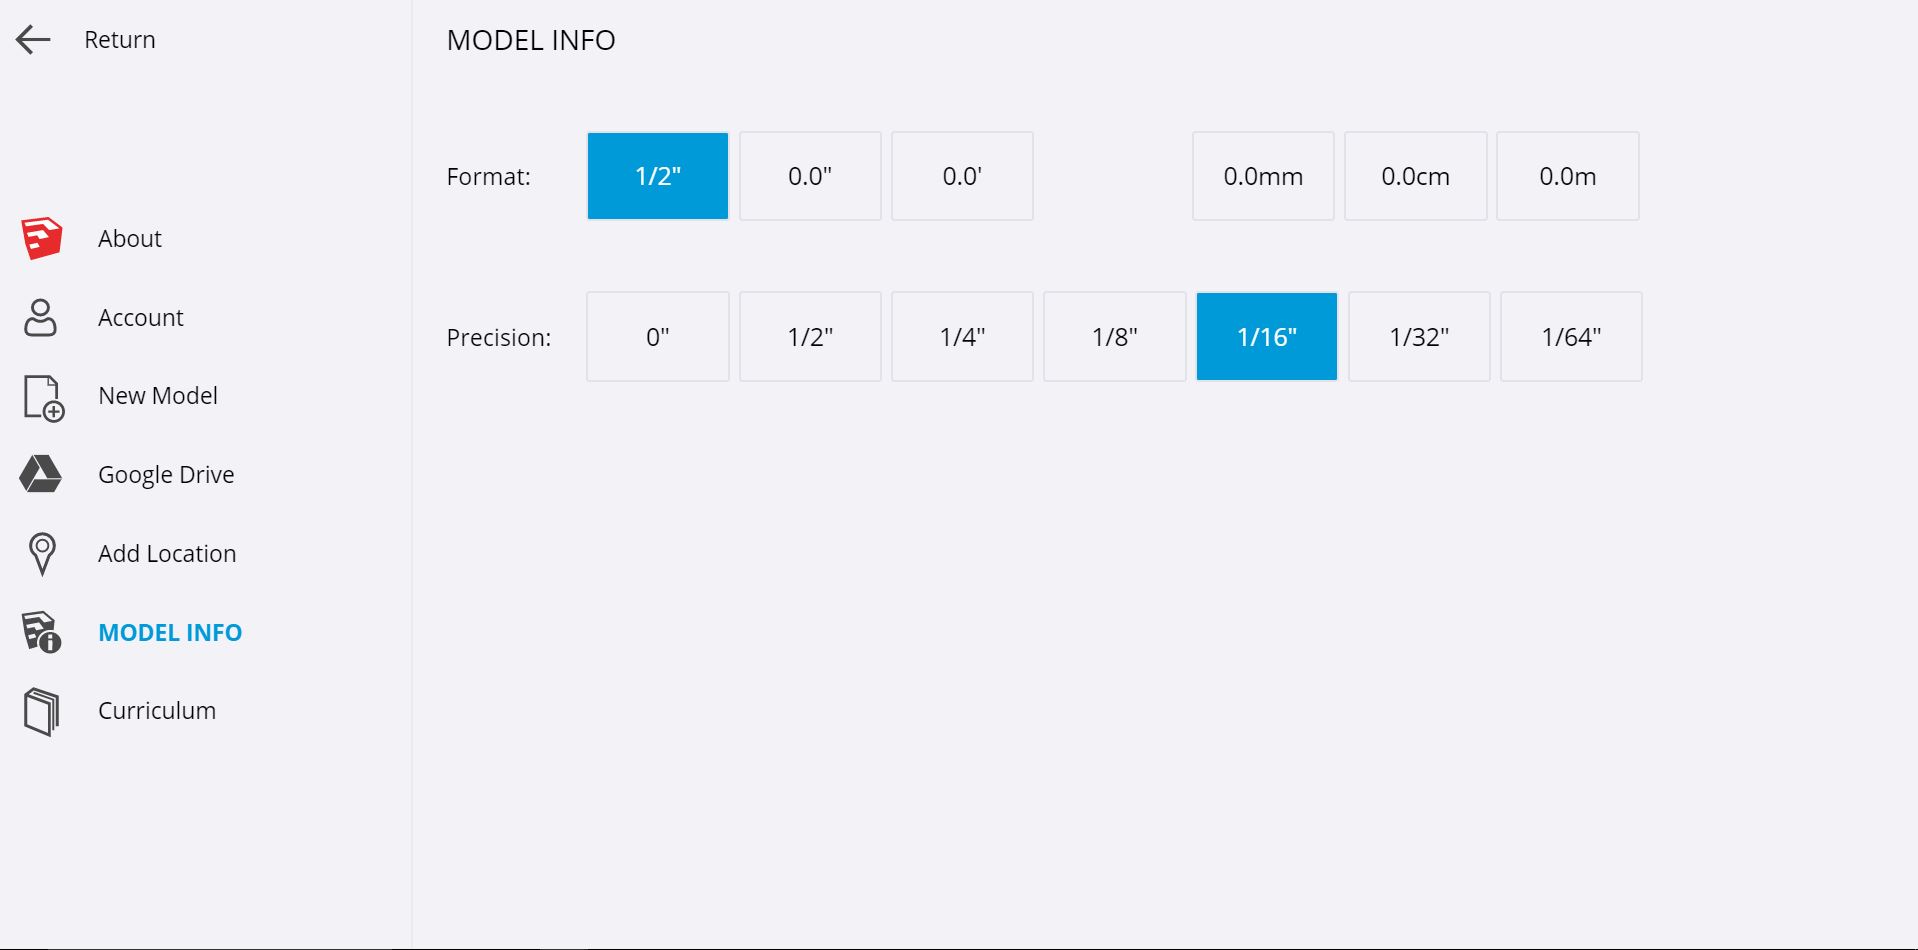
). - On the Model Info panel that appears, select an option in the Format area. In the following figure, 1/2" is selected.
- In the Precision area, select your desired level of precision.
- Click Return in the upper left to return to your model.
Inspecting entities
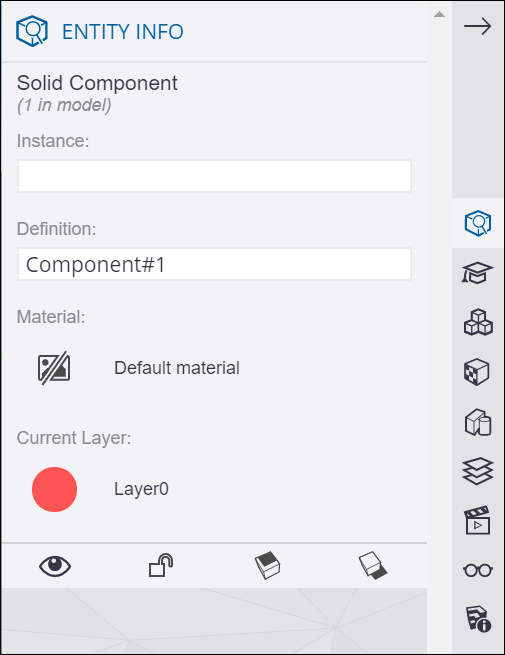
To see details about an entity in your model, select it and click the Entity Info icon ( ). As shown in the following figure, the Entity Info panel that appears shows details such as the type, instance, definition, layer, shadow settings, and visibility setting.
Introducing the SketchUp for Schools tools
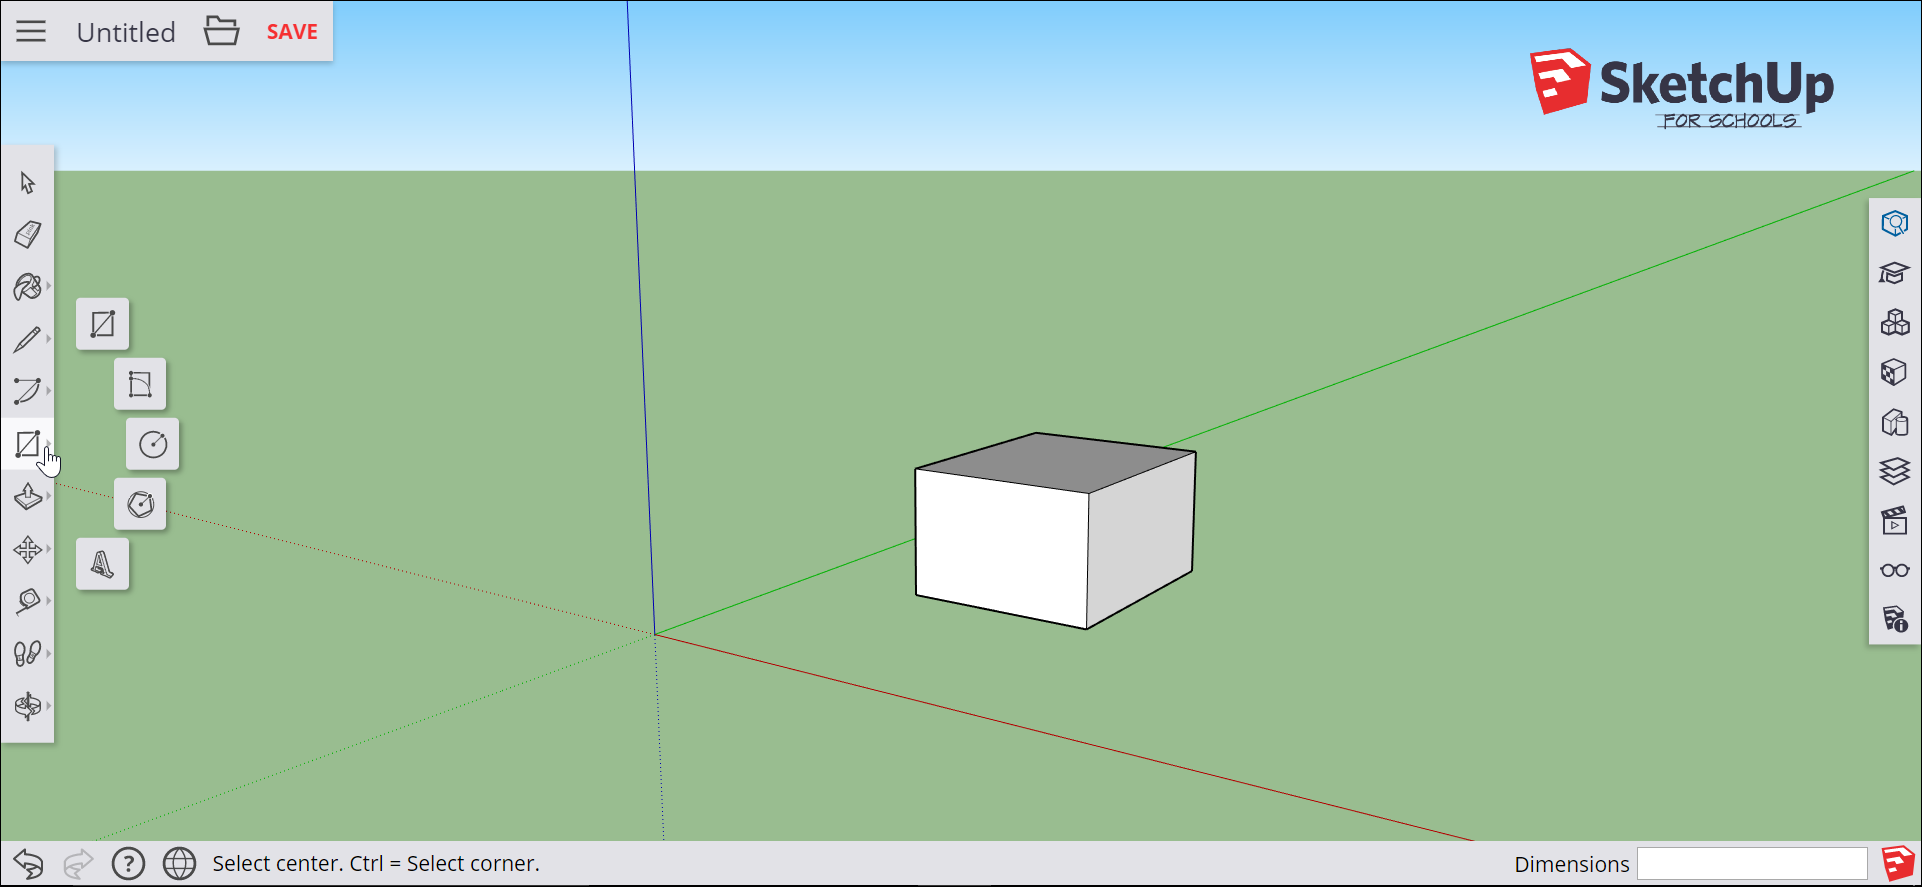
As you create a 3D model in SketchUp for Schools, the tools look a little different but work just as they do in the desktop version of SketchUp. In the SketchUp for Schools interface, you find the toolbar of tools on the left. Some tools display a little arrow, which means that clicking the tool displays a flyout menu of several related tools, as shown in the following figure.
In the following table, you find an introduction to each tool and a link to the SketchUp area of the Help Center, where you find more details about how to use the tool.
| Tool | What It Does | Learn More |
|---|---|---|
 |
Use Select to select entities. | Selecting Geometry |
 |
Eraser removes lines, faces, or other entities. | Erasing and Undoing |
 |
Paint Bucket applies the active material to faces . | Adding Colors and Textures with Materials |
 |
Sample makes any material you click the active material. | Adding Colors and Textures with Materials |
 |
Line draws straight lines. | Introducing Drawing Basics and Concepts |
 |
Freehand mimics drawing with a pencil or pen. | Drawing Freehand Shapes |
 |
Arc creates a basic arc. | Drawing Arcs |
 |
2 Point Arc pulls an arc from a straight line. | Drawing Arcs |
 |
3 Point Arc bends an arc on a pivot point. | Drawing Arcs |
 |
Pie creates a closed arc that’s a pie shape. | Drawing Arcs |
 |
Rectangle creates a basic rectangle or square. | Drawing Basic Shapes |
 |
Rotated Rectangle helps create a rectangle at an angle instead of aligned with an axis. | Drawing Basic Shapes |
 |
Circle draws a circle. | Drawing Basic Shapes |
 |
Polygon creates a polygon with any number of sides. | Drawing Basic Shapes |
 |
3D Text creates 3D-style text in your model. | Adding Text, Labels, and Dimensions to a Model |
 |
Push/Pull drags a face in 3D space so it expands or disappears. | Pushing and Pulling Shapes into 3D |
 |
Follow Me creates an entity along a path. | Extruding with Follow Me |
 |
Offset creates an entity that’s offset a distance from another entity. | Offsetting a Line from Existing Geometry |
 |
Outer Shell leaves only the outer faces of overlapping solids. | Modeling Complex 3D Shapes with the Solid Tools |
 |
Move can move, copy, or stretch entities. | Moving Entities Around |
 |
Rotate moves entities at a specified angle. | Flipping and Rotating |
 |
Scale resizes entities. | Scaling Your Model or Parts of Your Model |
 |
Tape Measure measures entities and helps you model precisely. | Measuring Angles and Distances to Model Precisely and Scaling Your Model or Parts of Your Model |
 |
Dimensions marks a length or angle. | Adding Text to a Model |
 |
Section Plane cuts through a model to show a plan and/or side view | Slicing a Model to Peer Inside |
 |
Protractor measures angles. | Measuring Angles and Distances to Model Precisely |
 |
Axes moves or sets a model or component’s axes. | Adjusting the Drawing Axes |
 |
Walk simulates walking through a model | Walking through a Model |
 |
Position Camera allows you to view your model at a specific height relative to the surface of your model. | Walking through a Model |
 |
Look Around allows you to move the camera from side to side, sort of like turning your head. | Walking through a Model |
 |
Orbit enables you to fly around a 3D model. | Viewing a Model |
 |
Pan moves your view up, down, left, or right. | Viewing a Model |
 |
Zoom enables you to view detail or your overall model. | Viewing a Model |
 |
Zoom Window zooms into a specific rectangular portion of your model. | Viewing a Model |
 |
Zoom Extents displays the whole model in the drawing area. | Viewing a Model |
Inserting an image or SketchUp file into your model
With SketchUp for Schools, you can insert image files (PNG or JPG) or a SketchUp (SKP) file. When you insert an image file, you can insert it as an image or a material. When you insert a SketchUp model, the model becomes a component within your currently open model.
To insert an image file, follow these steps:
- Click the File Operations icon (
 ) and select Insert from the menu that appears.
 - Drag and drop a PNG or JPG file to the Insert File box. Or click the Computer icon to browse to an image file saved on your computer, and use the dialog box that appears to open the file.
- Choose whether you want to insert the image file as an image or as a material. For details about working with images in SketchUp, see Sticking a Photo or Texture to a Face. For help working with materials, see Adding Colors and Textures with Materials.
To insert a SketchUp file as a component, follow these steps:
- Click the File Operations icon () and select Insert from the menu that appears.
- Choose the SketchUp file you want to insert in one of the following ways:
- Drag and drop a SKP to the Insert File box.
- Click the Computer icon to browse to a SketchUp file saved on your computer, and use the dialog box that appears to open the file.
- Click the Google Drive icon (
 ) to select a model saved via Google Drive.
Geolocating a model
When you geolocate model, you embed longitude and latitude information that enables you to conduct shadow studies and more. In SketchUp Free, you can geolocate a model by following these steps:
- Click the Open Model/Preferences icon ().
- In the panel that appears, click the Add Location icon (
 ).
). - In the Search box at the top of the map that appears, type an address or intersection where you want to locate the model. Then click Search.
- Click Select Region in the upper right.
- Drag the corners of the selection box to refine the location.
- Click the Grab button in the upper right, and your location’s terrain is imported into your model as a layer.
For an introduction to terrain, start with Modeling Terrain and Other Rounded Shapes. If you’re interested in studying realistic shadows, check out Casting Real-World Shadows.
Touring the SketchUp for Schools panels
On the right side of the SketchUp Free interface are icons that open a tray of panels. Click an icon to open the tray, and click any panel name to toggle it open or closed. The following table points you to a Help Center article that explains more about each panel.
| Panel | Learn More |
|---|---|
| Entity Info | Entity Info is handy in all sorts of instances. These articles explain when Entity Info is especially handy. |
| Instructor | The Instructor is a help tool in itself. Open it for help with the currently selected tool. |
| Components | Adding Premade Components and Dynamic Components |
| Materials | Applying Colors, Photos, Materials, and Textures |
| Styles | Choosing a Style |
| Layers | Controlling Visibility with Layers |
| Views | Viewing a Model explains perspective and parallel projection. Creating Scenes explains how to save a view as a scene. |
| Display | This panel helps you manage hidden geometry, section planes and cuts, axes, guides, shadows, and fog. |