With SketchUp's Shadows feature, you can make your model cast a basic shadow or see how the sun casts shadows on or around a geolocated model. With Shadows you can get a general idea of how the sun or shadows will look in a specific location at a specific time of day.
Note: You must geolocate your model before using the Shadows feature. To learn how to geolocate your model, see Geolocation and Terrain.
When you're casting real-world shadows, SketchUp's calculations are based on the following:
- The model's latitude and longitude.
- The model's cardinal orientation. See Adjusting the Drawing Axes for details about how the drawing axes are aligned to the cardinal directions.
- The selected time zone.
To change the way shadows appear in your model, open the Shadows panel and adjust the following settings:
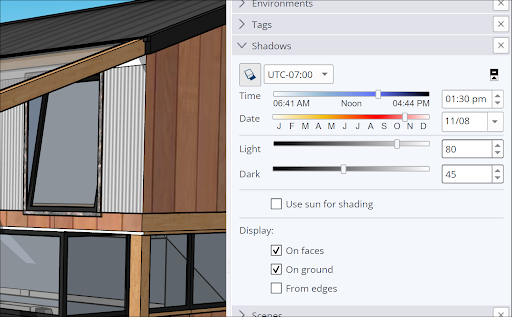
- Show/Hide Shadows – Toggle shadows on or off.
- Time and Date – Use the sliders and dropdown menus to select the time and date SketchUp will use to cast your shadows.
- Light and Dark – Use the sliders and dropdown menus to adjust the intensity of light and dark when casting shadows.
- Use Sun for Shading – When selected, SketchUp's simulated sun shades parts of your model even with shadows toggled off.
- On Faces – Faces in your model will cast shadows on other faces. Unchecking this option can improve performance.
- On Ground – Geometry casts shadows on the ground plane.