Using the Soften Edges feature, along with the Smooth edge property, changes the visibility of edges and can make your model look more realistic with less geometry. As an added bonus, it may also improve your computer’s performance.
Understanding the edge properties
In SketchUp, the following properties, in various combinations, enable you to control edges’ appearance:
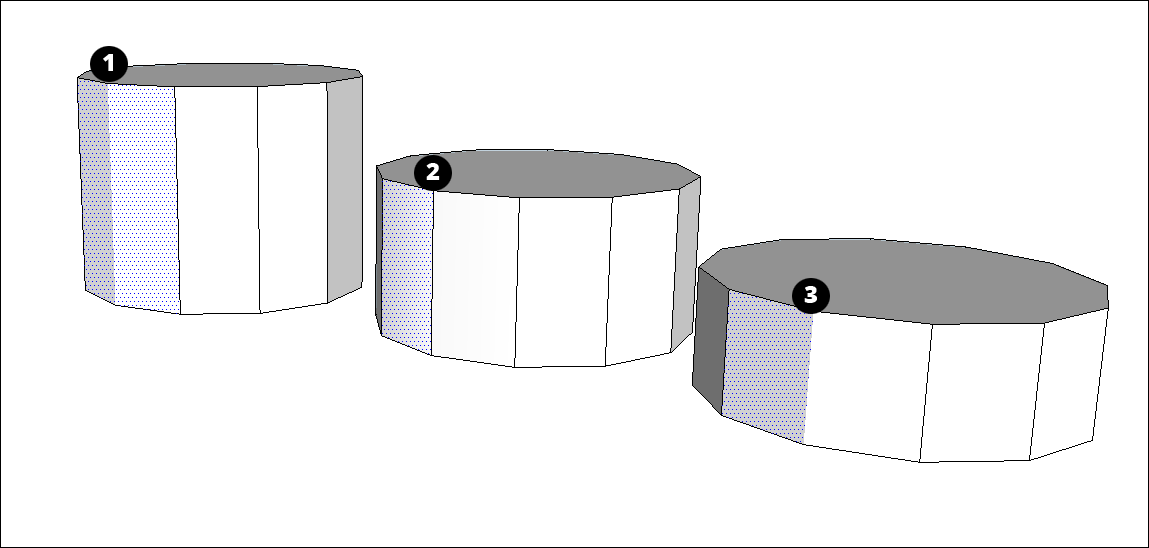
Soft: When you soften an edge, the edge is hidden, and the faces that the edge bounds become a surface entity.
Note: A surface entity joins two or more faces so that they look round. Although you still see inferences for all the geometry that a surface entity contains, the surface entity acts like a single entity when you select or paint it. In the figure, you see that clicking the face on either side of the soft edge (1) selects both faces.- Smooth: Smoothing an edge adds shading that makes the faces look smooth. However, when you apply the Smooth property alone, the edge remains visible. (See Edge 2 in the figure.)
You can also hide an edge (or any geometry, the hidden property isn’t exclusive to edges). When you hide an edge, the edge is not visible, but any faces adjoining the edge are not transformed into a surface entity. (Edge 3 in the figure is a hidden edge.)
Softening and smoothing edges at once
In SketchUp, softening and smoothing edges typically go hand-in-hand. That’s why both the Eraser tool and the Soften Edges dialog box apply these properties together.
To soften and smooth edges with the Eraser, follow these steps:
- Select the Eraser tool (
 ) or press the E key.
 - Tap the Ctrl key (Microsoft Windows) or the Option key (macOS) to toggle Smooth Edges and then "erase" these lines the same way you would to delete them.
If you make a mistake or change your mind, tap the Alt (Microsoft Windows) or Command (macOS) and click the edges to undo the softening and smoothing.
To soften and smooth with the Soften Edges dialog box, follow these steps:
- Select the edges you want to soften and smooth. (See Selecting geometry for tips and selection techniques.)
In MacOS select Window > Soften Edges. In Windows select Window > Default Tray > Soften Edges. You can also context-click your selection and choose Soften/Smooth Edges. The Soften Edges dialog will appear.
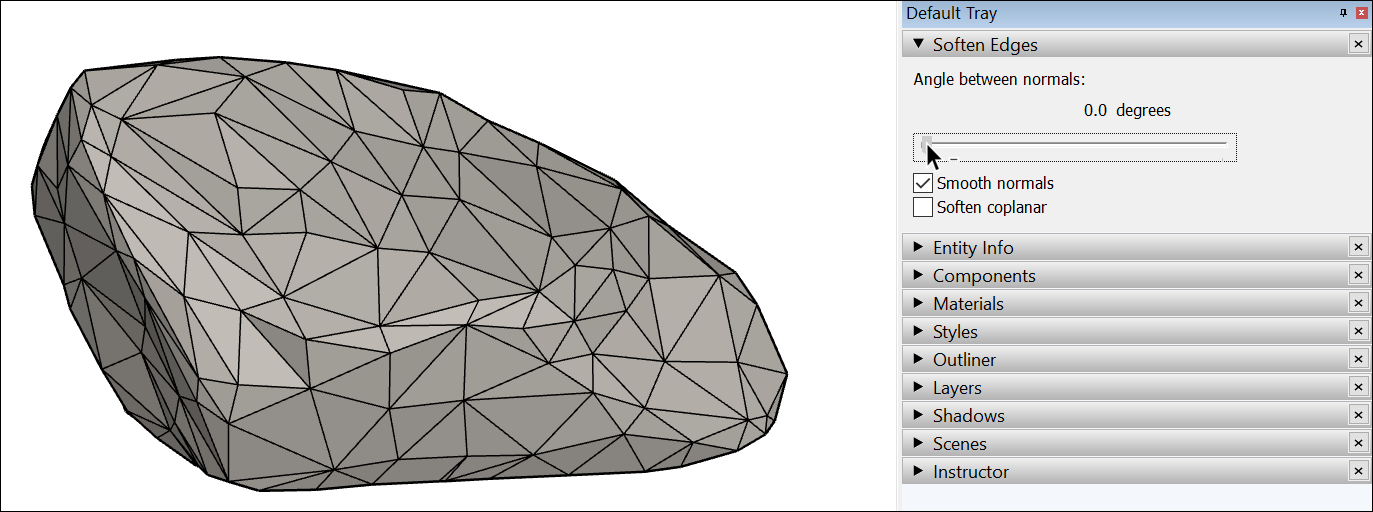
Use the slider to set the maximum size of all angles that will be smoothed or softened. The higher the setting, the more angles you are likely to smooth or soften. In the example, the slider is set to 20 degrees, which smooths and softens most of the rock’s surface.

- (Optional) The Smooth normals checkbox is selected by default. If you don’t want the shading effect that makes your edges look smooth, clear this checkbox.
- (Optional) Select the Soften coplanar checkbox to soften edges between coplanar surfaces, essentially deleting those edges. In the example of the rock, selecting the checkbox doesn’t impact the rock much, because few (if any) of its faces are on the same plane.
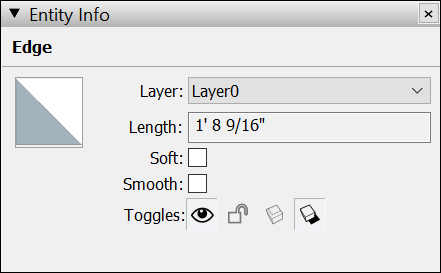
To check or change the properties applied to an edge, context-click it and choose Entity Info. In the Entity Info box, the type of entity appears in the upper left and you can select or clear the Soft and Smooth checkboxes.
Hiding geometry
As you draw a model, you may not want a line marking every edge in your model. The Soften Edges feature not only hides the line, but also creates a surface entity. If you want to hide an unsightly line without creating a surface entity, seek out the Hide feature. You can always hide lines, faces, and any SketchUp entity.
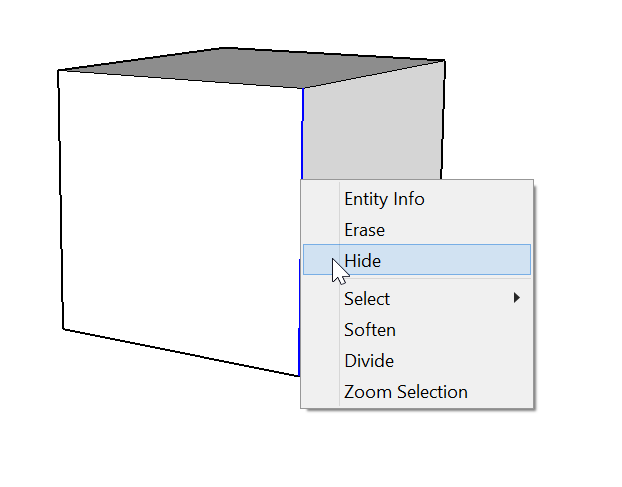
To hide a line or any geometry:
- Select the geometry you want to hide.
- Context-click the selection.
- Choose Hide from the context menu that appears.
- You can also select Edit > Hide.
- The selected geometry remains in your model but disappears from view.
After you hide geometry you can’t select it. To select hidden geometry, display hidden geometry or unhide the geometry.
Viewing hidden geometry and objects
In SketchUp, any geometry that’s hidden is still there. You just can’t see or select it.
To see the hidden geometry or objects but keep them hidden:
- Choose View > Hidden Geometry or View > Hidden Objects.
- All hidden entities appear in a ghosted pattern.
- Choose View > Hidden Geometry or View > Hidden Objects again to hide those objects again.
To change geometry from hidden to visible, you need to unhide it by:
- Select the hidden geometry.
- Context-click the selection, and choose Unhide.
- To change back, context click and select Hide.

