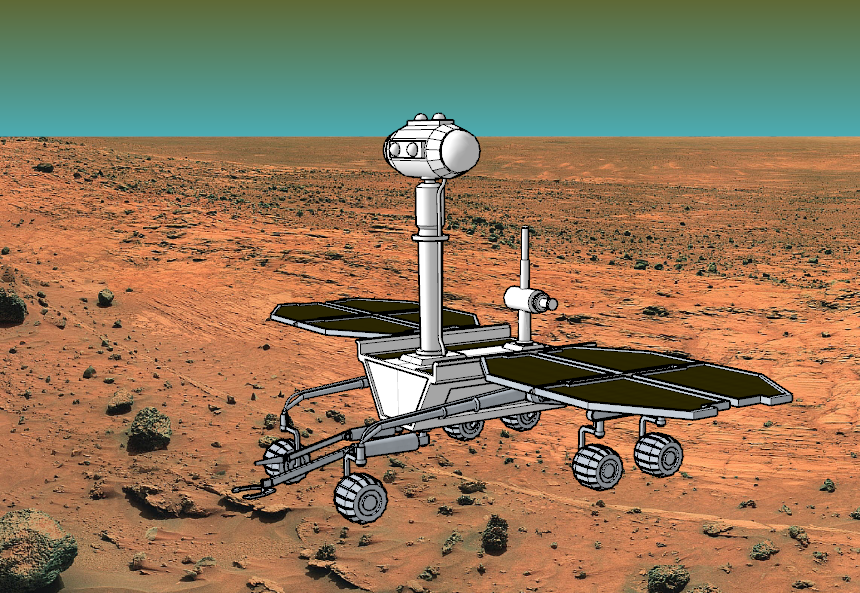
A big part of your model's style is what you see in the background. SketchUp makes it easy to customize the background including the sky, horizon, and ground to best fit the style of your model. After all, what's the use in making a Mars Rover if it doesn't look like it's on Mars?
You can customize the background colors of your model in the Styles panel by following these steps:
- Open the Styles panel. On Windows, you'll find the Styles panel in the Default Tray if visible, or under Default Tray in the Windows menu. On MacOS, you'll see the Styles option in the Windows menu.
Under Edit, select Background Settings (
 ).
).
- Choose from the following options:
- Background - Change the color of the default background in your model.
- Sky - Choose a color for the sky. This option can be turned on or off using the checkbox.
- Horizon - Choose a color for the horizon. The horizon color interacts with the sky color, creating a unique blending effect.
- Ground - Select a ground color. This option can be turned on or off using the checkbox.
- Show ground from below - Toggle to display ground color when viewing your model from below the horizon.
- Click Update Style (
 ) in the top-right of the Styles panel to update your Model Style. See Managing in Model Styles and Collections for more details about Model Styles.
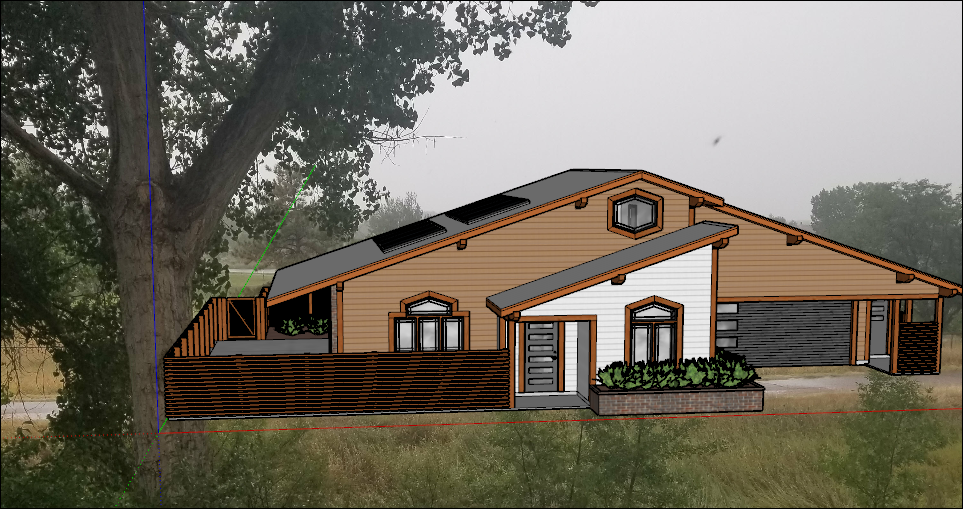
Backgrounds can also be 'established' with photographs or imported images. To use a static background -- with your model appearing in the foreground of a view -- add watermarks to your style.
Here's how it works:
- Open the Styles panel and select Edit.
Click Watermark Settings (
 ).
).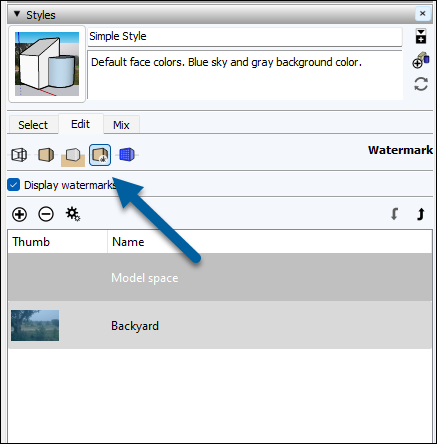
- Click Add Watermark (
 ).
). - Navigate to the image you want to use as your background and select it.
Name your watermark and select Background. Click Next.

- Check Create Mask if you want to create a masking watermark. Masking can help you manipulate parts of your image without erasing them.
- Use the slider to adjust the transparency of your image. Click Next.
- Choose one of the following options:
- Stretched to fit the screen - Your image stretches to fill the background. Uncheck Lock Aspect Ratio if it's okay to distort your image to do so.
- Tiled across the screen - Repeat your image as tiles. Use the Scale slider to set the tile size.
- Positioned in the screen - Select where you want your image positioned using the diagram. Use the slider to adjust the size of your image.
- Click Finish.