SketchUp provides everything you need to create your own terrain for your model using the Sandbox tools.
Creating terrain can be useful when:
- You have imported or traced contour lines in your model and would like to transform them into a Triangulated Irregular Network (TIN).
- Real-world terrain would interfere with your creative vision.
- You want to use your imagination and create a landscape that doesn’t exist.
The easiest ways to create your own terrain is to add contour lines to your model and then create a TIN using those lines, or to create a flat rectangular TIN and shape it into your desired terrain.
Creating a TIN From Contour Lines
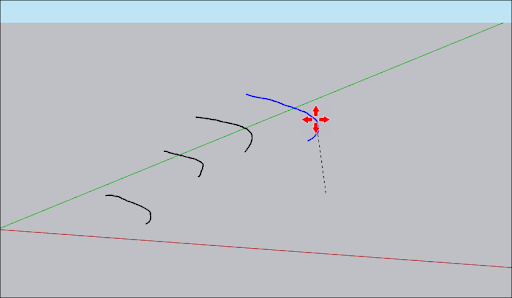
You can draw or import the contour lines you want to use to create your terrain. For best results, include as many contour lines as you can and then simplify those lines by reducing the number of segments, if needed. For more details on drawing contour lines freehand see Drawing Freehand Shapes.
After drawing and simplifying your contour lines, turn them into a TIN using these steps:
- Use the Move tool (
 ) and the Measurements box to place each contour line at the appropriate height relative to the ground plane.
- Once all contour lines are in place, select them all with Lasso Select (
 ).
). - Activate From Contours (
 ).
). - SketchUp will generate a TIN using the selected contour lines. This TIN is a group and can be edited like any other grouped geometry.

Creating a Flat Rectangular TIN
SketchUp’s Sandbox tools can help you create your own flat rectangular TIN.
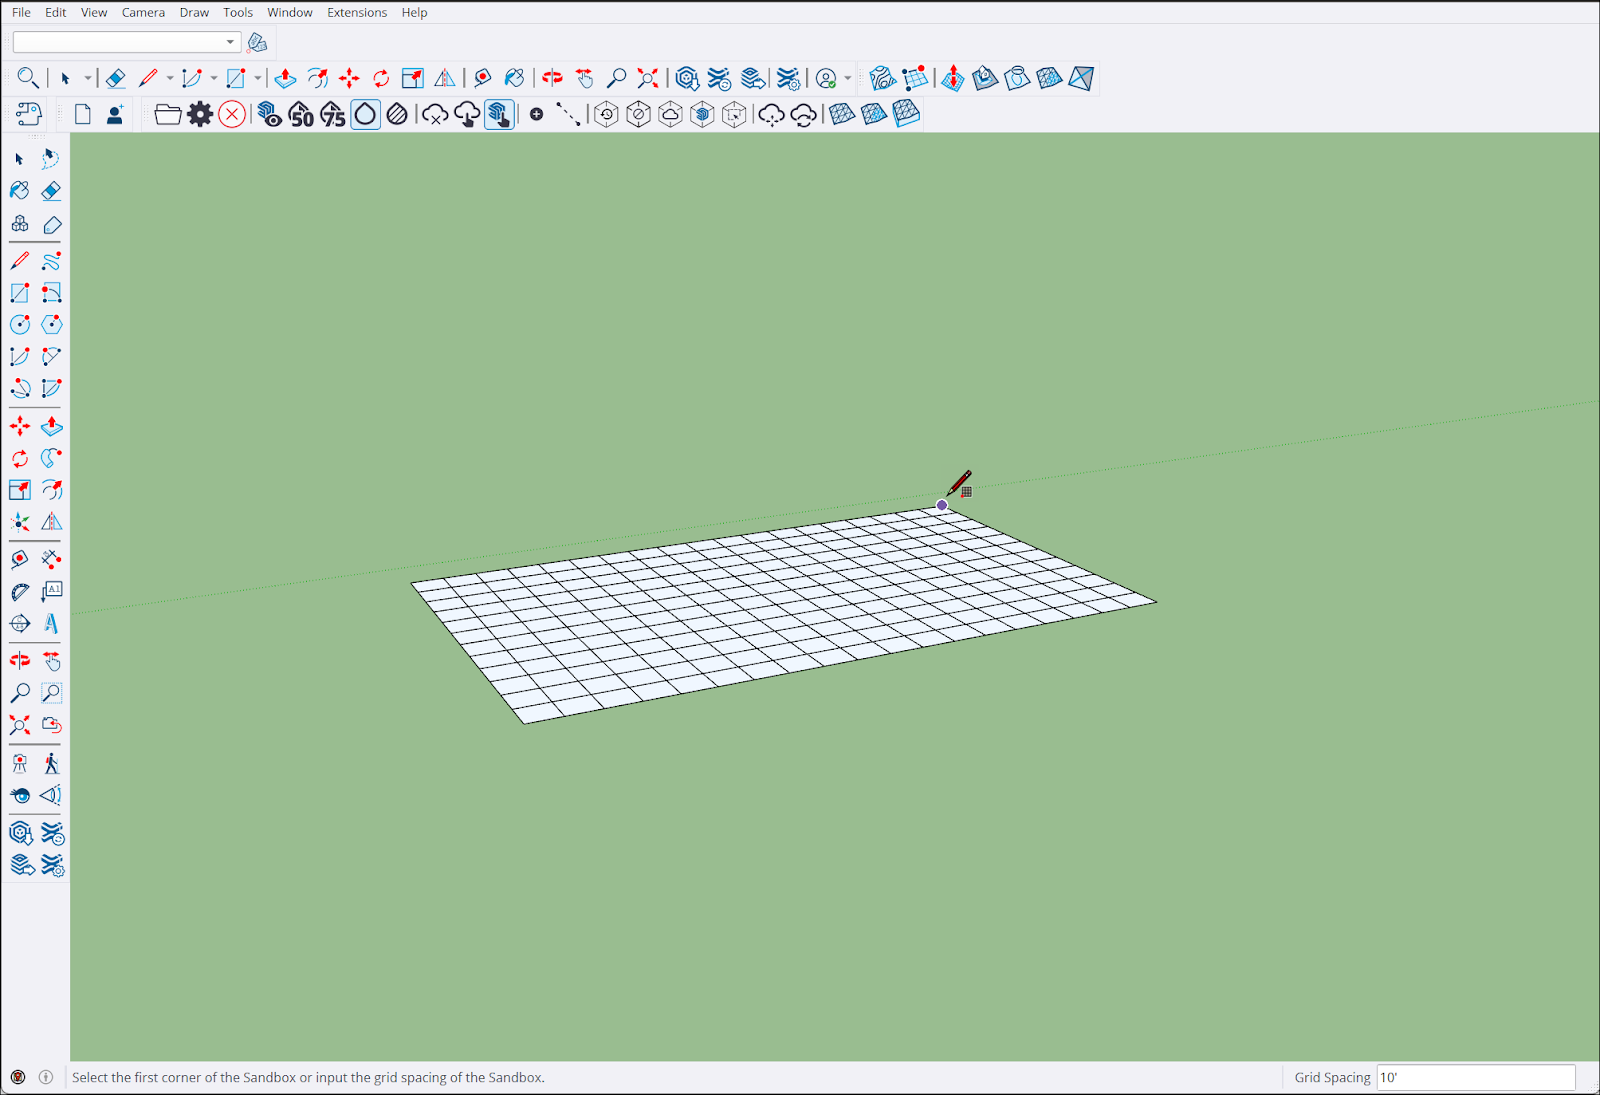
To create your own TIN:
- Activate the From Scratch (
 ) tool.
 - Click the TIN starting point.
- Set the length and width using your mouse or by entering a value in the Measurements box just like you would other geometry.
- The TIN will appear in your model.
- To change the grid spacing, select the TIN and enter a value in the Measurements box.