Creating Terrain from Scratch

In SketchUp, importing preexisting terrain is your easiest route to creating terrain. However, the tools for creating terrain from scratch are useful in the following scenarios:

  • You have contour lines that you either imported or traced and now need to transform into a TIN (triangulated irregular network).
  • Reality would only interfere with your creative vision. That is, you want to shape the terrain yourself, starting from a fairly flat surface or you want to model something other than terrain. This approach is a great starting point if, for example, you’re creating a model of a golf course full of ponds, sand traps, and other obstacles or a model sprung wholly from your imagination.


Tip: If you’re working with imported contour lines, simplify them before you create a TIN.


Simplifying contour lines with a script

To optimize SketchUp’s performance, include the minimum number of contour lines needed to create your TIN. Beyond erasing actual lines, you can simplify the lines themselves by reducing the number of segments in each line. Of course, do this only if the contours’ complexity isn’t necessary for your overall model.


Note: For a refresher on how curve and polyline entities are made of segments, see Drawing Freehand Shapes.


If your hands feel cramped just thinking about all that mousing, you’ll be happy to know that an extension can simplify contour lines for you. Developers create SketchUp extensions, which are Ruby scripts designed to do special jobs. The Simplify Contours Tool script is specifically designed to reduce the number of segments in curves and polylines so that a TIN created from your contours has the least geometry necessary.

To install the script, follow these steps:

  1. Select Window > Extension Warehouse.
  2. Sign in with your Google account user name and password.
  3. Search for Simplify Contours Tool.
  4. Follow the on-screen instructions to download and install the extension. The Knowledge Center’s Extension Warehouse section explains all the ins and outs of SketchUp Extensions.

After you install the script, here’s how to make it evaluate and simplify contour line segments:

  1. Select all the contour lines you want to simplify.
  2. From the menu bar, select Extensions > Simplify Contours.
  3. In the Simplify Angle dialog box that appears, enter the angle at which you want to merge two segments into one. For example, say you use the default of 10 degrees. If any pair of segments forms an angle of less than 10 degrees, the script merges the pair into one segment.
  4. Click OK and the contours are simplified.

Creating a TIN from contour lines

After you import or draw contour lines and then simplify them, follow these steps to transform contours into a TIN:

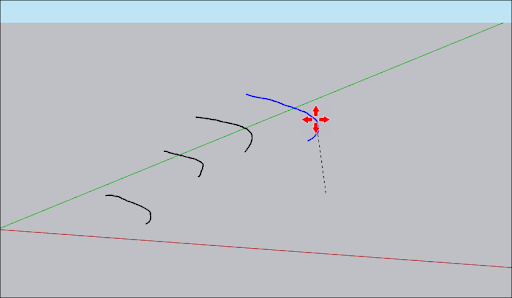
  1. Place each contour line at the appropriate height relative to the ground plane, as shown in the following figure. Your first contour might be on the ground plane, the second line 2 feet above the ground plane, the third line 4 feet above the ground plane, and so on. Use the Move tool () to raise or lower each contour along the blue axis.


  2. With the Select tool (), select all the contour lines.
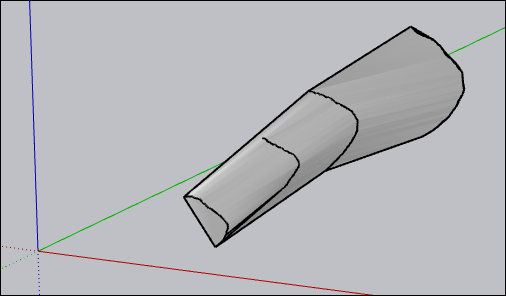
  3. Click the Sandbox From Contours tool () on the Sandbox toolbar or select Draw > Sandbox > From Contours on the menu bar. Either way, the contour lines instantly become a TIN, as shown in the following figure. SketchUp automatically organizes all the TIN geometry into a group, so you have to open the group context to edit the TIN.


Tip: Sometimes, the Sandbox From Contours tool creates flat spots or plateaus that don’t belong in your TIN. You can retriangulate the plateaus (to create a slope) using the Flip Edge tool. Editing and Fine-Tuning Terrain explains how to flip edges and make other common edits.


Creating a flat rectangular TIN

If you prefer to to start modeling terrain from a flat, rectangular TIN, you draw the shape with the Sandbox From Scratch tool:

  1. Select the Sandbox From Scratch tool () on the Sandbox toolbar, or select Draw > Sandbox > From Scratch from the menu bar.
  2. Click to set the TIN’s starting point.
  3. Set the TIN’s length by moving the mouse cursor in any direction and clicking to set the desired length. As you move the cursor, you see inferences that help you align the length to your desired drawing axis or in relation to existing geometry. Instead of using the mouse, you can type a value and press Enter (Microsoft Windows) or Return (Mac OS X) to set a precise distance in the Measurements box. If you type only a number, SketchUp uses the units that your template specifies. But you can also use a different unit by typing it after the value. For example, if your template is set to inches, typing 48 sets a length of 48 inches but typing 104cm or 6’ sets a length of 104 centimeters or 6 feet, respectively.
  4. Set the TIN’s width by moving the mouse cursor and clicking or typing a precise value. In the following figure, the inference engine is indicating that the width is parallel with the green axis, and the Measurements box, which updates dynamically as you move the cursor, indicates that clicking at this point would set the width at 51 feet, 8 5/16 inches.

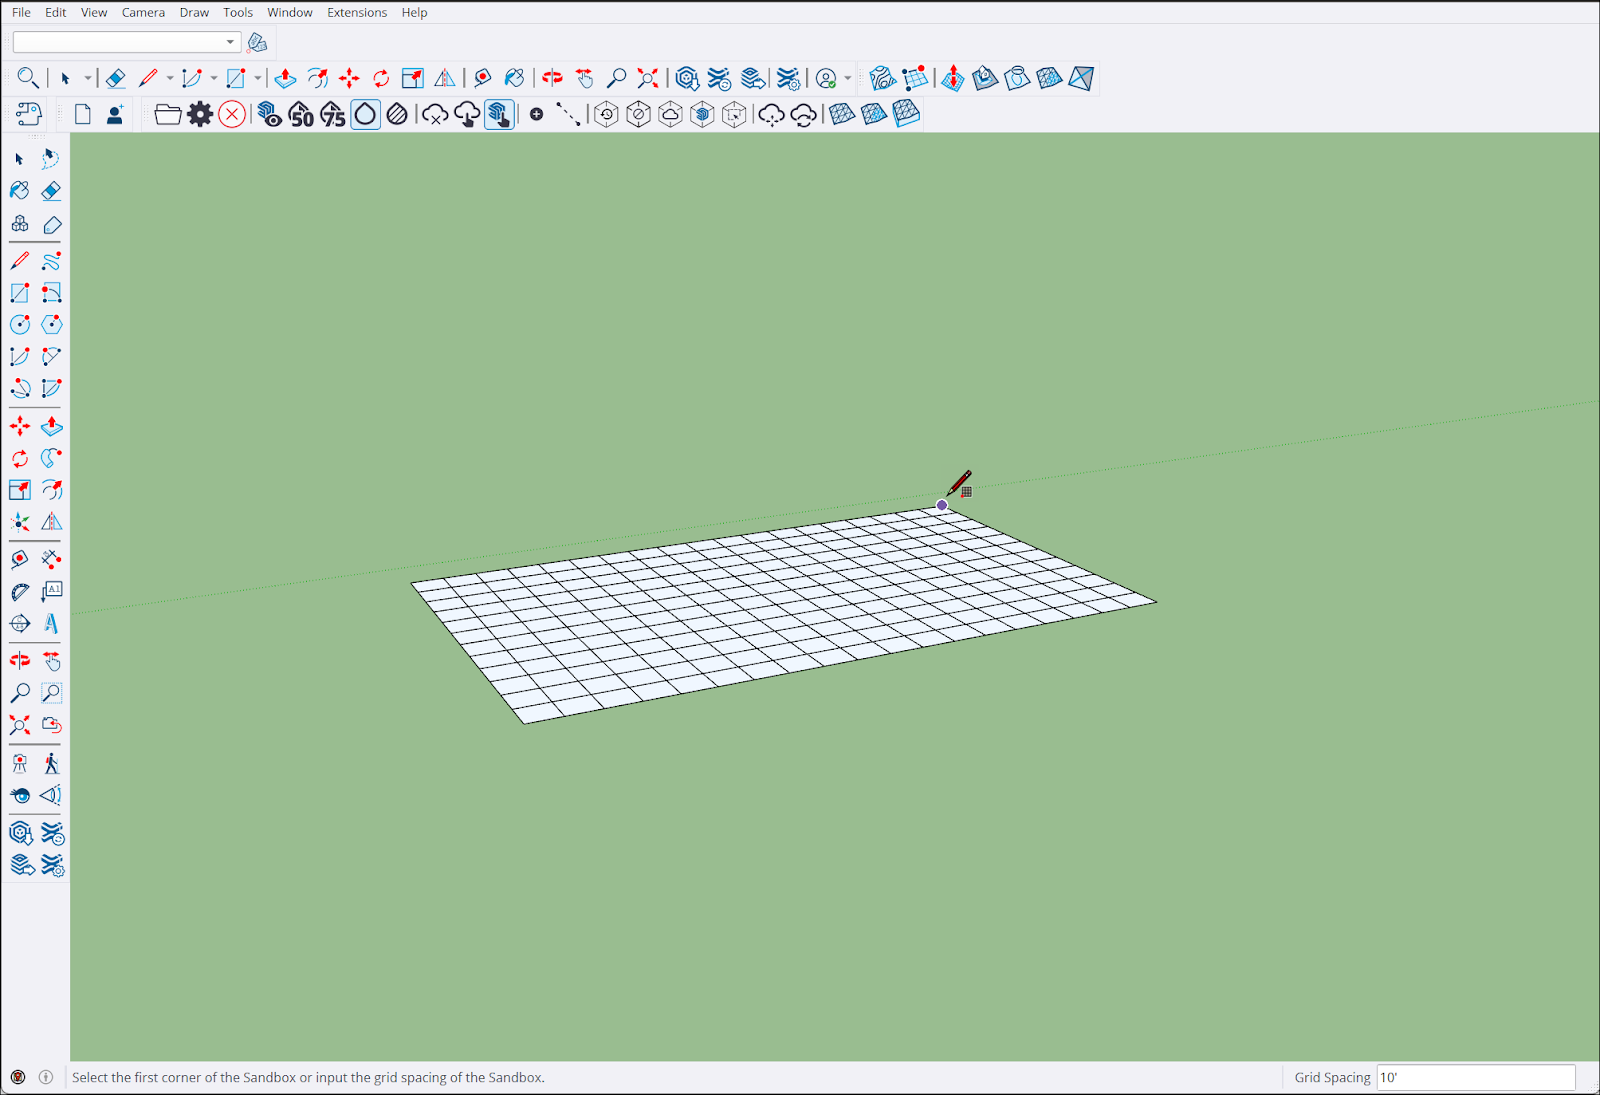
  5. (Optional) Type a value in the Measurements box and press Enter (Microsoft Windows) or Return (Mac OS X) to change the TIN’s default grid spacing from 10 feet to some other value. In the following figure, you see the newly created TIN and the Measurements box ready to accept a Grid Spacing value.


Tip: When you create a TIN with the Sandbox From Contours or Sandbox From Scratch tool, the TIN geometry is contained within a group. This means you need to open the group’s context in order to sculpt or edit your TIN. Grouping Geometry explains how SketchUp groups work, and Editing and Fine-Tuning Terrain walks you through common edits to terrain.


Was this article helpful?