Although documents tend to include more visual elements than text, you likely want a little text to add headings, bullet points, or other text to your document.
In LayOut, you use the Text tool (![]() ) to type text into a bounded or unbounded text box. You can also bring text into LayOut by importing a supported text document. In the following sections, you find out how all these text options work.
) to type text into a bounded or unbounded text box. You can also bring text into LayOut by importing a supported text document. In the following sections, you find out how all these text options work.
To learn about automating text boxes so that they provide data from SketchUp models and update as you document changes, consult Labeling items in your document and Automating title block text with Auto-Text tags.
Table of Contents
Typing into a bounded or unbounded text box
You can type any text you like right into your document. In LayOut, the Text tool can create either a bounded or unbounded text box:
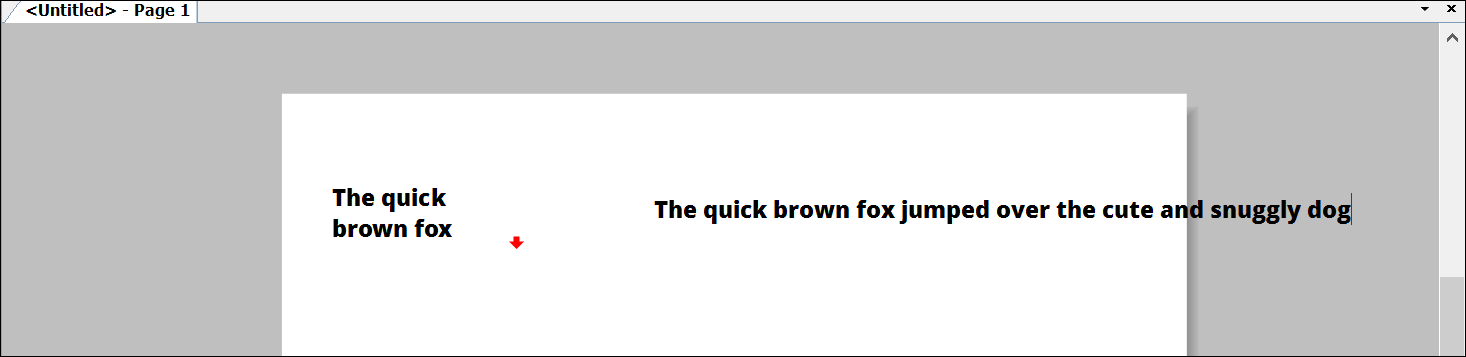
- A bounded text box stays the same size, no matter how much text you type, but the text wraps automatically when the text reaches the end of the box. If you write a short novella, or the text simply exceeds the size of the box, some text is hidden and a red arrow appears in the lower-left corner of the text box, as shown in the following figure. To see all the hidden text, select the text box and drag out a side or corner until all the text appears inside the bounded box.
- An unbounded text box grows to accommodate all the text you type. However, text doesn't wrap as you type; you have to press Enter to start a new line. Otherwise, the text just extends off the edge of the drawing area, as shown in the following figure.
To start making text boxes, simply follow these steps:
- Select the Text tool (
 ) from the default toolbar or by selecting Tools > Text.
 - To create a bounded text box, click and drag to draw the size of the box and then release the mouse button. To create an unbounded text box, simply click where you want to start typing text.
- Type your text.
- Click outside the text box when you're done typing.
When you draw a bounded text box, you can set the text's vertical and horizontal alignment, too. The following table outlines your options. You can also format text later, using the Text Style panel, as explained in Formatting Text.
| To Align Text Like This... | Here's How to Draw the Bounded Text Box |
| Top- and left-aligned | Drag from top left to bottom right. |
| Top- and right-aligned | Drag from top right to bottom left. |
| Bottom- and left-aligned | Drag from bottom left to top right. |
| Botton- and right-aligned | Drag from bottom right to top left. |
| Center aligned | Hold down Ctrl (Microsoft Windows) or Option (MacOS) while dragging from center. |
Once you add text to your document you can search for specific words and phrases using Find & Replace. Using Ctrl + F on Windows, or Command + F on a Mac, you can search your entire document. Find and Replace also allows you to replace the text you search for.

Importing text into LayOut
Typing right into a document isn't always a great idea, especially if the text is already typed, proofread, and ready to insert into your document. Why redo all that work?
LayOut enables you to import text in Rich Text Format (an .rtf file) or plain text format (a .txt file). If your text is in a different format, most word-processing programs enable you to save a file to either of these formats.
When your text is ready to import, follow these steps:
- Select File > Insert. An Open dialog box appears.
Navigate to the text file you want to import.
Tip: In Microsoft Windows, to see only those text files that are compatible with LayOut, you can select Plain Text or RTF Text from the drop-down menu to the right of the File Name box. On Mac OS X, incompatible files are grayed out in the Open dialog box.- Select the .rtf or .txt file, and click Open. The text of your document appears in the document area, as shown in the following figure.
