Web 用 SketchUp でのモデルの作成と編集は、デスクトップ用 SketchUp でのモデル作成とよく似ています。 ただし、Web 用 SketchUp には、デスクトップ版とは少し異なる点がいくつかあります。
新しいモデルの作成
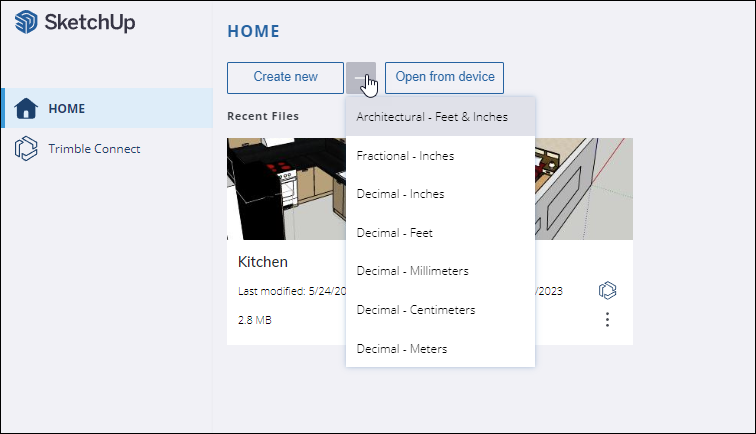
Web 用 SketchUp を初めて開くと、ホーム ページが表示されます。 新しいモデルを作成するには、Create New (新規作成) をクリックするか、ドロップダウン メニューを使用して目的の測定単位を選択します。
測定単位の変更
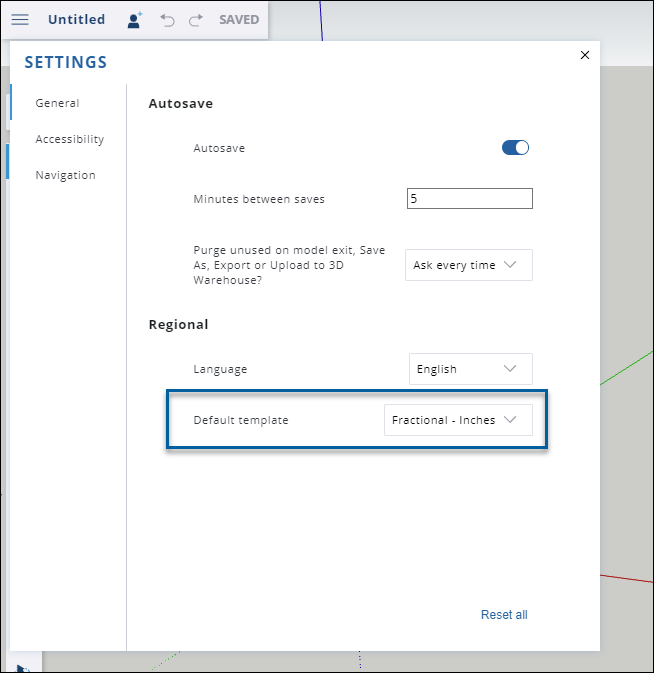
モデルで使用する測定単位は、App Settings (アプリ設定) でいつでも変更できます。 Main Menu (メイン メニュー) から App Settings (アプリ設定) を選択し、General (一般) タブで Default Template (デフォルト テンプレート) セクションを見つけます。
ファイルと画像のインポート
Web 用 SketchUp を使用すると、ファイルを直接モデルにインポートできます。 以下の形式で保存されたファイルをインポートできます。
- 3DS
- DAE
- DEM
- DWG
- DXF
- KMZ
- STL
- JPG
- PNG
ファイルをインポートするには、以下の手順に従います。
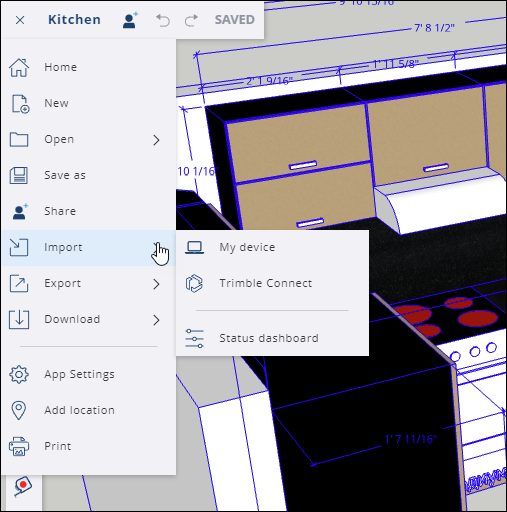
- Main Menu (メイン メニュー) から Import (インポート) を選択します。
ファイルの場所として、My Device (マイ デバイス) または Trimble Connect を選択します。
- デバイスからインポートする場合は、表示されるウィンドウにファイルをドラッグ&ドロップするか、提供されているリンクを使用して画像を参照します。
- Trimble Connect からインポートする場合は、保存したプロジェクトからインポートするファイルを見つけて選択します。
モデルにインポートされた画像ファイルは、画像またはマテリアルになります。 CAD ファイルをインポートすると、そのファイルはコンポーネントになります。 モデルにインポートしたファイルの使用方法については、SketchUp データを他のモデリング プログラムまたはツールと共に使用するで、インポートするファイルの種類に関連付けられているセクションを参照してください。
Web 用 SketchUp のパネル
Web 用 SketchUp のパネルは、インターフェースの右側に表示されます。 各パネルには、モデルを次のレベルに引き上げるのに役立つ特定の機能セットが用意されています。
| パネル | アイコン | 記事 | 説明 |
|---|---|---|---|
| Entity Info (エンティティ情報) | エンティティの検査 | Entity Info (エンティティ情報) には、選択したエンティティに関するあらゆる種類の情報 (使用マテリアル、コンポーネントの数、割り当てられたタグなど) が表示されます。 | |
| Outliner (アウトライナー) | Outliner (アウトライナー) で階層を操作する | Outliner (アウトライナー) パネルでは、モデルのオブジェクトを階層ツリーとして表示できます。 | |
| Instructor (インストラクター) | 該当なし | Instructor (インストラクター) パネルは、初心者が使っているツールに基づいてモデリングに役立つヒントを確認できる便利な機能です。 | |
| 3D Warehouse | 3D Warehouse | 3D Warehouse は、SketchUp とシームレスに連携する、検索可能な既成の 3D モデルの Web サイトです。 | |
| Components (コンポーネント) | SketchUp でコンポーネントを操作する | コンポーネントは、モデルの構成要素です。 このパネルには、各コンポーネントが一覧表示され、それらの管理と操作に役立ついくつかのオプションが用意されています。 | |
| Materials (マテリアル) | マテリアルを使用した色とテクスチャの追加 | マテリアルは、モデルにディテールとリアリズムを追加するのに役立ちます。 このパネルは、モデルで使用するマテリアルを追加または管理するのに役立ちます。 | |
| Styles (スタイル) | スタイルの選択 | Styles (スタイル) は、モデル全体に一度に適用できるグループ化された設定です。 Styles (スタイル) パネルでは、モデルにスタイルを追加したり、追加済みのスタイルを管理したりできます。 | |
| Tags (タグ) | タグによる表示 / 非表示の制御 | タグは SketchUp のレイヤーの拡張バージョンで、オブジェクトの整理や表示設定の制御に役立ちます。 Tags (タグ) パネルを使用してタグを管理または作成します。 | |
| 影 | 現実世界の影を落とす | 影の表示方法を設定したり、ジオロケーション モデルで太陽が影を落とす様子をシミュレートしたりします。 | |
| Scenes (シーン) | シーンの作成 | Scenes (シーン) は、さまざまなセット モデル ビューを表します。 Scenes (シーン) パネルでシーンを管理および作成します。 | |
| エッジのソフトニング / スムージング | ジオメトリのソフトニング、スムージング、および非表示 | エッジの見え方を変更して、より少ないジオメトリでモデルをよりリアルに見せることができます。 | |
| Display (表示) | 該当なし | Display (表示) パネルでは、非表示のジオメトリ、影、霧などの表示 / 非表示を管理できます。 | |
| Model Info (モデル情報) | 該当なし | Model Info (モデル情報) では、測定単位やフォントなど、モデルの基本要素を見つけて調整できます。 | |
| Solid Inspector | Web 用 SketchUp の Solid Inspector | Solid Inspector では、グループやコンポーネントにジオメトリのエラーがないかチェックでき、一部の問題を自動的に修正することもできます。 |