Working with Components in SketchUp

Introduction to components

Basic rules of modeling in SketchUp

There are five basic rules of modeling in SketchUp.

  • Rule #1: If you are going to use something more than once in your model, make a Component of it.
    • This applies to copying things. Make a Component of it first, then copy the Component.
  • Rule #2: Draw everything on Layer0. (This is the default layer, so unless you actively change it, everything you draw will be on this layer.)
  • Rule #3: Before you copy a Group, first consider making it into a Component.
  • Rule #4: Context click > Make Unique if you need to change some components to be different than others of the same definition.


You can not make too many Components. You can always simplify later. When you explode all of a component, it (they) turns back into basic geometry and the definition can be purged from the model.

Groups and Components vs Layers

The process of modeling complex items requires internal order or structure to the 3D file, keeping separate things separate, and similar things together. In SketchUp this order can be attained using Groups or Components.

Layering in SketchUp is for display only. Think of them as light switches that illuminate something or turn it off. Layers in SketchUp are not for individual edges and faces. This is because of the shared nature of faces and edges. All native geometry in SketchUp (edges and faces) belong on Layer0.

After you have made something into a Group or Component, then you put it on a Layer.

The organization of components in a SketchUp model greatly affects the speed at which your design and modeling work can progress.

By definition, a Group is a single instance of a collection of geometry.

A Component is a named collection of geometry that can exist at multiple locations within the model. Each instance is a repetition of all others. A change to one instance changes all other instances.

Making components

Creating Components

Components can be made by selecting all of the edges and faces of an object, or a set of objects, and then right-clicking over the highlighted (i.e. selected) objects and selecting Make Component from the menu. Ensure that Replace Component with Selection is checked.

Determining the best point for component origin

Determining a proper component origin is important to users of your product models. This is the point by which people will bring your component in from 3D Warehouse and the Component Browser. The origin also affects swapping of components in a SketchUp model. This video shows how various origin points will affect the behavior of a simple chair. The video also explores swapping a component for another, and applying materials to a component.

The origin point for a model should be based upon how the model will be used by the designer once downloaded from the 3D Warehouse. For example, a good origin for a faucet would be the center line of the base (origin shown here as a red-green-blue icon).

Products like furniture that goes against a wall should use the back left corner (this should be outside the entire bounds of the component, otherwise a new component could be forced inside a wall when reloaded). The same back left corner point is good for items such as cabinets, that are installed out from a wall or corner. Furniture that is put in the middle of a space (tables, vases, lamps) should use the center of mass of the object at the base of the object. Chairs that are meant to fit around a table or at a desk could benefit from an origin that is at the midline of the front of the chair, at the floor line.

Here, the chairs swap by the knee space of the chair, so that if the chair is larger, it will expand outward from the table, not into the table. The table swaps by its center.

Component naming

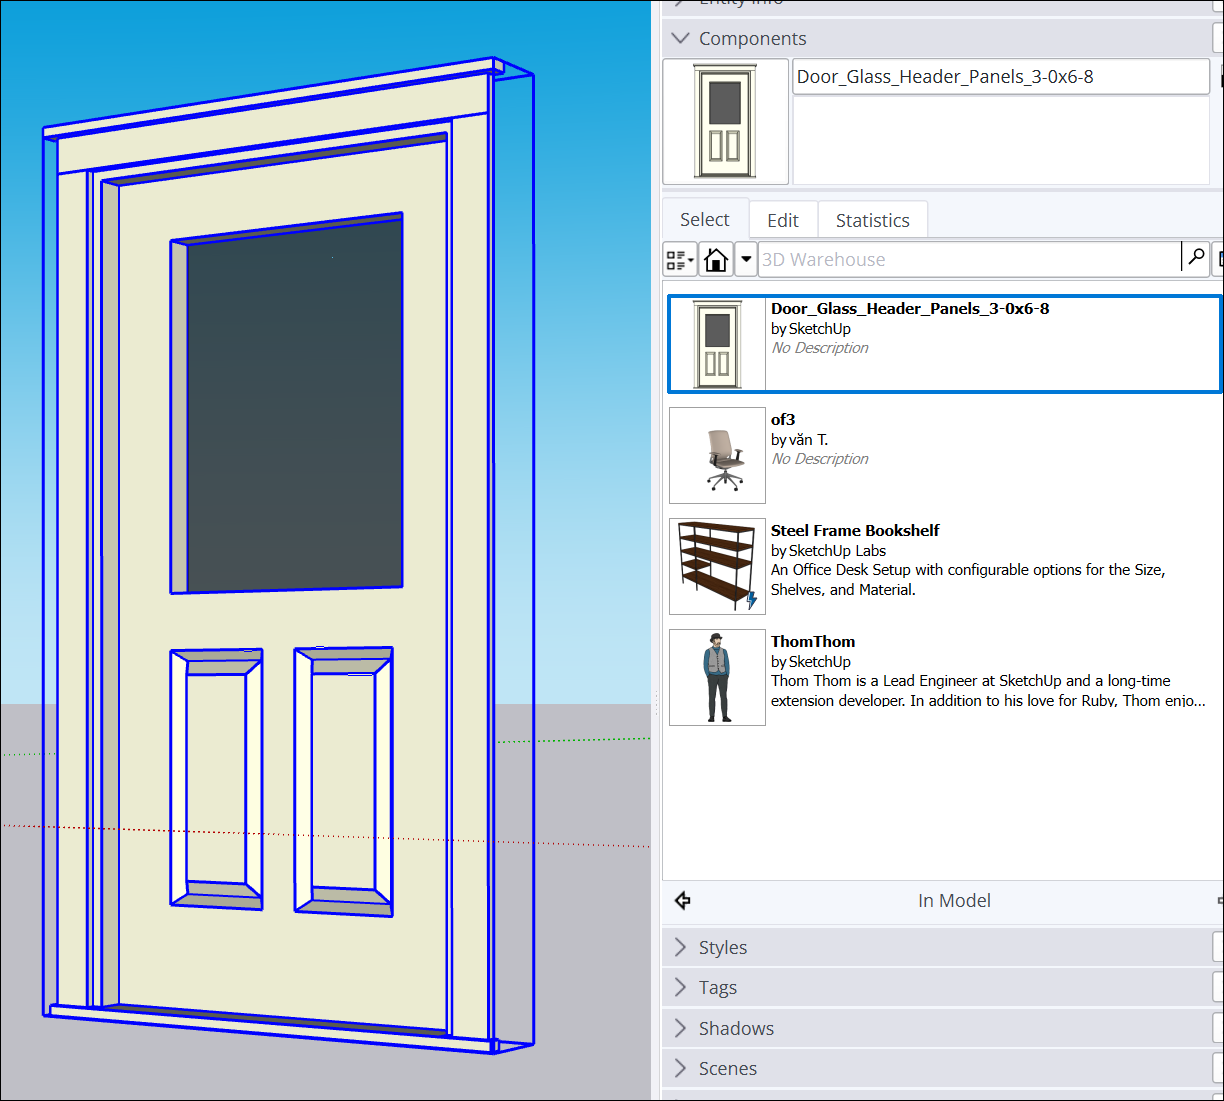
Creating Components during modeling is quite fluid in SketchUp. SketchUp provides auto naming of Components to speed up Component creation. The default name provided in the create Component dialog is the word ‘Component’ followed by a ‘#’ and an incremented number (for example Component#57). The numeric value keeps incrementing to assure that each new Component is named uniquely. But when a Component requires a specific product name, the Component name can be changed. Select the Component in the Component Browser and select the Edit Tab, or use the Entity Info dialog. The Definition name is the actual Component name. In the Component Browser, the definition name is the name shown in the top text field of the Components dialog, and the Definition in the Entity Info dialog. See the article File management, uploading & branding for more discussion on naming components from product manufacturers.

In the Entity Info dialog box, the Name field is only a description for a particular instance of the Component in the model, it is not the actual name of the Component definition. That is stored in the Definition box.

Importing CAD files as components

A third video explores the topic of importing CAD files into SketchUp for the import file types DWG/DXF, STL, 3DS, and IFC. Imported files become components in the current model. Many CAD programs model in a unitless environment, where the unit of measure is assigned to the file and not to entities within the file. SketchUp models are real-world size. This means that you need to apply a scale factor to the CAD file as you import it into SketchUp.

In a blank file, draw a single edge before importing a CAD file. Then the import will come in as a component, with its linework isolated from the rest of the model.

How to avoid empty outer wrappers of components

Never insert a component into an empty model, modify the component, and then save the entire file as a component. This creates an empty outer wrapper. When you do this, the actual component you want is the only thing within the model. By saving this entire file, a user would have to dig down two levels to reach the actual product Component when such a model is used as a Component in another file. The outer context is effectively an ‘empty wrapper’ caused by saving a Component within an empty file.

This probably occurs when a modeler imports a 3D CAD source file and then saves the model as a SketchUp Component. They don’t realize that the CAD geometry comes into the file as a Component to begin with, and thus saving the file right away puts an empty wrapper around the Component.

Cleaning nesting levels of imported CAD geometry

Many CAD programs used by the manufacturing industry output deeply nested files. This is often based upon parametric requirements, or family groupings. The list on the left came from a CAD import into SketchUp. It shows that each Component containing geometry is nested five levels deep within the main chair Component.

Part of the cleanup for a file like this is to move the nested Components "up" to the upper level in the main Component. This allows for direct painting (and manipulation) of sub-Components once the user opens the Component for editing. You can accomplish this using the Outliner by dragging the nested piece of geometry up the tree and placing it under the main Component name.

IFC classifications from some CAD applications come into SketchUp as empty nesting levels. There is no geometry, just a name for the IFC classification. You don’t actually get to the geometry in the Component until you navigate several levels down. These outer sub-Component ‘wrappers’ should be exploded, effectively moving the geometry up to the main level of the Component.

Working with product models in a master file

Modeling multiple Components in a master file is a good way to maintain consistency in Component naming and use.

When using a working model to make changes to a product Component, always set the attributes of the product the way you want them shown on the Component thumbnail, then right-click [context click] on the Component and select Save As to save the Component out to a separate file.

This Save As method works all through the master file, not just on upper level components. Consider this example. It contains many parts and subparts (castors, arms, handles) that are mixed and matched to create multiple products. The benefit to working this way is that as you make a change to a Component, all products using that Component as a sub-part will be up to date with the latest changes. For example, changing the castors in the table could also be the same castors in the rolling file cabinet and the chair.

What you need to know about components

Working in context

All the tools act only on entities within the current editing context. This means that the Erase tool cannot touch anything outside the current context even if you click on something unintentionally. The Select tool will not select anything outside the context, even when using a crossing window.

The drawing window can sometimes become too crowded with information during editing. View > Component Edit > Hide Rest of Model is a toggle that shows or turns off everything outside the current context. You can also toggle the visibility of similar components while component editing View > Component Edit > Hide Similar Components. Learn to use these features to become a faster, more efficient modeler.

Component nesting and context

Components can contain other Components and Groups in addition to faces and edges. This is called nesting. Each time a Component (or Group) is included within another Component or Group, it is nested one level within the outer context.

Context means the immediate container for entities (edges, faces, groups, components, dimensions, text, etc.). A model is the largest context that SketchUp can have;it is the uppermost level of organization. When entities are selected and included in a Component, the Component becomes the context for those entities. If a Component is made from three other Components, that Component becomes the context for those three sub-entities.


Fig. 1

In Fig. 1, the orange lines indicate the outer bounds of the main Component’s context. The blue lines indicate the first nesting level of sub-Components within the main Component. Each blue box represents the context for the items within the box. Finally the magenta lines indicate the second nesting level down of sub-Components within the first (blue) nesting level. Notice that the magenta objects are within context of each of the nested blue components.

Context editing components and nested components

Components and groups may be edited (modified) at any time by Right clicking [context clicking] on the object and selecting Edit from the context menu, or by double clicking the select tool on the object. To finish editing, right click [context click] in white space outside the bounding box and select Close Group or single click the select tool outside the bounding box.

Editing a component is like working on another SketchUp model within the main model. SketchUp uses in-place component editing. This allows you to see the rest of the model in context for reference while you make changes to the component. When editing a component, the limit of the current context for the component being edited is shown by a gray bounding box. The axes directions and origin for the component are shown with a red, green, blue icon. When editing a component, the rest of the model is low lighted (dimmed). You cannot change any of the rest of the model outside of the current context, but you can infer to anything throughout the entire model.

Complexity / Level of detail in a model

Level of detail (LOD, or Complexity of detail) has important implications for a product manufacturer. Complexity refers to the materials, nesting levels, and number of polygons used to represent geometry. See the article: Making a detailed model in a lightweight way.

Many products are modeled using engineering CAD programs to allow the models to drive the manufacturing process and machinery. To do this, a great deal of detail is required of the CAD models. When these types of models are brought directly into SketchUp, however, they can immediately bog down the performance of the designer’s model and therefore may not be a very useful product for the designer to integrate into their design.


There may be times, however, when a designer desires a more detailed representation, especially when they are planning on using the model to create section details. This is a good opportunity for two product models of differing levels of detail to be swapped one for another using a consistent origin point.

Adding intelligence using Dynamic Components

Basic attributes

SketchUp lets you assign extended attributes to a Component, things like Name, Summary, Description and ItemCode using Dynamic Components. Below is a screen capture of the Dynamic Component Attributes dialog box. By default, it shows the Component name at the top, with the additional attributes below in an editable box. The bottom image shows how this information will be displayed in the Options dialog.

If you have assigned properties (or options) to the Component, using Dynamic Component attributes you might want to change the defaults that are seen in the thumbnail for 3D Warehouse.

Advanced attributes and user interaction

SketchUp offers four attributes that can be easily applied to a component using the Dynamic Component interface. The diagram above shows where to place the four pieces of recommended information so that it displays when the Component Options dialog is opened. You can add additional attributes to the Component to affect the display of the Component, such as arrangement of sub-Components, product color, and standard options, to name just a few.

The following illustrations diagram how this works. Attributes are assigned to a Component within the context of the Component. The attribute is applied to either the whole Component, or to its sub parts. Attributes can set colors, product options, sizing and more.

All of these attributes exist inside the context of the component and travel with the component when it is imported into another model.

But to allow the user to interact with these settings, there has to be a series of attributes that are applied to the outside of the context, setting values that are used by the attributes inside the context. These outer attributes get displayed to the user in the component options dialog.


This component options dialog can only be accessed from outside the component. This means that you cannot see them when you are working inside a component model file. The component file must be imported into a working file so that the dialog showing the outer options for that component can be displayed.

Here is a dialog showing the options that can be set for a faucet. The values the user sets here get used within the Dynamic Component to perform calculations, set materials, and display one option versus another.

From a working file, you can set the options you want for the component’s thumbnail when it is uploaded to 3D Warehouse.

Dynamic component case study

Attributes can manipulate text and numbers from other attributes to dynamically create labels (for example build the full product name based upon chosen options).

Attributes can perform calculations (for example, placement of subcomponents) or control display of sub parts, hiding or showing them. (for example, add a steering wheel).

Attributes can control options (for example panel color, age group, panel style).

Sharing components and how users use them

Component saving from a master file

When you are modeling a Component in a working file with other Components: Right-click [context click] on the Component and select Save As. SketchUp will let you point to the folder in which you wish to store the component, and it will use the name of the Component as the default filename for the external file.

The Component is saved as a file, and its file origin point will be the origin point of the Component (not the origin of the current model).

Quick primer for 3D Warehouse

Sharing a SketchUp model for public use is accomplished via 3D Warehouse. This video Putting models into 3D Warehouse gives a general overview of what 3D Warehouse is about, and follows a specific simple example using a kitchen chair and table. For more information about 3D Warehouse, see the article: File management, uploading & branding. To share models as a collection, see Creating and Sharing Collections

Proper component nesting for shared components

Model organization is often different between a working model and the model for public consumption on 3D Warehouse.

When you are developing the model you might want to nest Components to develop a hierarchy that makes it easier to work on the model. Once the model is finished, reduce the nesting to a minimum.

For example, the image above shows a set of four workstations that have been put into an outer Component that contains all four sub-Components and the walls separating them. When you look at the nesting levels, here shown in decreasing order using colors: first level down is 1(red), next 2(yellow), 3(green), 4(cyan), 5(blue), you see that a user of the Component will be able to open the Component and quickly paint the walls. But to paint the rolling file cabinet, they will have to open three levels deep before painting. This is because each workstation is a Component (with its own hierarchy) within the whole workgroup.

SketchUp represents the selection of a Component with a blue bounding box surrounding all objects contained in the selection. These blue lines are not entities (edges) and are therefore not selectable, and they cannot be inferred to while modeling.

Each file cabinet and rolling file cabinet are more deeply nested within each work station. White objects are at the main context level of the main workgroup component (ie. the walls). The upright file cabinets are one level deep, inside a workstation sub-Component. The desk and rolling file cabinet are two levels deep inside a workstation sub-Component. And the castors are further nested yet, within the desk sub-Component and the rolling file cabinet sub-Component.

When editing a Component, SketchUp represents the context (the bounds) of a Component as a gray bounding box surrounding all objects within the Component or Group. These gray dotted lines are not entities (edges) and are not selectable. You cannot affect any entities outside of this gray bounding box. All geometry outside the context will show as faded to let you know it cannot be changed or erased. But you can infer to entities outside of the current context while modeling.

Perhaps a better organization for a work station would be to make it so that the file cabinet, the desk, and the rolling file cabinet could all be colored just one level deep into the component.

So, to prepare the whole workgroup Component for 3D warehouse, it might be better to first re-structure the workstation sub-Component as shown, then explode each workstation within the whole workgroup Component. The workgroup Component can now be easily worked with by a designer with minimal Component editing (remember, red here indicates you can paint the object immediately upon opening the outer Component).

Modifying the material of nested components

Fig. 2

In Fig. 2, the blue chair is an example of a chair that has all the geometry as one component . Painting the Component causes all the faces in the Component to accept that color. The right image shows a chair that contains multiple components. Now a designer can edit the chair Component and quickly paint the arms, cushions, shell and base separately, because each set of geometry is encapsulated within a nested Component. This is more efficient modeling for the end user of the Component.

Using the default material to enable efficient modifications

For items like furniture that vary in color (for example, chair cushions), you can build the component such that the designer does not have to open the chair Component to be able to change the color of the cushions. To enable this quick application of material, a Component of this product type should be organized such that all the items for which you want quick material changing (e.g., cushions) are painted with the default material. All other items should be painted with a material or color. Now when the Component itself is painted by the designer, only the cushions will inherit the color. To change the color of any of the other sub-parts (the base or the shell or the arm pads), the designer will need to edit the chair Component and repaint those items within the component.

When a material texture is applied in this way, any smooth surfaces within the Component will not allow the texture to tile seamlessly. To control orientation of textures, you will need to apply the texture, then right click [context click] on the surface and select Texture > Position to adjust the pattern to match your geometry.

Anything within a Component that uses the default color will inherit the paint applied to the outside of the Component. This means that a Component within a Component within a Component will inherit the paint as well, regardless of nesting level. See this video showing component nesting for an illustration of this concept.

Component swapping

Components can be reloaded with an updated version, or swapped one for another. Many designers will want to swap content from the 3D Warehouse during their design process. It is important to anticipate this activity when you model content for 3D Warehouse.

Components are swapped at their respective origin points, and based upon the scaling and rotation factors of the original Component being replaced. The scale and rotation factors get applied to the new Component coming in.

You can swap Components that are in the current model by selecting all the instances, and then replacing those instances with a different Component.

This can be very helpful when you have a high polygon version of a product and a low polygon version of the same product. This allows the designer to see the location of your product, but keeps the polygon count low so as not to bog down the modeling process during design. When they want to share an image with more rich context, they simply Replace the low poly version with the high poly version.

To do this, one would select the items they want to change, or from the Component Browser, right-click [context click] and select Select Instances to find all similar components in the model. Then find the Component to swap from the Component browser and right-click [context click] and select Replace Selected to change all the simplified Components to complex Components.

In the previous example we selected the items to be replaced. You can also Reload one component in the model with another from outside the file. This replaces one Component for another. Only one Component exists within the file, not two.

Again, the most important rule to ensure good behavior of Components is to choose an appropriate origin point for them.

This swapping ability makes SketchUp ideal for designers who want to present design options to a client. It makes the presentation all the more compelling if the designer has access to actual manufacturer content from 3D Warehouse. This enables a designer to start making product specification decisions earlier in the design process.

Product models are shared as components and typically each product model is a separate file (unless many products are combined together, e.g. as a vignette). Many manufacturers have multiple products to put into 3D Warehouse. Anytime you have multiple files, developing a methodology of systematic component and file naming is important. Also you should be consistent across your collections. For more information about file naming see the following article: File management, uploading & branding.

Was this article helpful?