A Snap is a custom point you can add to a group or component. Once added, a Snap allows you to both position and orient objects at the same time. Snaps can help you create models with components that are easy to place, layout, or assemble.
The Anatomy of a Snap
Snaps appear as a disk. The disk contains visual cues that help explain how the snap will work.
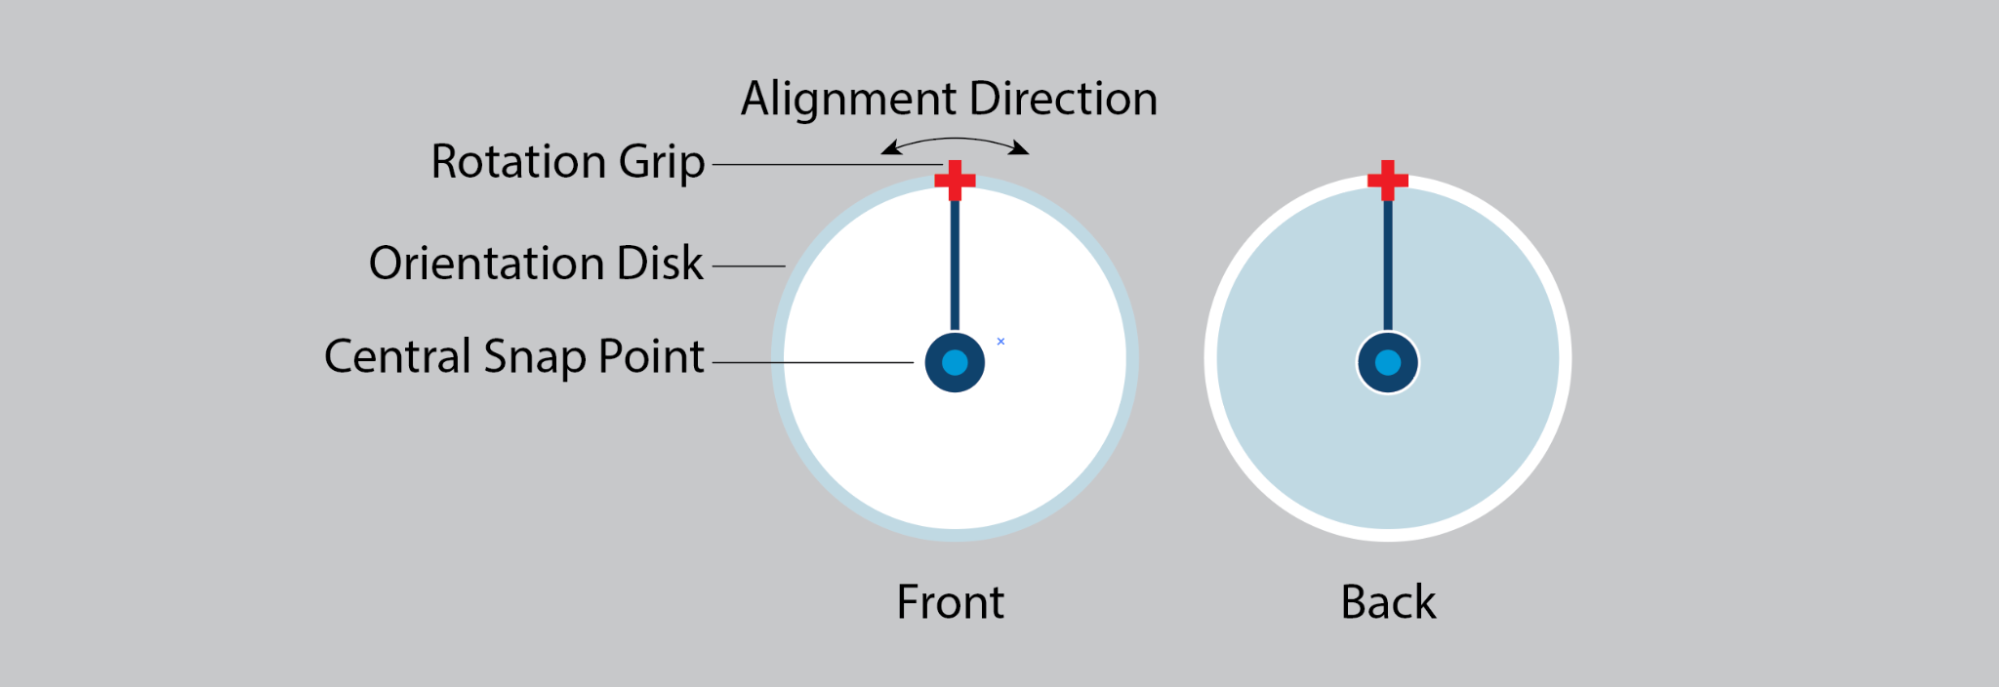
In most templates, the front side is white while the back side is blue. The front side is the active side you will attach to another snap or a face on a component.
The dot in the middle of the Snap is the Central Snap Point. This is where your Snap connects to other entities.
The Alignment Direction defines the orientation of a Snap. Alignment Direction determines:
- How a Snap aligns to a face.
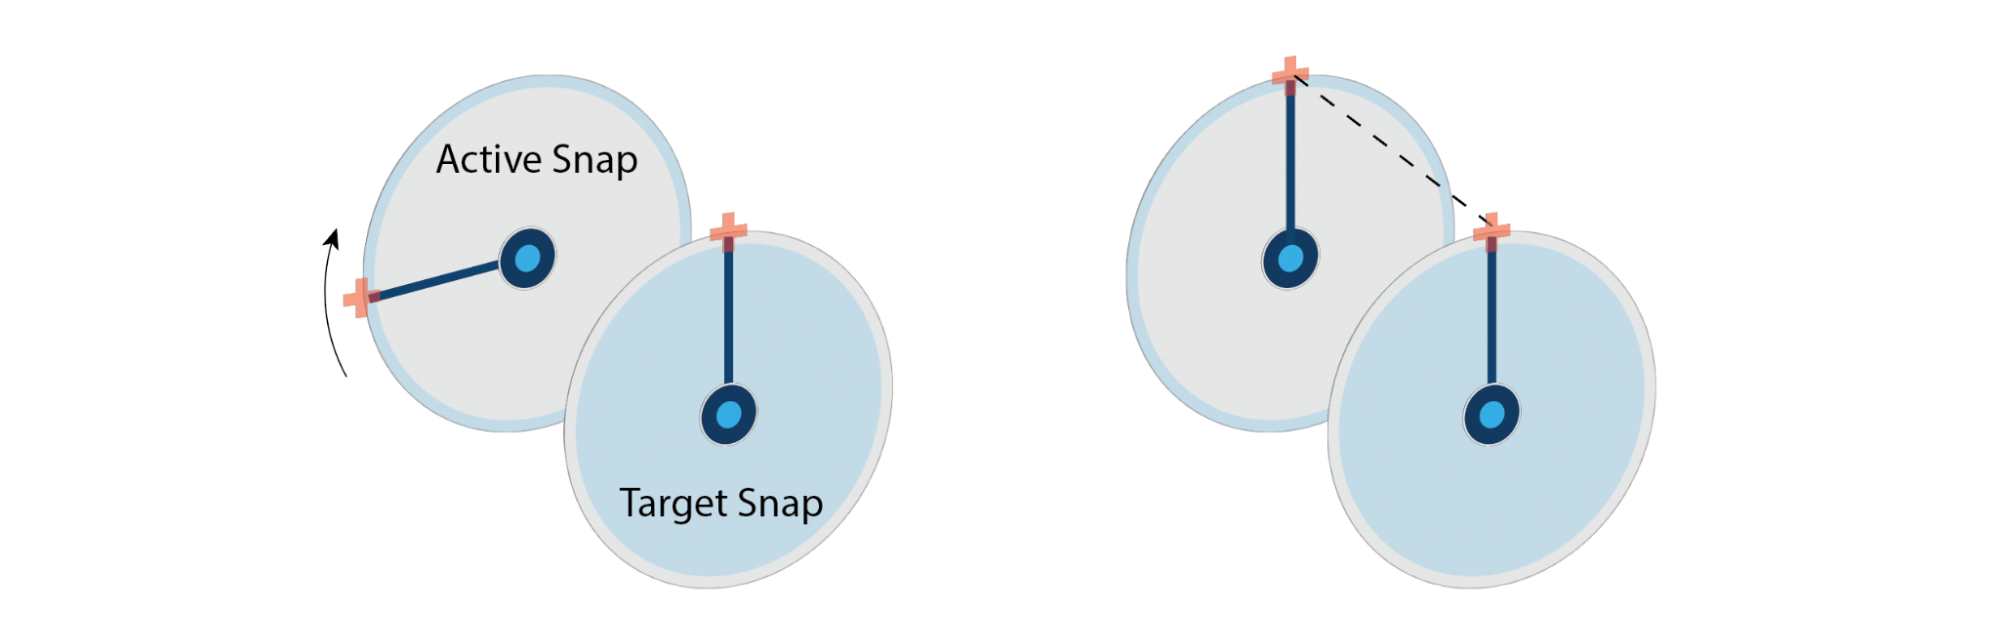
What happens when you try to attach two Snaps to each other. For example, an object with an active Snap will rotate and align to match a target Snap as you move to attach them.
- The protractor orientation when using the Rotate (
 ) tool.
Creating a Snap
Snaps are created within a group or component. To create a Snap:
- Right click your selected component and choose Edit Component.
Right click your component and select Make/Edit Snaps.

A disk representing the snap will appear attached to your cursor.
- Just like any other tool, you can then hover over edges, faces, arc/circle centers, midpoints, or intersections to find the right place to attach your snap. When you determine the location for your snap click once to place the snap.
You can then move your cursor to set the snap's orientation plane..
Tip: When placing your snap you can use the arrow keys to lock orientation to the red, blue, or green axis.- Click again to lock in the placement and orientation of your snap.
You choose the Alignment Direction after creating your snap. It's set to match the blue axis of your model by default when you create the snap. After creating a snap you can enter Modify mode to change it.
Moving and Rotating with Snaps
Attaching to Another Snap
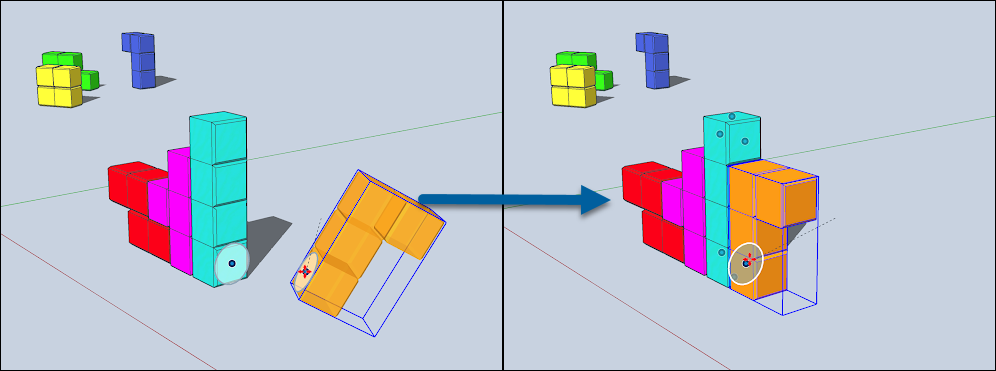
Using the Move (![]() ) tool, you can pick up and move an object using its snap. When you do so, you can attach the snap to another snap, a face, or an edge.
) tool, you can pick up and move an object using its snap. When you do so, you can attach the snap to another snap, a face, or an edge.
Snaps attach to each other front side to front side. As you approach another Snap, visual cues help show what will happen. When the Snaps are close enough they will snap into place with an orientation based on the Alignment Direction of the target Snap.
Having trouble finding a target Snap? Press Alt on Windows or Command on iOS to activate your very own tractor beam to help identify the nearest eligible Snap and preview the orientation you'll see after attaching your Snaps. This also works when you've activated the Move tool's Stamp mode.
Attaching to a Face or Edge
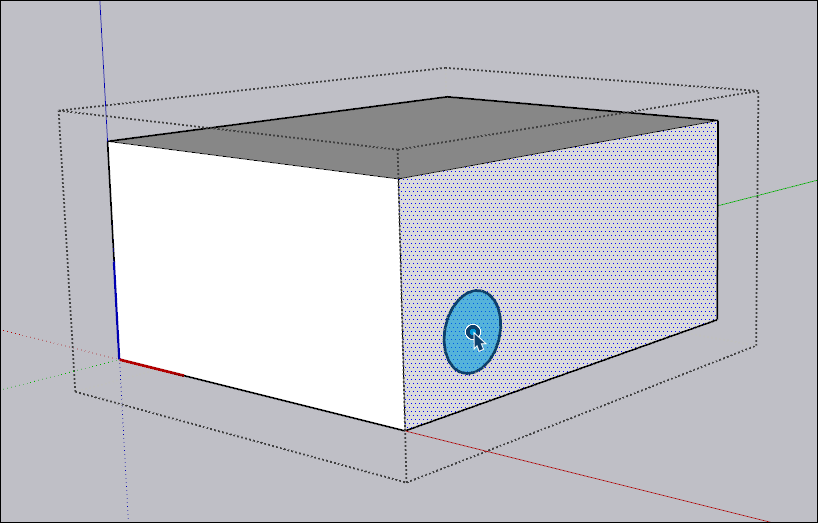
Snaps on an object will align to a face with the front side of the Snap attaching to that face. The Snap's Alignment Direction orients to the blue axis by default. When attaching a Snap to an edge, the Snap orients to the last face used for an inference point.
Rotating with a Snap
The center point of a Snap defines how the Snap acts when you use the Rotate (![]() ) tool. To rotate a snap:
) tool. To rotate a snap:
- Activate the Rotate () tool.
Hover over the Snap. The protractor will align to the Alignment Direction of the Snap.
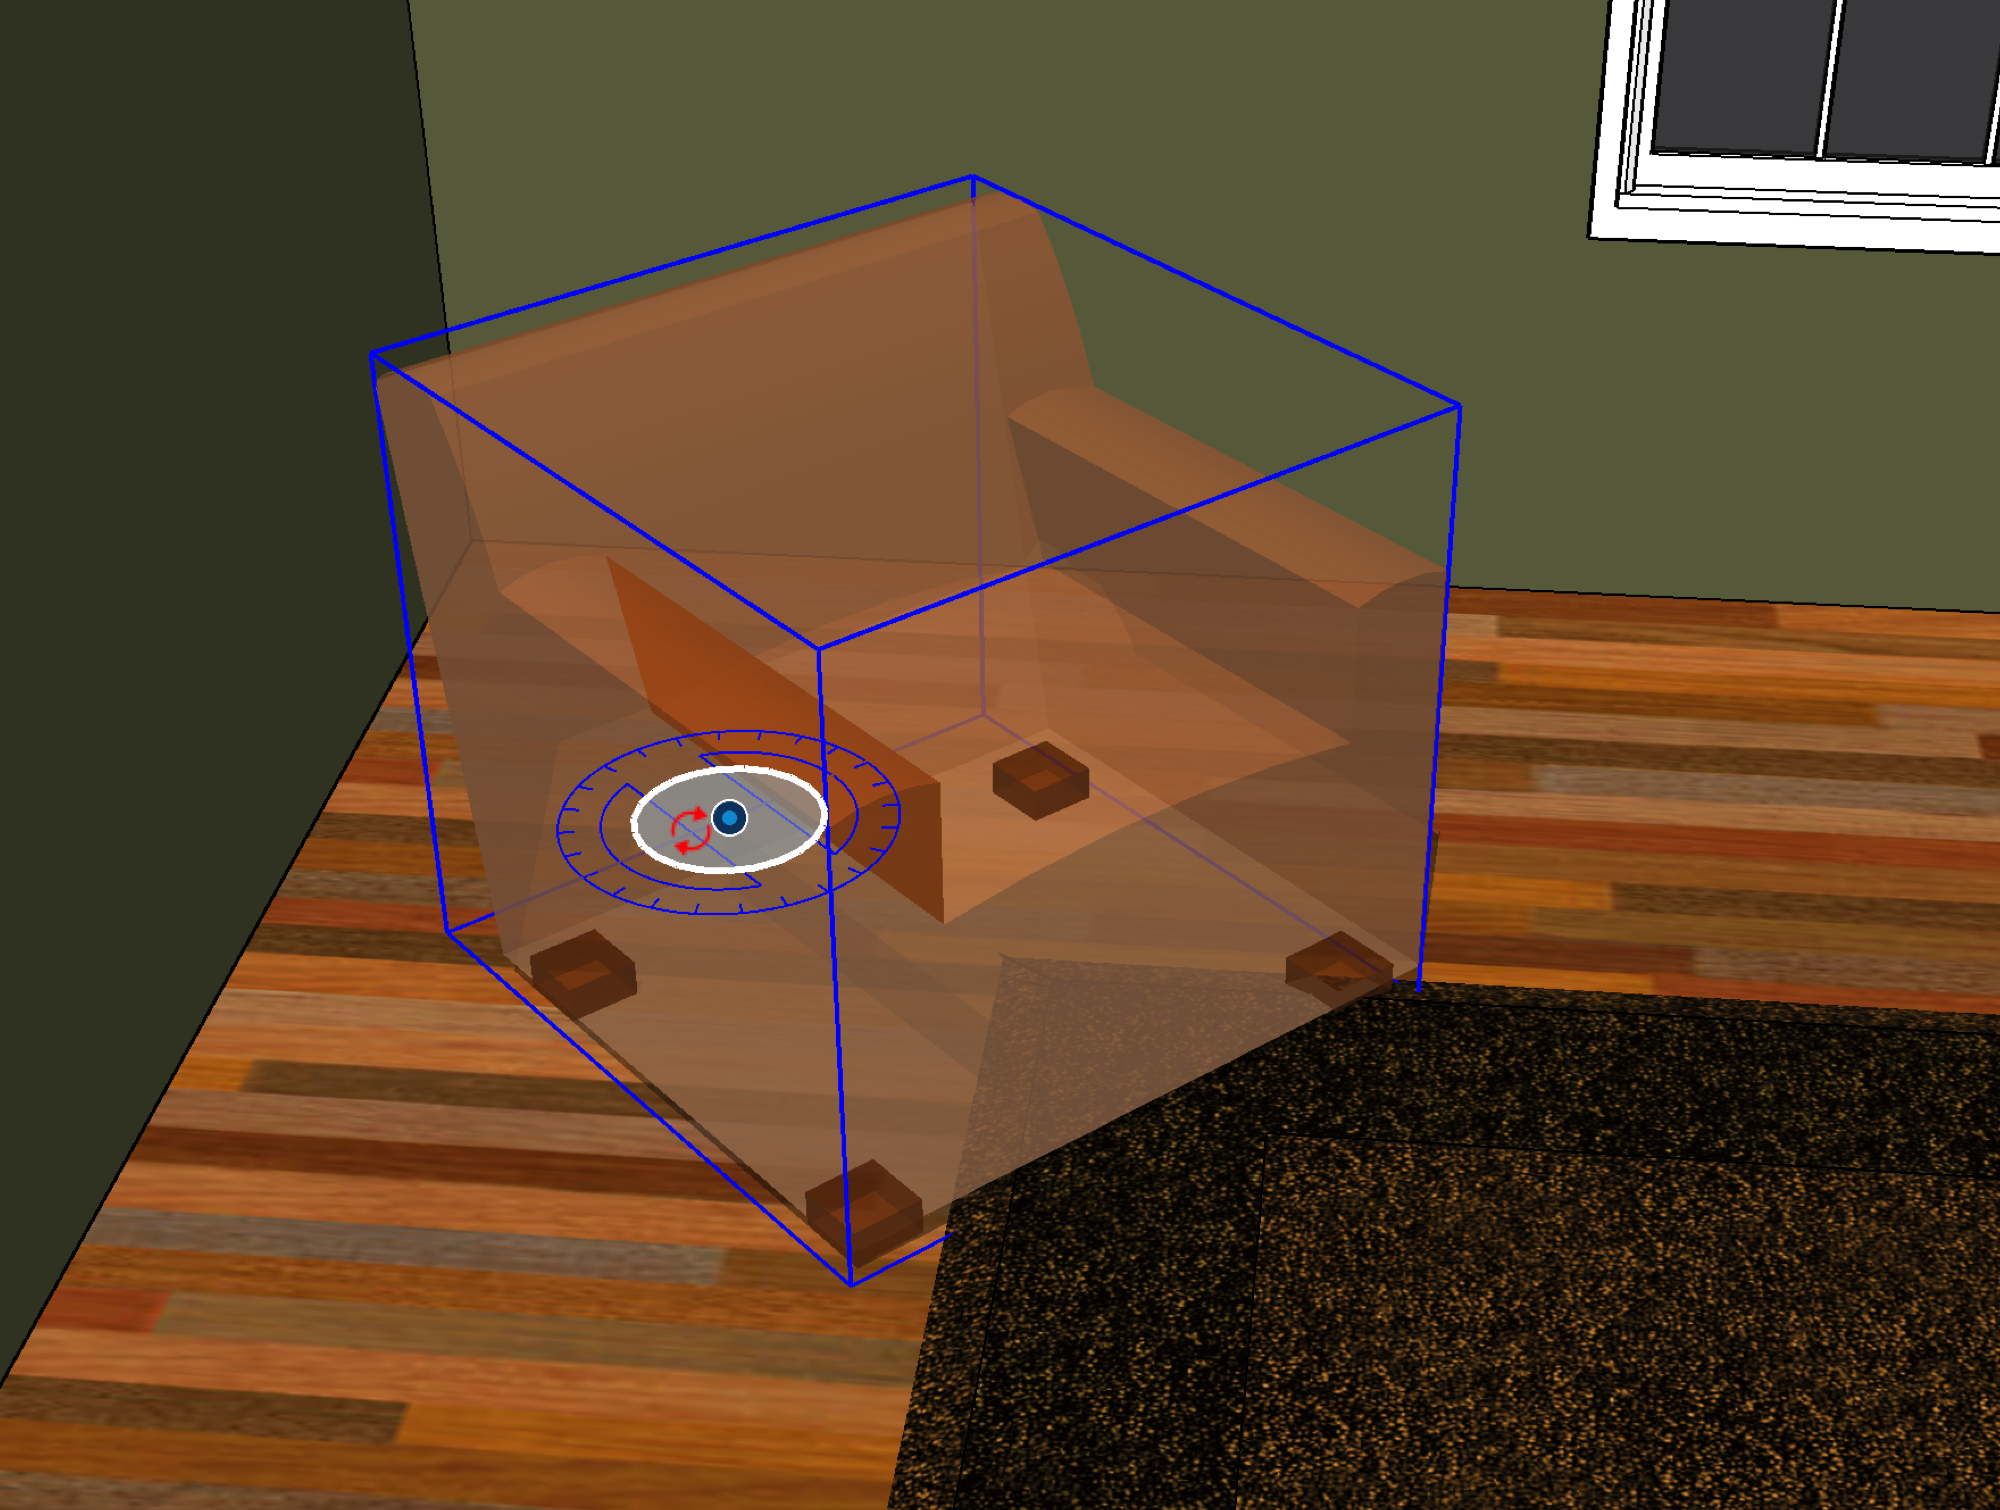
- Using the protractor, choose the rotation
- Click once to start the rotation.
Click again to finish.
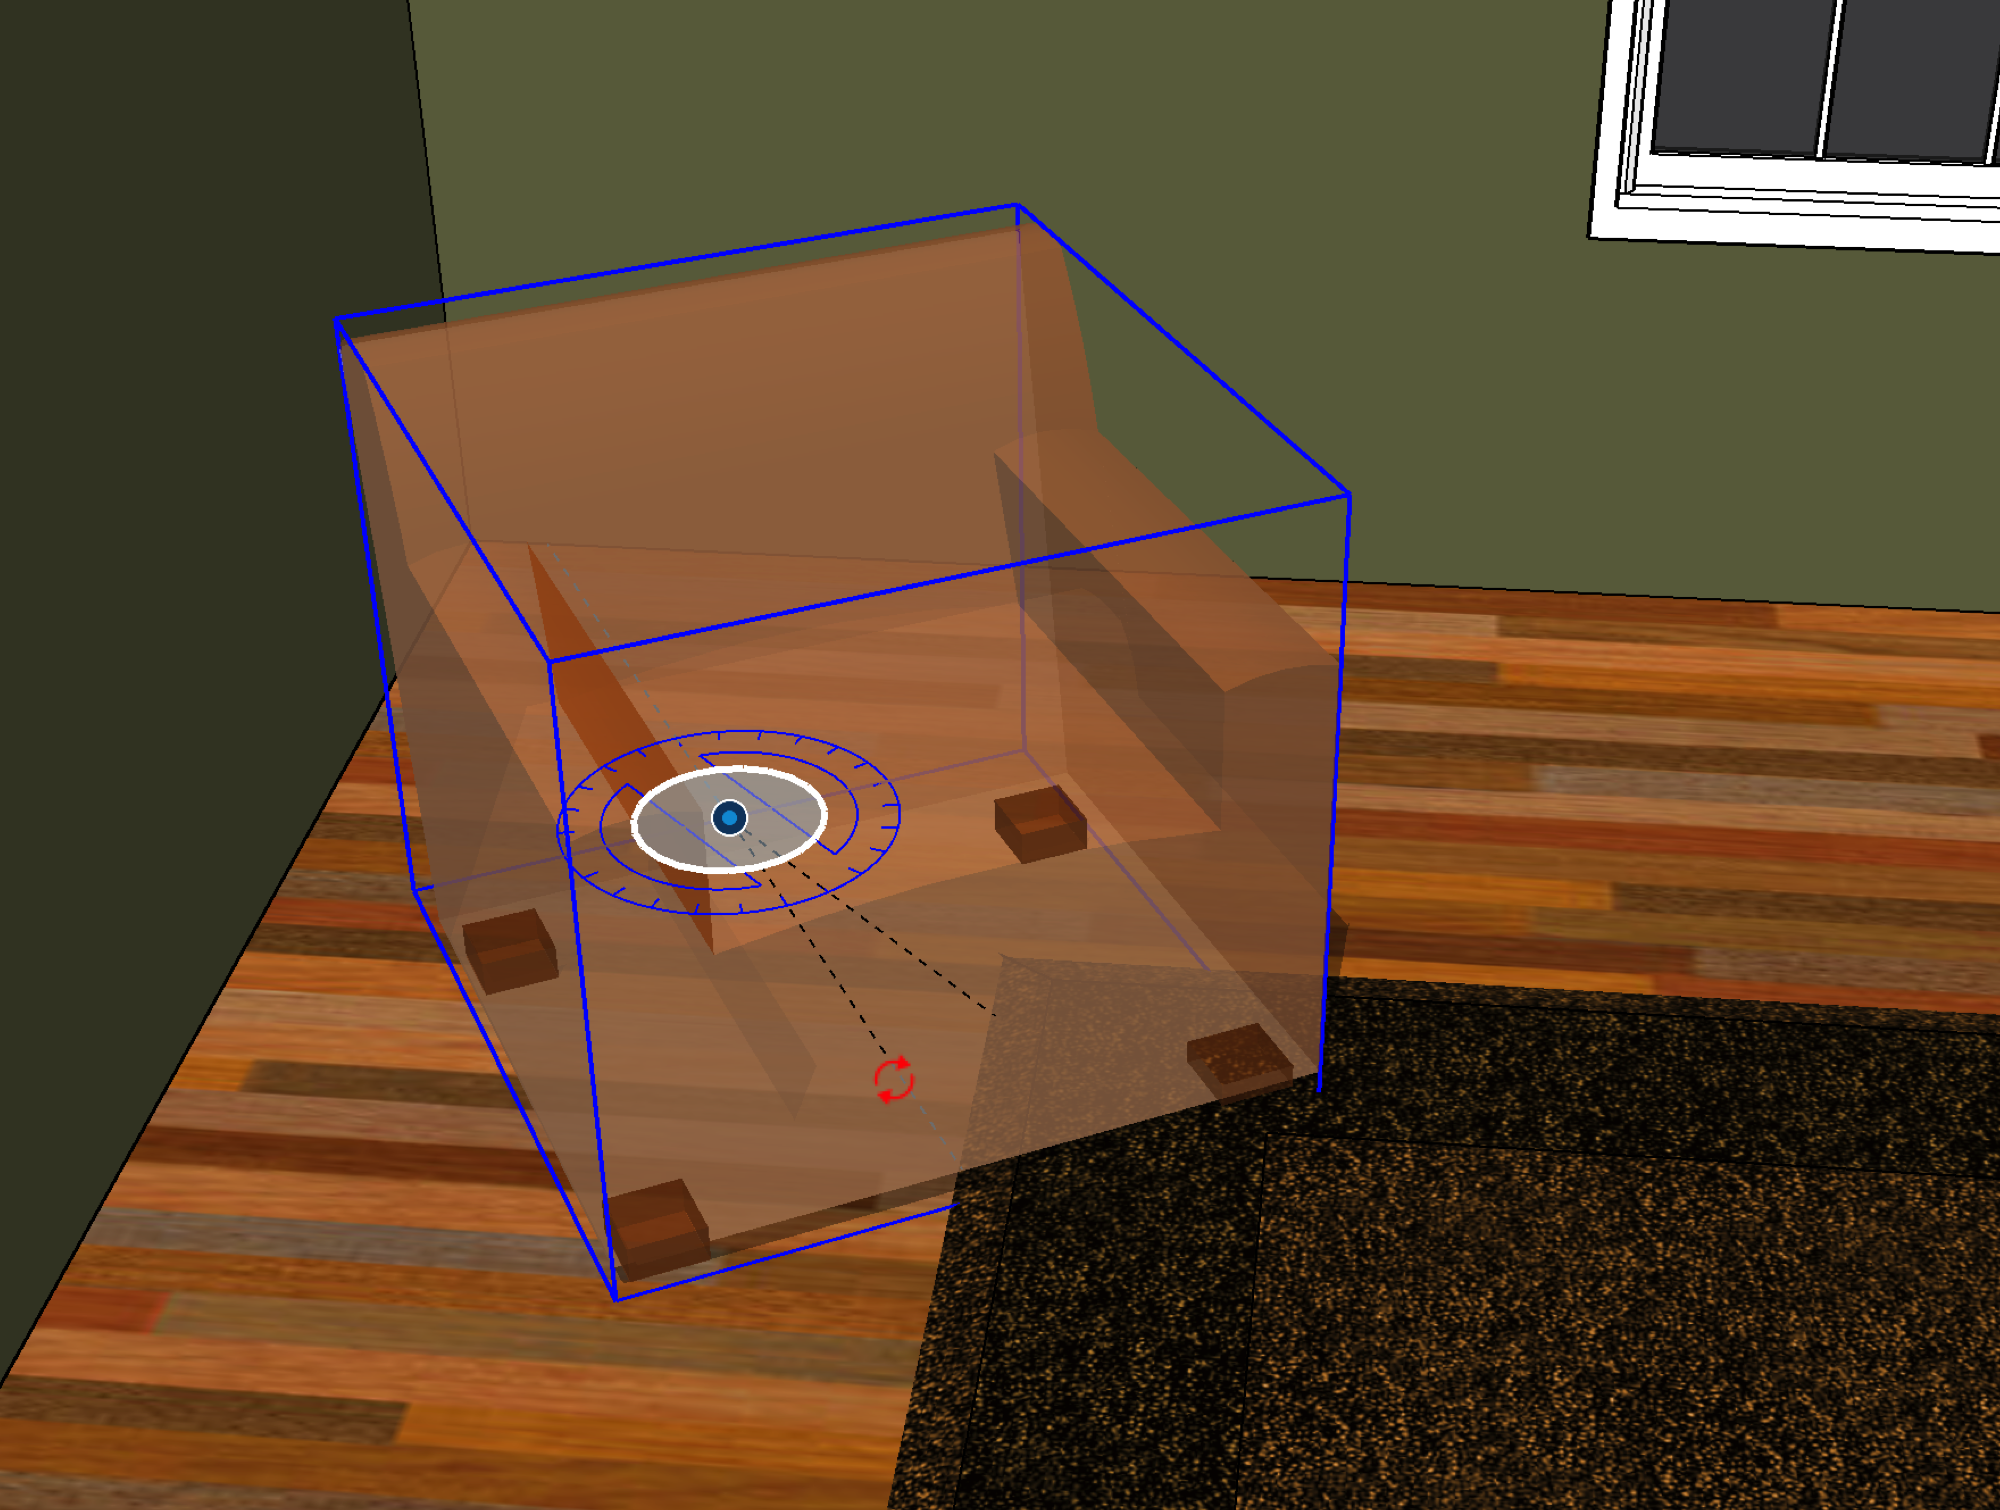
Just like other Rotate operations, you can hover over other geometry, protractor ticks, or type an angle to specify the rotation. You can even point your cursor at other Snaps!
Modifying a Snap
You can modify a Snap after placing it through either Make/Edit Snaps or by activating the Select (![]() ) tool.
) tool.
Make/Edit Snaps
To modify a Snap from Make/Edit Snaps in a component's context menu:
- Select Make/Edit Snaps to view all Snaps in a group or component.
- Press Ctrl (Windows) or Option (MacOS) switches to Modify Snaps or Erase Snaps mode.
- After selecting Modify Snaps, hover over the center point and click to move a Snap. Hover over the Rotation Grip and click to change the Alignment direction.
- Press Alt (Windows) or Command (MacOS) while hovering to reverse the orientation of a snap.
- After selecting Erase Snaps hover over the center point and click to delete the Snap.
Select Tool
Activating the Select or Lasso tools within a group or component will make Snaps visible. You can then select one or more Snaps and perform the following actions:
- Activate the Move tool to reposition a Snap while preserving its orientation.
- Use the Move tool to copy Snaps while preserving their orientation.
- Rotate snaps or copies of snaps.
- Create arrays of snaps.
- Use the Flip tool to reverse a snap's orientation.
- Use the Scale tool to scale the placement of snaps.
- Right click on a snap to access Edit Snap or Erase Snap.
- Use the Eraser tool to remove selected snaps.