A modellek webes SketchUpban való létrehozása és szerkesztése nagyban hasonlít a modellek asztali verziójú SketchUpban történő létrehozásához. Van azonban néhány dolog, amit a webes SketchUp kissé másképp csinál, mint az asztali verzió.
Új modell létrehozása
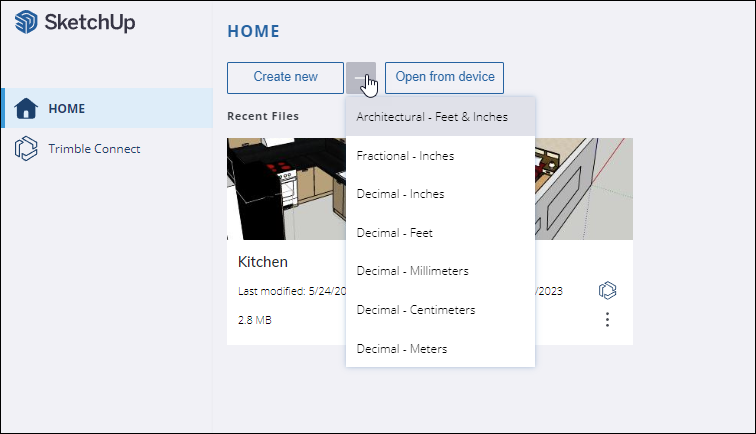
A webes SketchUp első megnyitásakor a Home oldal (Kezdőoldal) jelenik meg. Új modell létrehozásához kattintson az Create New (Új létrehozása) lehetőségre, vagy a legördülő menü segítségével válassza ki a kívánt mértékegységet.
A mértékegység módosítása
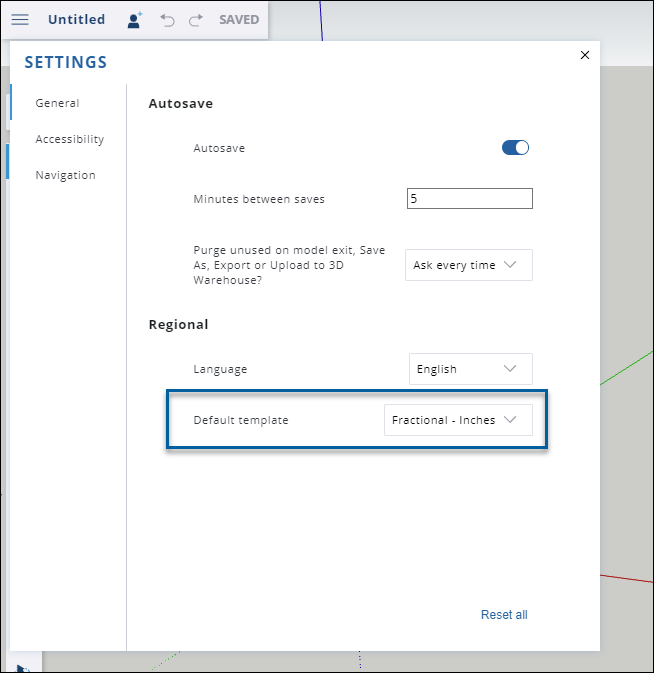
A modellben használt mértékegység az App Settings (Alkalmazásbeállítások) oldalon bármikor módosítható. Válassza ki a főmenü App Settings (Alkalmazásbeállítások) elemét, és General (Általános) lapon keresse meg a Default Template (Alapértelmezett sablon) részt.
Fájlok és képek importálása
A webes SketchUp segítségével közvetlenül importálhat fájlokat a modellbe. A következő formátumokban mentett fájlok importálhatók:
- 3DS
- DAE
- DEM
- DWG
- DXF
- KMZ
- STL
- JPG
- PNG
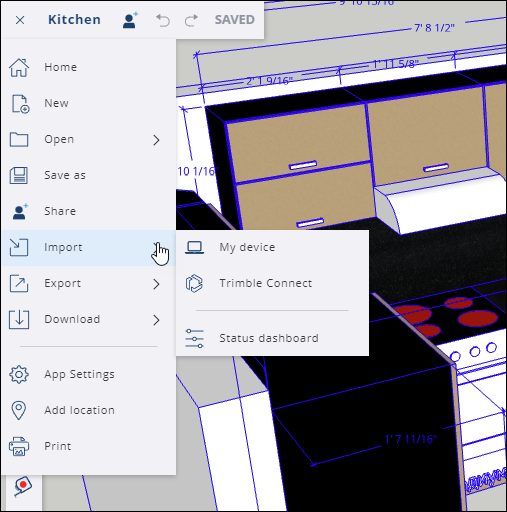
Fájl importálása:
- Válassza ki a főmenü Import (Importálás) elemét.
Válassza ki, hol található a fájl; ami a My Device (Saját eszköz) vagy a Trimble Connect lehet.
- Ha saját eszközről importál, húzza a fájlt a megjelenő ablakba, vagy a megadott hivatkozást használva tallózással keresse meg a képet.
- Ha a Trimble Connectről importál, keresse meg és válassza ki a mentett projektből importálni kívánt fájlt.
A modellbe importált képfájlokból kép vagy anyag lesz. Az importált CAD-fájlokból összetevő lesz. Az importált fájlok modellekben való használatával kapcsolatos további tudnivalókért tekintse meg az importált fájltípushoz tartozó részt a Using SketchUp Data with Other Modeling Programs or Tools (SketchUp-adatok használata más modellező programokkal vagy eszközökkel) alatt.
A webes SketchUp paneljei
A webes SketchUp paneljei a felhasználói felület jobb oldalán jelennek meg. Mindegyik panel egy adott funkciókészlet segítségével emeli modelljét a következő szintre.
| Panel | Ikon | Cikk | Leírás |
|---|---|---|---|
| Entity Info (Entitás adatai) | Entitás vizsgálata | Az Entity Info (Entitás adatai) a kijelölt entitás adatait jeleníti meg, beleértve a felhasznált anyagokat, az összetevők számát és a hozzárendelt címkéket. | |
| Outliner | Hierarchiák használata az Outlinerben | Az Outliner panelen a modell objektumait hierarchikus faként tekintheti meg. | |
| Instructor (Oktató) | N.A. | Az Instructor (Oktató) panel remek lehetőséget kínál a kezdőknek, hogy modellezés közben hasznos tanácsokat lássanak az általuk éppen használt eszközök alapján. | |
| 3D Warehouse | 3D Warehouse | A 3D Warehouse (3D-áruház) kereshető, előre elkészített 3D-modelleket tartalmazó webhely, amely zökkenőmentesen működik együtt a SketchUppal. | |
| Components (Összetevők) | Összetevőkkel végzett munka a SketchUpban | Az összetevők a modell építőkövei. Ez a panel felsorolja az egyes összetevőket, és a kezelésükre, illetve manipulálásukra szolgáló lehetőségeket kínál fel. | |
| Materials (Anyagok) | Színek és textúrák hozzáadása anyagokkal | Az anyagok segítenek részletgazdagabbá és valósághűbbé tenni a modelleket. A panel segítségével anyagok adhatók hozzá a modellhez, és kezelhetők a modellhez hozzáadott anyagok. | |
| Styles (Stílusok) | Stílus kiválasztása | A stílusok az egész modellre egyszerre alkalmazható csoportosított beállítások. A Styles (Stílusok) panelen stílusokat adhat hozzá a modellhez, illetve kezelheti a modellhez már hozzáadott stílusokat. | |
| Tags (Címkék) | Láthatóság szabályozása címkékkel | A SketchUpban használt címkék a rétegek továbbfejlesztett verziójaként működnek, és segítenek az objektumok rendszerezésében és láthatóságuk szabályozásában. Címkéket a Tags (Címkék) panel segítségével kezelhet vagy hozhat létre. | |
| Shadows (Árnyékok) | Valóságnak megfelelő árnyékok készítése | Állítsa be az árnyékok kívánt megjelenítését, vagy szimulálja, hogy a Nap hogyan vetne árnyékot egy helymeghatározási adatokkal ellátott modellben. | |
| Scenes (Jelenetek) | Jelenetek létrehozása | A jelenetek különböző beállított modellnézeteket ábrázolnak. A jelenetek a Sences (Jelenetek) panelen kezelhetők és hozhatók létre. | |
| Soften/Smooth (Élek lágyítása/simítása) | Geometria lágyítása, simítása és elrejtése | Módosítsa az élek láthatóságát, hogy a modell a kevesebb geometria használatának köszönhetően valósághűbben jelenjen meg. | |
| Display (Megjelenítés) | N.A. | A Display (Megjelenítés) panel segítségével kezelheti a láthatóságot, beleértve a rejtett geometriát, az árnyékokat és a ködöt. | |
| Model Info (Modell adatai) | N.A. | A Model Info (Modell adatai) panelen találhatja meg és állíthatja be a modell néhány alapvető elemét, beleértve a mértékegységeket és a betűtípusokat. | |
| Solid Inspector (Téridomvizsgáló) | A webes SketchUp téridomvizsgálója | A Solid Inspector (Téridomvizsgáló) segítségével ellenőrizheti a csoportok és összetevők geometriai hibáit, sőt bizonyos problémákat automatikusan ki is javíthat. |