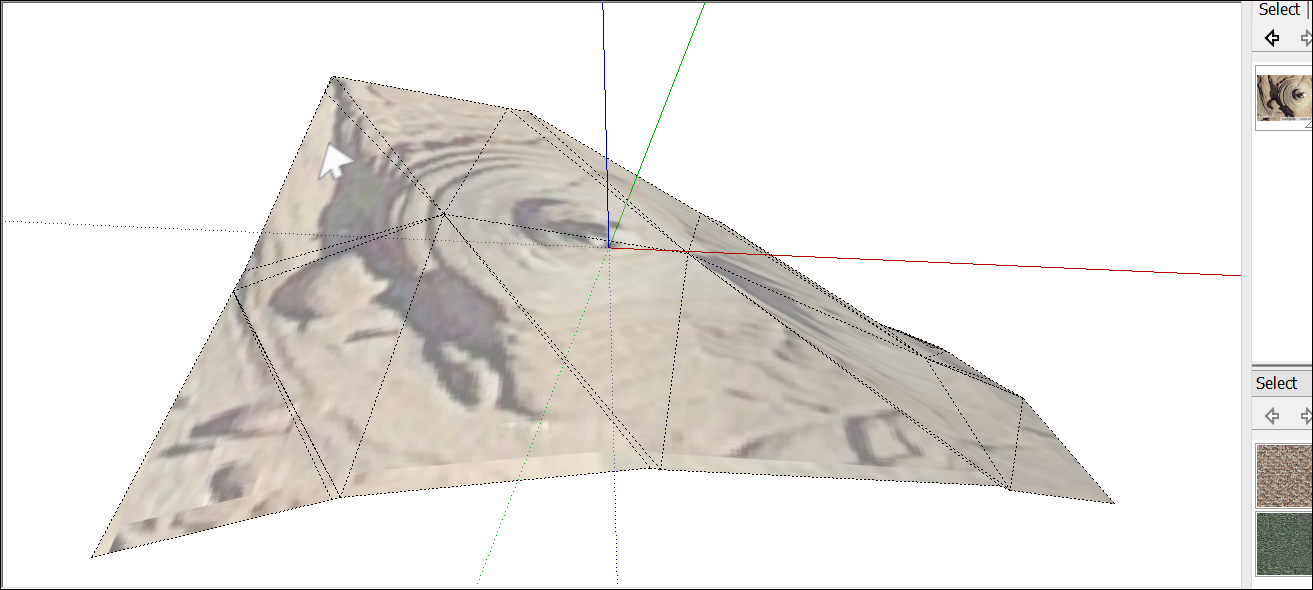
Sticking a Photo or Texture to a Face
Have you ever stuck a decal on a window or a wall? In SketchUp, sticking an image on a face is even easier than those decals, because digital images don't wrinkle or trap air bubbles.
Technically speaking, SketchUp enables you to import images that are already on your hard drive. When you import images from your hard drive (select File > Import to see the Open dialog box, shown in the figure), you can import the image as an image, a texture, or a matched photo.
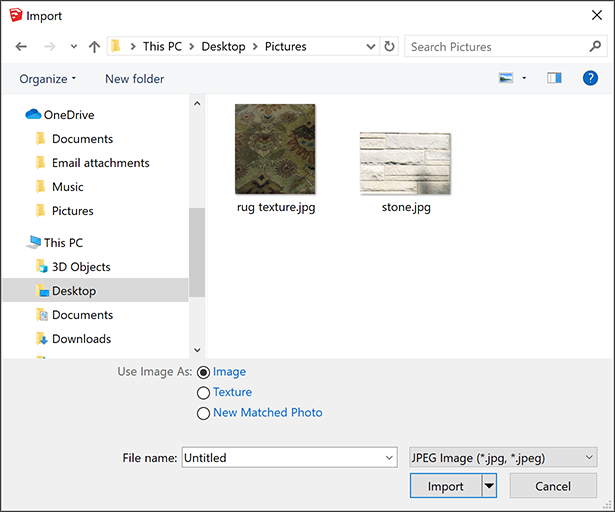
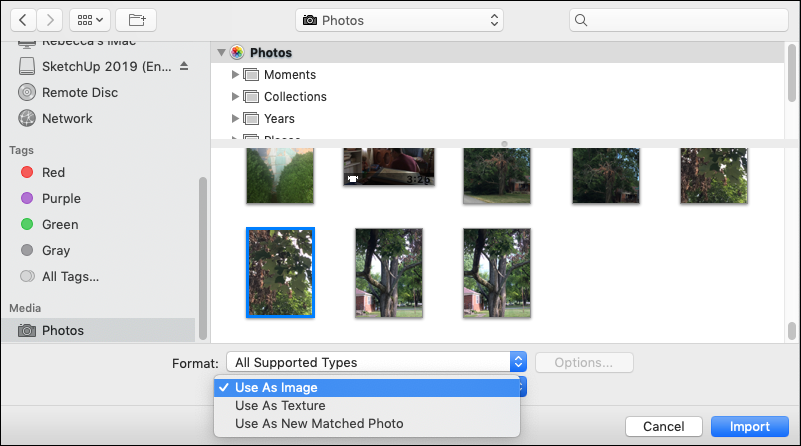
Here's how those options help you do different things with the image in your model:
- Import the image as a basic image, and SketchUp enables you to place the image anywhere in your model. You can then move, rotate, scale, or stretch the image.
- Import the image as a texture, and you can apply the image to an existing face. However, you also gain access to all the materials and Position Texture tools. These tools are introduced in Adding Colors and Textures with Materials, but that article focuses on tiled images. In this article, find out how to do special techniques with a single image, such as wrapping an image around corners, wrapping an image around a hidden face on a cylinder, or projecting an image onto a face. When you project textures, you can apply them to curved surfaces.
- Import the image as a matched photo, and you activate SketchUp's Match Photo tool, which enables you to match a photo of an existing building to a model of that building or draw a building based on a photo. Match Photo enables you to apply images to buildings two faces at time, using the corner of a building or room to apply a 2D image onto a 3D model. Unlike images or textures, which work best with rectangular images and faces, Match Photo works well with non-rectangular building shapes, such as angled roof lines. Learn all about Match Photo in Matching a Photo to a Model (or a Model to a Photo).
Table of Contents
Understanding image basics
Digital images come in myriad file types and sizes. SketchUp supports the image file formats outlined in the following table. Some formats may be more appropriate than others for certain types of images and applications.
| Microsoft Windows and macOS | Microsoft Windows | macOS |
|---|---|---|
| JPEG, PNG, EPS, TIFF | TGA, BMP | PDF, PICT, PSD, SGI |
An image's size is referred to as its resolution. An image's resolution reflects how many pixels the image contains. The resolution of an image depends on the image source. Typically, images captured with a digital camera, especially a dSLR camera, have very high resolutions, and images downloaded from the web have low resolutions. You can check an image's resolution in an image editing program, such as Photoshop.
Digital images and SketchUp models are so diverse, it's difficult to give specific recommendations here. However, here's an example to illustrate how you might find the right resolution and file type for an image. Say your image was captured with a digital camera in a JPEG or JPEG+RAW format. Try saving a copy of your digital image at a resolution of 72 ppi (pixels per inch) and in the JPEG format. If you model dimensions aren't very large, you may want to reduce the image dimensions as well (the width and height in pixels). Then, import the image into your SketchUp model and see how the image looks. If you save a copy of the original image, you can always go back and try different settings in your image editor until you find the resolution and dimensions that work well with your SketchUp model.
Importing a 2D image
To import an image from your hard drive into a SketchUp model, follow these steps:
- With your model open, select File > Import.
- In the Import dialog box that appears, navigate to the image file on your hard drive and select it. If you don't see the image you're looking for, make sure All Supported Image Types is selected from the Files of Type drop-down list.
- Select an option for importing your image: Use As Image, Use As Texture, or Use As New Matched Photo.
- Click the Import button and your image appears in your model.
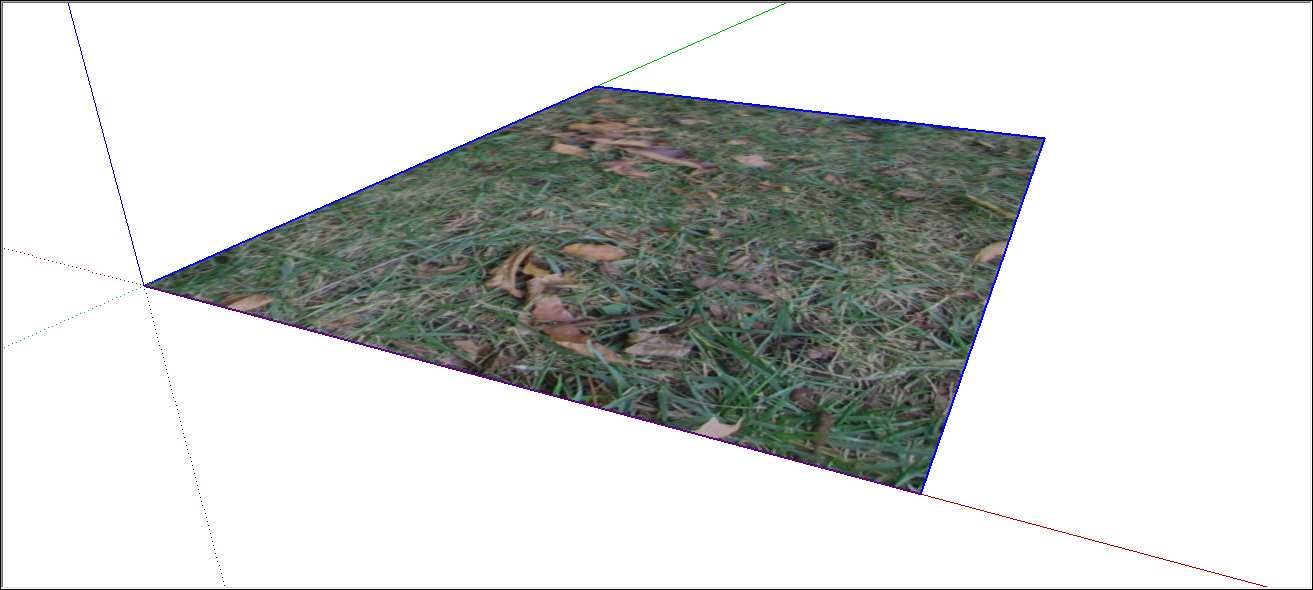
If you selected the Use As Image option, your image appears in your model as an image entity with a bitmap image applied to a face. Here are the basics of working with image entities in your model:
- To place the image entity, click anywhere in your model to place one corner. As you move the cursor, the image entity grows or shrinks in size. Click again to place the opposite corner. SketchUp maintains the image proportions by default; to deconstrain the proportions as you place the file, hold down the Shift key.
- To move or rotate the image, use the Move or Rotate tool.
- To resize the image after you've placed it, use the Scale tool.
The following figure shows an image placed on a model's ground plane.
Applying a texture to the side of a building
When you apply a photo as a texture instead of an image, you can't place the image anywhere in your model. You need to have a face already drawn to which you can apply the image. However, you do have a little more control over the texture's positioning on the face.
The following steps walk you through the process of applying a photo texture to flat face and offer a few tips along the way:
- Select File > Import and select the Use As Texture option.
- Click in the lower-left corner of the face that you want to photo-texture.
- Click in the upper-right corner of the face to finish applying the image.
- (Optional) If you need to stretch the image or adjust its position, context-click the texture and select Texture > Position from the menu that appears. Then context-click the texture again and clear Fixed Pins, so that the Position Texture tool is in Free Pin mode. You can then drag the white pins to each corner of the face to stretch the image or otherwise apply it to the face more precisely. Click outside the texture when you're done.
Wrapping textures around boxes and cylinders
After you import an image as a texture, you can wrap it around an existing box or cylinder, sort of like wrapping paper.
Follow these steps to import an image and wrap it around a box:
- Select File > Import.
- In the Import dialog box, navigate to your image, select it, select Use As Texture, and click Import.
- Click on the lower-left corner of the face on which you want to start wrapping your image.
Then click the upper-right portion of the face. This places your image, as shown in the following figure.
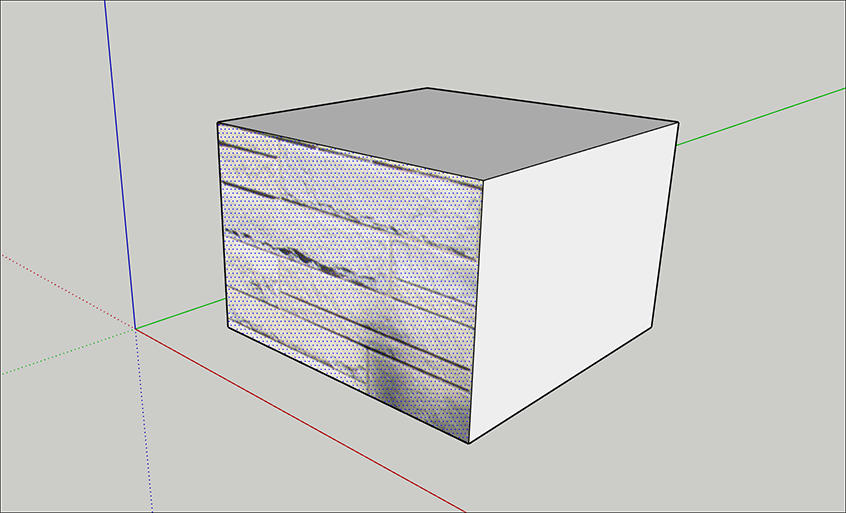 Tip: If you need to stretch or reposition your image after you place it, see the section on repositioning textures in the article Adding Colors and Textures with Materials.
- Select the Paint Bucket tool (
 ).
). - Hold down the Alt key (Microsoft Windows) or the Command key (macOS) to switch to the Eyedropper cursor.
- Click the texture that you applied to the face. The Eyedropper samples your photo.
Release the modifier key to return to the Paint Bucket tool, and click an adjacent face or faces in your model to wrap the image around it, as shown in the following figure.

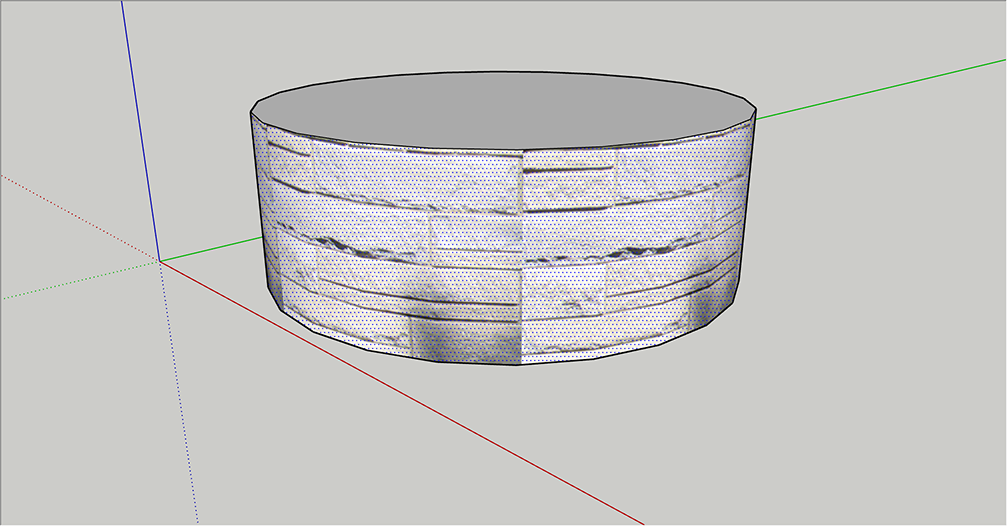
When you wrap a material around a cylinder, the steps are the same. However, because a cylinder is made of several faces that are hidden and smoothed, your image may look clipped at first. The following figure shows how the image looks after placing the texture by clicking the bottom edge of the cylinder and then the top edge.
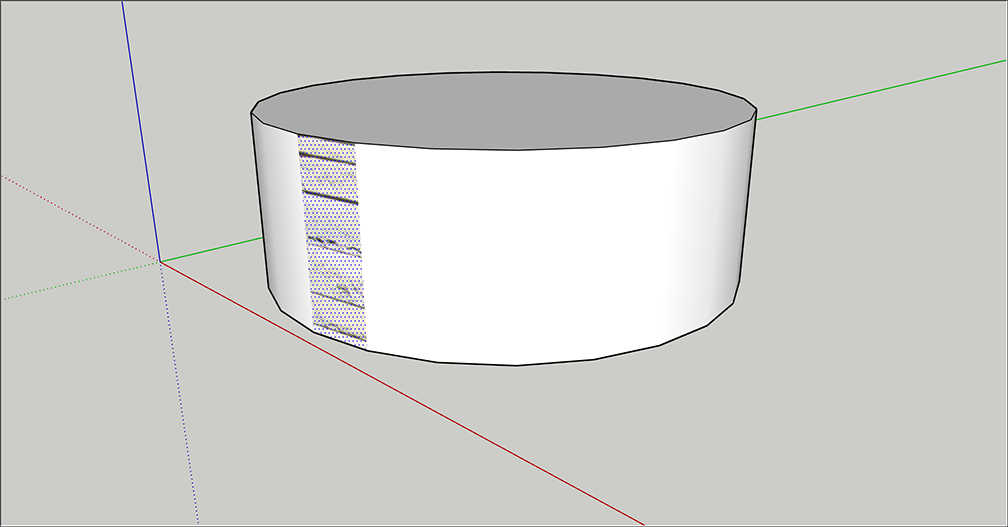
However, after you sample the texture with the Eyedropper cursor and click the cylinder with the Paint Bucket cursor, the whole image wraps around the cylinder, as shown in the next figure.
Projecting textures onto a curved surface
In SketchUp, projected textures are images applied to faces as though a slide projector is projecting the image onto your model. Projected textures enable you to apply a texture over a curved surface. This feature is particularly useful for applying a topographic image over a site model, because topography is rarely flat like the side of a building.
To project a texture over a curved surface, follow these steps:
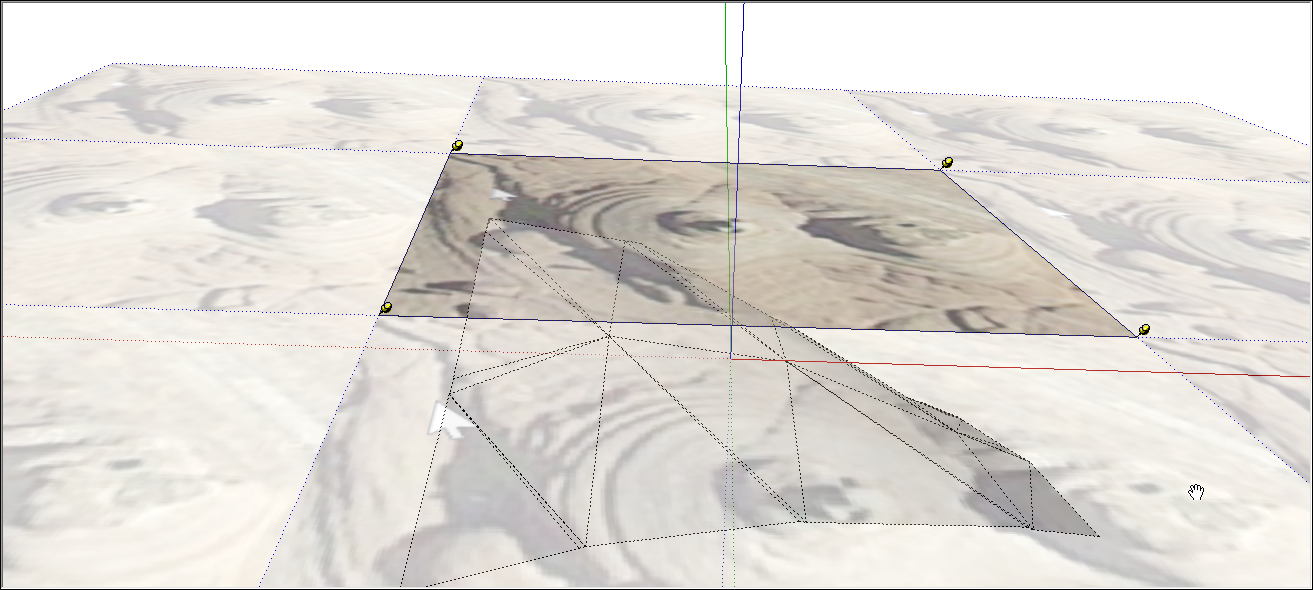
Draw a single, flat face that matches the dimensions of your curved surface. The following figure shows a top view of a flat surface over a blank terrain.
Tip: Select the flat face and turn on X-Ray mode (select View > Style > X-Ray) so you can see the curved surface under the flat surface.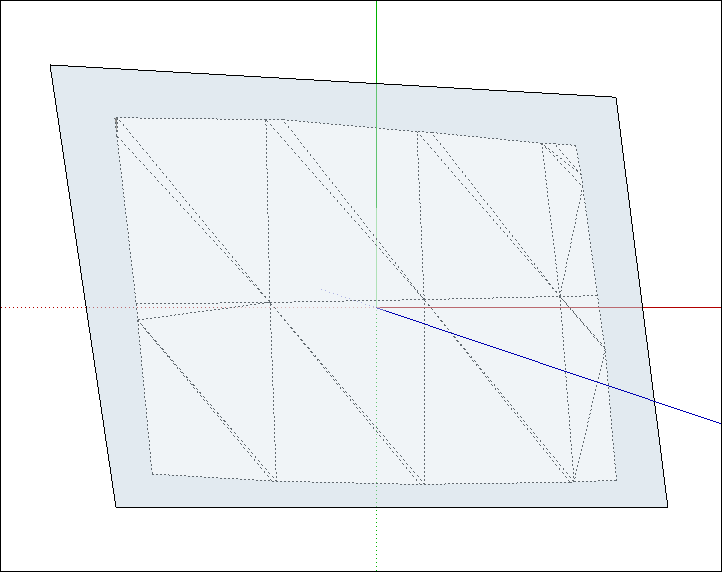
- Import a photo as a texture, as explained in the earlier section Applying a texture to the side of a building. Remember that to see this texture, the Face settings in the Styles panel must be set to Display Shaded Using Textures. (See Creating and Editing a Style for details about face styles.)
(Optional) If needed, adjust the position of the texture so it matches your flat face. For example, in the following figure, you see the texture in Free Pin mode after each pin was dragged to a corner of the flat face. See the section on repositioning textures in Adding Colors and Textures with Materials for details.
- Context-click the texture that you applied to the flat face, and from the menu that appears, select Texture > Projected. This step transforms the texture into a projected texture, so that the remaining steps work.
- With the Select tool (
 ), select all the faces in your curved surface.
 - Select the Paint Bucket tool (
 ).
). - Hold down the Alt key (Microsoft Windows) or the Command key (macOS), and with the Eyedropper cursor that appears, click the projected texture to sample it. Release the modifier key so the cursor turns back into the Paint Bucket.
- With the Paint Bucket cursor, click the curved surface selection to apply the projected texture to all the faces.
- Delete the flat surface, because you no longer need it. The following figure shows the projected texture after it's applied the curved surface and the flat surface is deleted.
