The Sets pane holds all the strokes for your sketchy edge style. The strokes you place here are the ones that become part of your .style file.
To add strokes to your style, first make sure the Sets pane reflects your desired sets and number of strokes per set. Then you begin filling and editing the Sets pane with strokes by using a few different commands. The following sections walk you through the details.
Table of Contents
Setting up the structure of the Sets pane
By default, the Sets pane has 5 empty sets, and the sets hold strokes that are 32, 64, 128, 256, and 512 pixels in length. Each set has empty gray boxes for 3 strokes, as shown in the following figure.

To change how many sets and strokes per set appear in your style, you have the following options:
- Add a set with the Lengths drop-down menu: You find the Lengths drop-down menu at the top of the Sets panel. On Microsoft Windows, click the plus sign next to the Lengths box and select a length from the menu that appears. For example, to add a set of 16-pixel strokes, select 16. On Mac OS X, select the Add a Length Set from the drop-down menu (for example, you might select Add a 16 Pixel Set). Lengths that already appear in the Sets pane are grayed out.
- Remove a set with the X: Next to each set, you see a little X to the left of its length. To remove the set, click this X icon.
- Change the strokes per set with the Strokes drop-down menu: The Strokes drop-down menu is at the top of the Sets pane. Select a number from the menu to change how many strokes appear in each set. Each set must have the same number of strokes; you can’t have two strokes in one set and three strokes in another set.
Adding and editing strokes in the Sets pane
After you set up the basic structure of sets and strokes per set, you’re ready to add strokes to the empty gray boxes. You can fill the boxes with strokes as follows:
- Drag and drop a stroke from a stroke library to a gray box in the Sets pane.
- On the Strokes tab, context-click a stroke library name and select Add Strokes to Current Style from the menu that appears. This command fills the Sets pane with all the strokes from the library. If the library doesn’t contain enough strokes to fill all the empty gray boxes, you can fill those empty boxes with other strokes. (You can also add a stroke from the same library more than once, but doing so defeats the purpose of having multiple strokes per set, which is to vary the strokes for a hand-drawn look.)
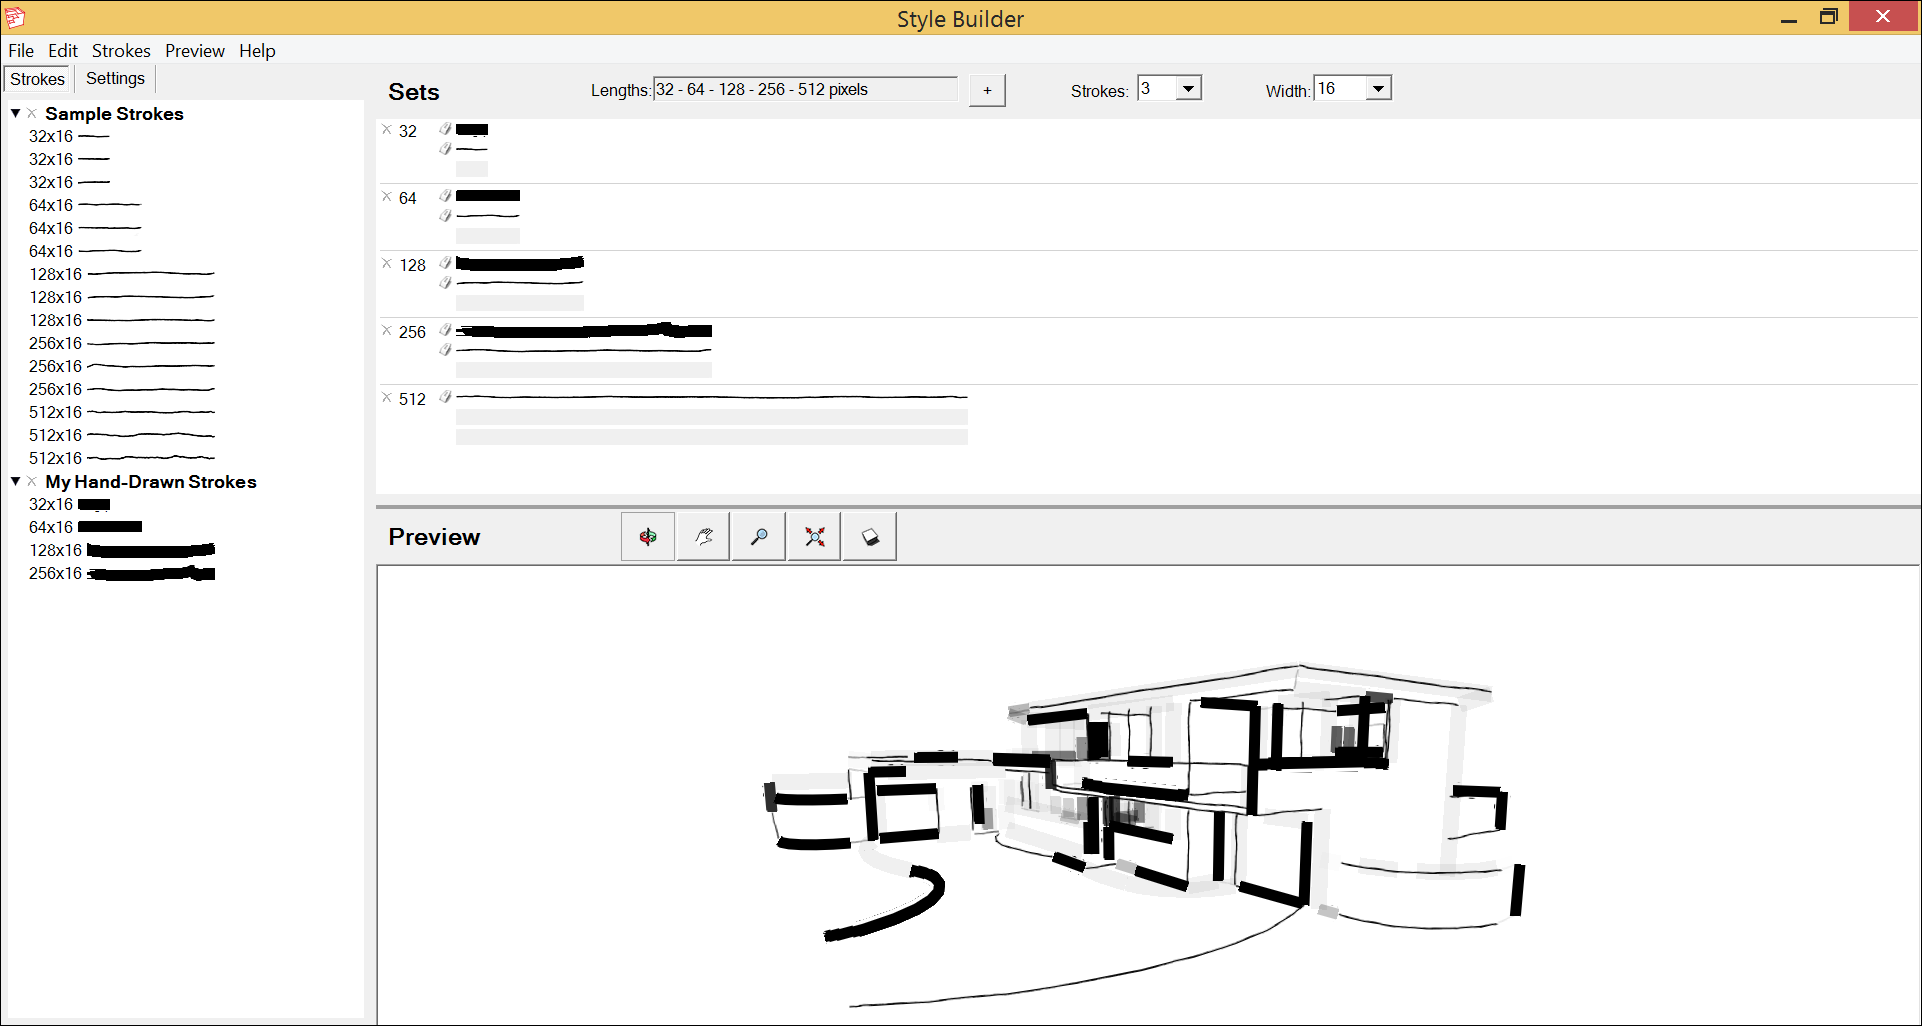
The following figure shows the Sets pane filled with a few different strokes from two different libraries. Notice how the preview area begins to reflect the stroke options as you add them to the Sets pane.
Tip: After you get the hang of adding strokes to the Sets pane, the following tips can make the process a little easier:
- If you change your mind about a stroke you’ve added, you can replace a stroke with an empty gray box by clicking the Eraser icon next to any stroke.
- To undo your most recent action, press Ctrl+Z (Microsoft Windows) or Command+Z (Mac OS X), or select Edit > Undo from the menu bar. After you undo a command, the Edit menu makes a Redo command available.
- To create a new sketchy edge style based on a specific library, context-click the library name on the Strokes tab and select Create New Style with Strokes. Style Builder asks whether you want to save the current style and then opens a new file. In the new file, the Sets pane structure reflects the number of sets and strokes per set in the library, and each set is automatically filled with the library’s strokes.