To draw strokes for a sketchy edge style, you create individual files of each stroke. Although you can save these files in a folder and import the folder, copying your strokes into a template and then importing the template into Style Builder is easier — and the more common method.
To draw your own strokes based on a template, here’s an overview of what you need to do:
- Generate a style template in Style Builder. This template contains fields for the exact number and size of strokes for your style.
- Draw and edit your strokes. You can draw strokes digitally in an image editor, using a pen and tablet if you have them. Or you can draw strokes on pen and paper and scan the strokes into an image editor. Although the pen-and-paper method is more tedious than drawing digitally, the results you get with pen and paper produce a more unique line drawing.
- Transfer the strokes from the image editor into the template.
The following sections walk you through the details of each step.
When you’re done setting up your strokes in the template, you can import the template as a stroke library in Style Builder.
Table of Contents
Understanding how sketchy edge styles are constructed and applied to a model
A sketchy edge style is composed of multiple strokes, which are organized into sets based on the stroke length, as shown in the following figure. Two or more strokes of the same length are referred to as a stroke set (or just a set), and all stroke sets must have the same number of strokes.
Tip: Sketchy edge styles that look truly hand-drawn have
- Five or more stroke sets grouped into the following lengths: 32, 64, 128, 256, and 512 pixels.
- Three or more strokes in each set.
Each stroke is a grayscale image, and when you apply a sketchy edge style to a SketchUp model, a stroke image is painted on top of the model’s vector edges. The slight variation of strokes in each set makes your models look hand-drawn, as shown in the following figure.
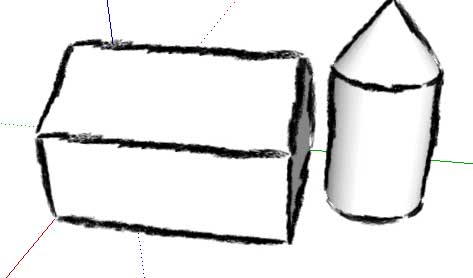
Behind the scenes, when applying strokes, SketchUp matches the appropriate stroke length with each edge in a model. The strokes in the following figure were created to illustrate how this matching process works.

When the strokes are applied to the model, as shown in the following figure, notice how Stroke C, the longest stroke, is used along the longest edges in a model, whereas a shorter stroke length, Stroke B, is applied to shorter edges. When an edge doesn’t exactly match a stroke length, SketchUp stretches or shrinks a stroke to fit the edge.

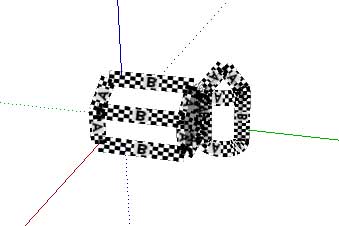
If you zoom out, SketchUp accommodates the new view by replacing Stroke C with Stroke B, and Stroke B with Stroke A, as shown in the following figure.
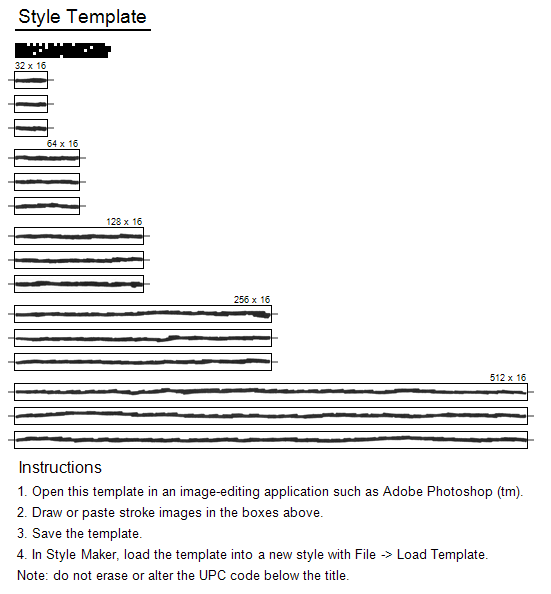
Generating a style template
Ready to start drawing strokes for your sketchy edge style? As mentioned at the beginning of this article, the typical first step is to generate a template. A Style Builder template is a PNG file that contains drawing fields for every stroke in your style.
To generate your template, follow these steps:
- Select File > Generate Template from the menu bar. The Style Template Generator dialog box appears, as shown in the following figure.
- From the Stroke Lengths drop-down list, select an option that reflects your desired number of sets and the stroke lengths for each set. Or, you can type a comma-separated list of stroke lengths; each length that you enter must be between 16 and 1024 and a power of 2.
- From the Strokes Per Set drop-down list, select how many strokes you want to include in each set. As mentioned earlier in this article, the recommended minimum is 3 strokes per set.
From the Stroke Width drop-down list, select how wide or narrow your strokes will be (in pixels). The larger the number, the thicker the stroke.
Tip: If needed, you can adjust the stroke width as you build your sketchy edge style in the Sets panel, but for best results, create the original strokes at your desired width.- Click the Save As button to open the Save As dialog box.
- Navigate to the location where you want to save your template file.
- In the File Name box, type a name for the template file. Be sure to leave the
.pngfile extension at the end of the file name. - Click the Save button, and the template is saved in the location you selected in Step 6.

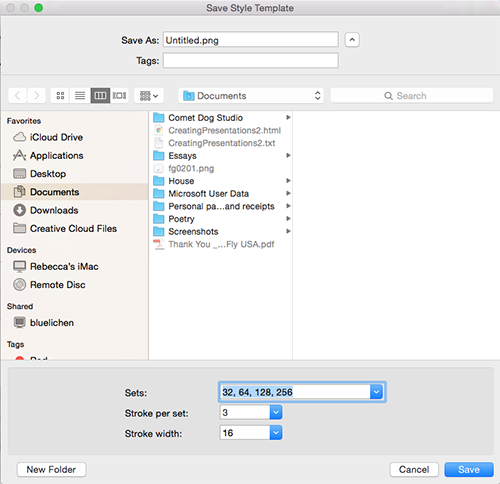
- Select File > Generate Template from the menu bar. The Save Style Template dialog box appears, as shown in the following figure.
- In the Save As box, type a name for your template. Be sure to leave the
.pngextension in the file name. - Navigate to the location where you want to save your template.
- From the Sets drop-down list, select an option that reflects your desired number of sets and the stroke lengths for each set. Or, you can type a comma-separated list of stroke lengths; each length that you enter must be between 16 and 1024 and a power of 2.
- From the Strokes Per Set drop-down list, select how many strokes you want to include in each set. As mentioned earlier in this article, the recommended minimum is 3 strokes per set.
From the Stroke Width drop-down list, select a how wide or narrow your strokes will be. The larger the number, the thicker the stroke.
Tip: If needed, you can adjust the stroke width as you build your sketchy edge style in the Sets panel, but for best results, create the original strokes at your desired width.- Click the Save button, and your template is saved in the location you specified in Step 3.
Drawing and editing strokes
You can draw your strokes digitally or on paper. If you draw them on paper, you need to scan the strokes into your computer, so you have a digital file.
Whichever way you draw the strokes, you then need to edit them in an image editor, such as Adobe Photoshop, to size the strokes and remove any background artifacts.
Here a few tips for drawing your strokes:
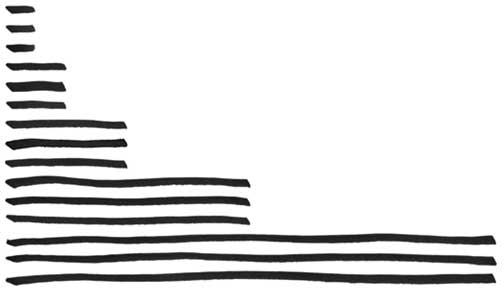
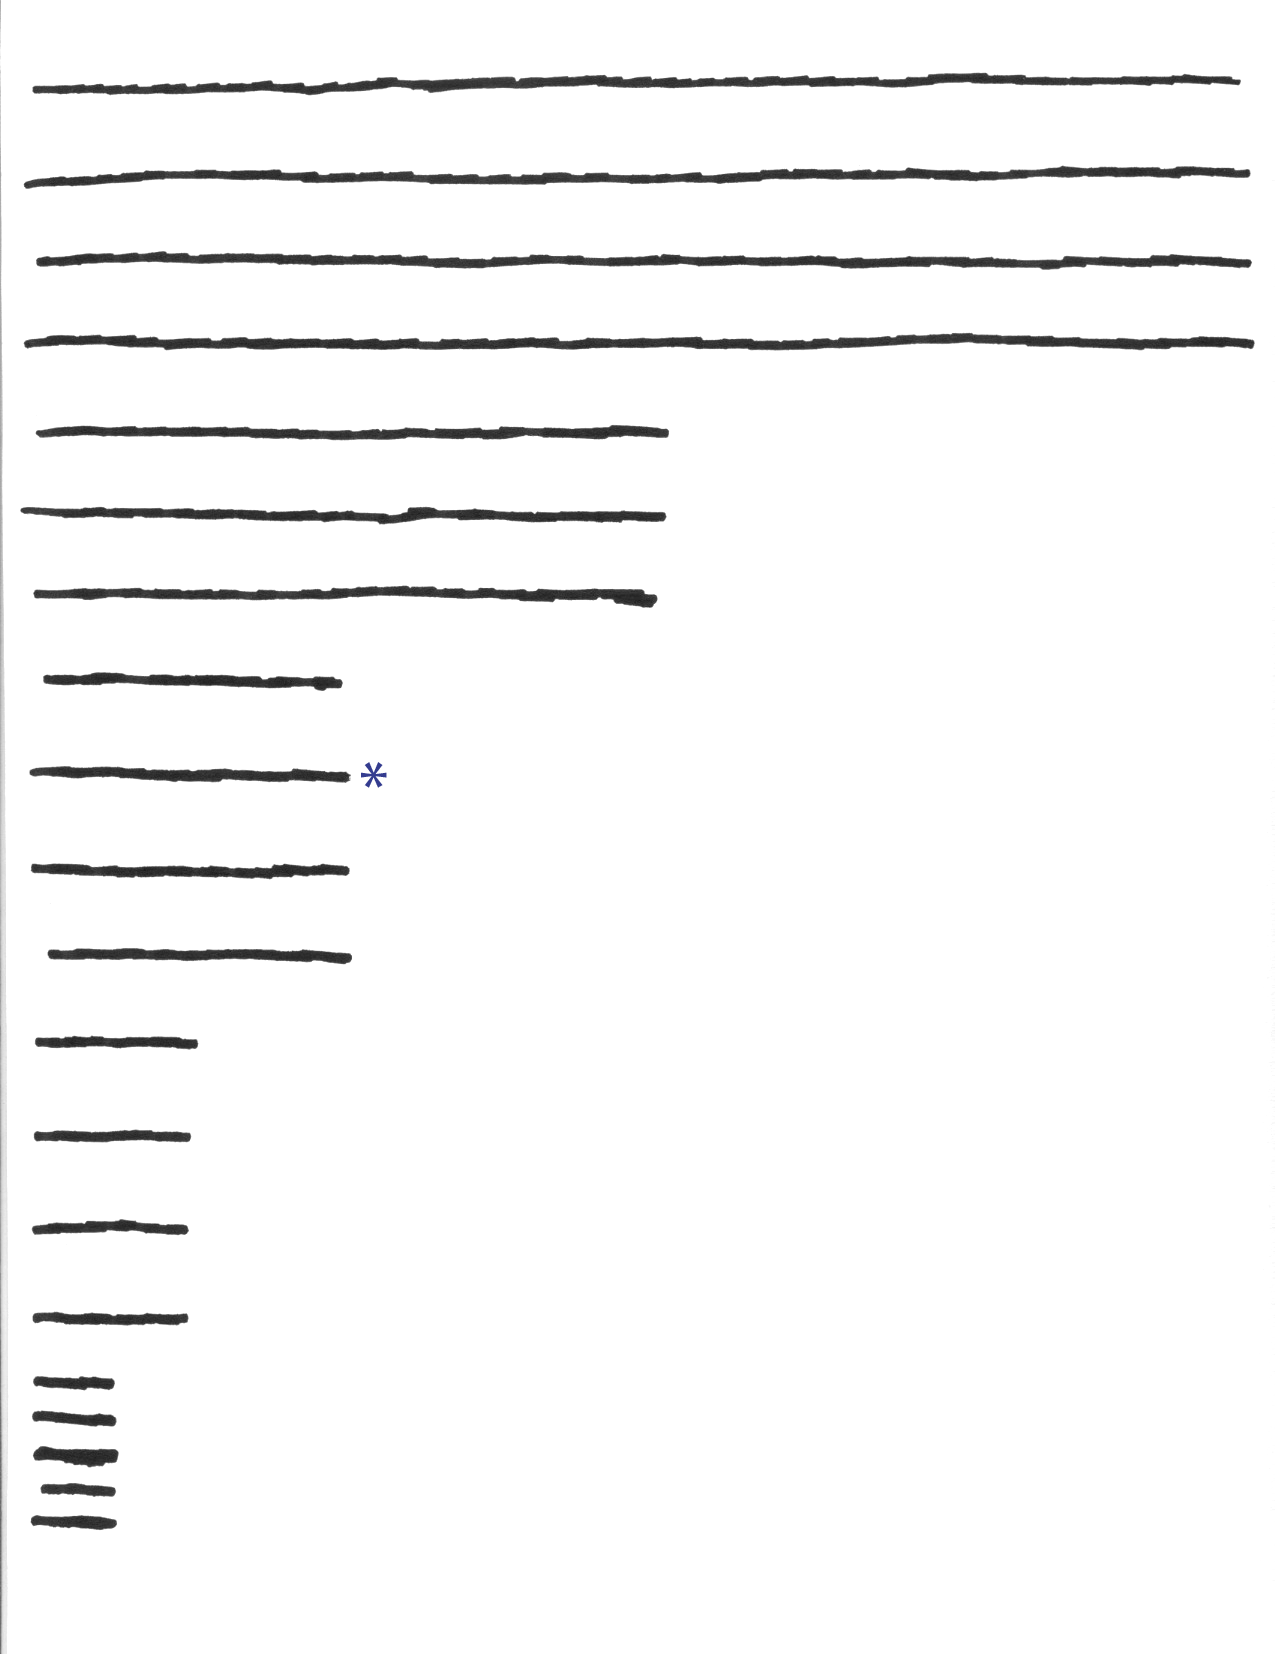
- Create at least as many strokes as you have in your template. For example, if your template has the recommended 5 stroke sets with 3 strokes per set, you need to draw 15 strokes.
- Draw strokes of varying lengths that reflect the lengths and strokes per set in your template. For example, if you have 5 sets with the 3 strokes per set, you’d draw strokes of 5 different lengths and draw at least 3 strokes for each length, as shown in the following figure.
- Draw the strokes so they’re as straight as possible.
The steps for editing your strokes vary, depending on what image editor you use. The following steps reflect the general process you need to follow in any image editor:
Create a precise selection of a stroke that matches the length and width in your template. For example, if you’re editing a stroke that’s 128 pixels long and 16 pixels wide, create a selection marquee that’s 128 x 16 pixels and use it to select your stroke, as shown in the following figure.

- Copy your selection to the clipboard.
- Create a new file in your image editor and paste the selection in the new image file.
- Remove any artifacts, such as stray black marks from a scan, so that the stroke’s background is totally white. You might use your image editor’s eraser or painting tools to get rid of these artifacts.
- If needed, rotate the stroke so that it’s horizontally straight across the image document area.
- Make sure the stroke fills the width of the document area. You don’t want white space at either end of the stroke.
- Make sure the image document size matches the desired stroke size. For example, if your stroke needs to be 128 x 16 pixels, the image document should also be 128 x 16 pixels.
- Save the stroke as a bitmap (
.bmp) file. Bitmaps are basic black-and-white image files. To help you keep track of what stroke files you’ve created, you might name the file based on its size and order in the set, such as128x16_1.bmp,128x16_2.bmp, and so on. - Repeat Steps 1–9 for every stroke you want to use in your template. When you’re done, you have a stroke file for each stroke that you edit, and you’re ready to transfer the strokes into your template.
Transferring strokes into the template
To transfer strokes into the Style Builder template that you generated, follow these steps:
- Open the template file in your image editor.
- Open a stroke file in your image editor.
- Copy and paste the stroke into a template box that matches the stroke length.
- Adjust the stroke placement as needed. You want the stroke to fit inside the box’s border. Align the stroke with the marks on either end of the template box. These marks indicate the middle of the template box.
- Repeat Steps 2–4 for each stroke file you want to include in your template. The following figure shows a completely filled template.
- Save the template. Make sure the file is saved as a
.pngfile.
When you’re done, you’re ready to import the template into Style Builder.