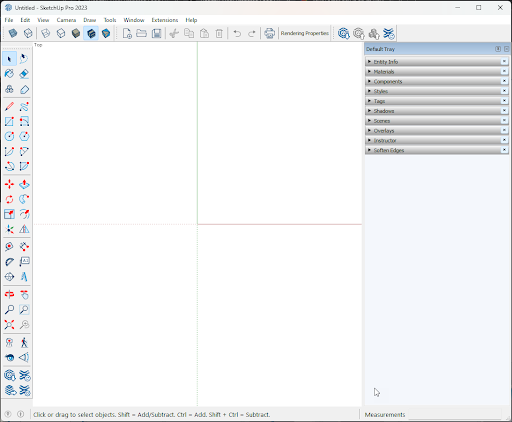
SketchUp’s tools are sorted into several toolbars. The Getting Started toolbar is the default toolbar seen when opening a new model. All other toolbars can be activated using the View menu.
In the example below we’ve activated the Standard, Styles, Large Toolset, and Warehouse toolbars.
Customizing Toolbars
Depending on what you decide to model in SketchUp or your expertise in 3D modeling, you might want to use some tools more than others. In SketchUp, you can decide which Toolbars you want to see. Managing your toolbars works differently depending on if you are using the Windows version or MacOS version of SketchUp.
Windows
Clicking Toolbars… in the View menu opens the Toolbars window.
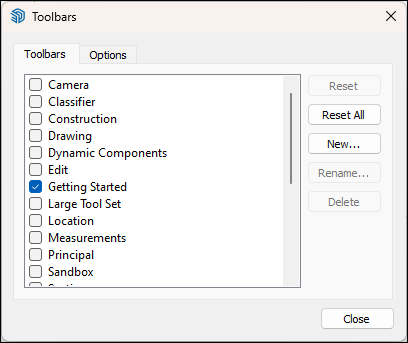
In Toolbars you can select which toolbars you’ll see in SketchUp, In the Options tab you can choose to show screen tips on your active toolbars or to use large icons.
Once you’ve selected which toolbars you would like to use, you can then arrange them to best fit the way you work.
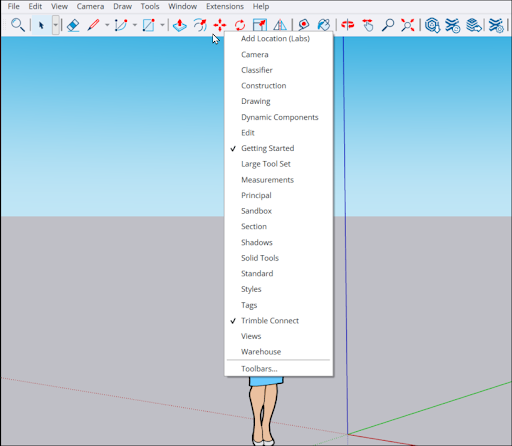
You can also context click anywhere on a toolbar to see the list of toolbars, allowing you to toggle visibility.
For easy reference, here’s a list of each toolbar and what they are used for:
| This Toolbar… | Is Handy When... |
|---|---|
| Add Location | Geo-locating your model. |
| Camera | Looking at your model from many different angles. |
| Classifier | Modeling with BIM (Building Information Modeling) and IFC data. |
| Construction | Modeling precisely. |
| Drawing | Drawing a 3D model. |
| Dynamic Components | Developing dynamic components. |
| Edit | Editing an existing model. |
| Getting Started | Learning to draw in SketchUp. |
| Large Tool Set | You need an all-purpose toolbar. |
| Measurements | Modeling with precision. |
| Principal | You need only a basic tool set and want to maximize the drawing area. |
| Sandbox | Modeling TINs to create terrain or rounded objects. |
| Section | Adding section planes that create a view inside your model. |
| Shadows | Adjusting shadow settings or studying shadows at different times of day. |
| Solid Tools | Modeling complex shapes. |
| Standard | Accessing basic file and clipboard commands from a toolbar. |
| Styles | Incorporating multiple styles in your model. |
| Tags | Organizing groups or components into layers to control visibility. |
| Trimble Connect | You need to access your content in your Trimble Connect account. |
| Views | Switching between views is necessary. |
| Warehouse | You need to share or find a model in 3D Warehouse or manage your extensions in Extension Warehouse. |
MacOS
On MacOS, your main toolbar is seen at the top of the window along with several tool palettes. You can fully customize what appears on the main toolbar and choose what tool palettes you want to see.
Toolbar customization options on MacOS include:
- Icon and text appearance – Context clicking on a toolbar opens a dialog where you can choose to see just icons, icons and text, or just text on that toolbar.
- Hide or show toolbars – You can select Hide Toolbar under the View menu if you want to model without the toolbar visible. You can always bring it back with Show Toolbar.
- Select what tools appear on a toolbar – If you only want to see specific tools, or want the tools to appear in a specific order on a toolbar, these options have you covered. Select Customize Toolbar from the View menu or that toolbar’s context menu to see all of your tool options laid out for you.
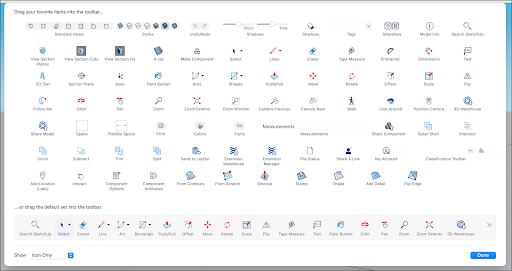
- To add a tool drag it to the toolbar. Remove tools by dragging them off of the toolbar. Wherever you place a tool is how it will appear after you exit the customization screen. When you’re finished, click Done.
In addition to the main toolbar, there are several tool palette options available:
- Large Tool Set – A larger selection of tools most often used when drawing, editing, and viewing a 3D model.
- Add Location – An easy shortcut to Add Location features.
- Warehouse – A collection of tools to help you access and use both 3D Warehouse and the Extension Warehouse.
- Sandbox – This palette contains tools for modeling TINs to create terrain or rounded objects.
- Solid Tools – All these tools help you model complex shapes from other shapes. For example, use a peg to create the hole into which the peg must fit.
- Advanced Camera Tools – A palette designed for anyone who uses the ACT tools to model movie sets.
- Dynamic Components – Tools that come in handy when developing dynamic components.