Before you start classifying objects, make sure your model is ready using these guidelines:
- The object you want to classify should start as a component. See Components for more information on how to change ordinary geometry into a component.
- The classification system needs to be loaded into your template. The architectural template in SketchUp includes the IFC 2x3 and IFC 4 classification systems. If you need to use other systems you’ll need to import it.
- Use the Classifier toolbar. You can toggle the Classifier toolbar from View > Toolbars.
![]()
Once you have everything set up you are ready to start classifying objects by following these steps:
- Select your component.
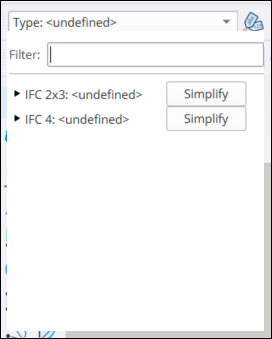
- Open the drop-down menu in the Classifier toolbar to see the available classification systems loaded into your model.
- Select the classification system and select an object type. Use Filter, if necessary, to narrow down the amount of objects you see.
You can also use the Classifier tool to classify objects in your model. When you are using the Classifier, there are a few things you may want to keep in mind:
- If the drop-down menu has a white background and a type, this indicates that the Classifier tool is active and clicking objects with the Classifier tool will apply the type displayed in the toolbar.
- Clicking a component assigns that classification type to all instances of the same component. Use the Shift key as you click with the Classifier tool to apply the type data only to the object you click.
- To remove a type from an object, activate Type: <undefined> in the drop-down menu and click that object to remove the type data. Alternatively, select the same type from the list of classification options.
You can also select classification data from the Entity Info panel:
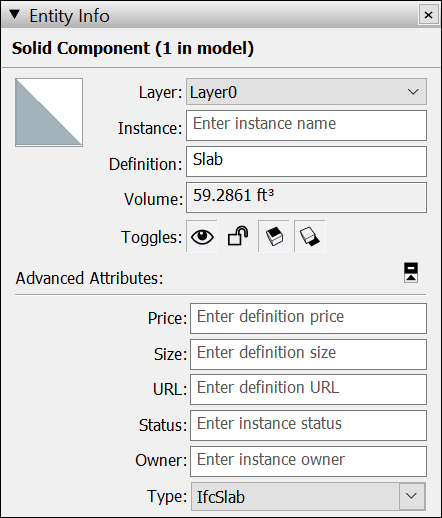
- Context click an object in your model and select Entity Info.
- Under Advanced Attributes, use the Type drop-down menu to select a classification.
If you want to copy the classification for one object to another:
- Make sure no geometry is selected.
- Activate the Classifier tool.
- Hold down Alt (Windows) or Command (MacOS) and click the object with the classification you want to copy.
- Release the modifier key and click the object you want to copy the classification to.
- When you assign an IFC type to a component, that type is assigned to the component definition and will assign that classification to all component instances in your model.
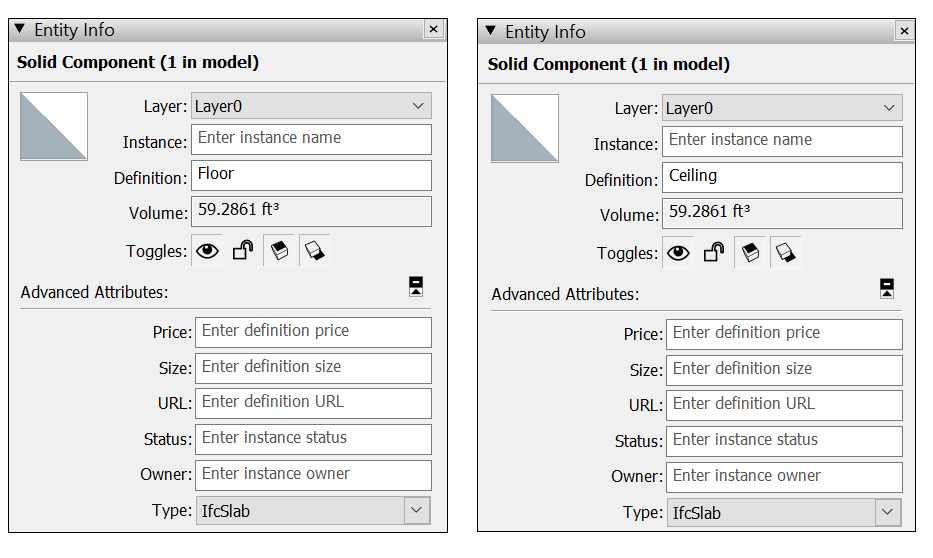
You may want to use the same classification for two different instances of an object. For example, the floor and ceiling in your model may use the same classification but you want to make sure they each have a unique definition. To give a classified component two different definitions:
- Copy the classified object and move it to its new position.
- Context click the copy and select Make Unique.
- Open Entity Info.
- Update the entities Definition.