Creating an ACT camera
To create a camera using ACT:
- Select View > Tool Palettes > Advanced Camera Tools (Mac OS X) or View > Toolbars > Advanced Camera Tools (Microsoft Windows). The Advanced Camera Tools toolbar is displayed.
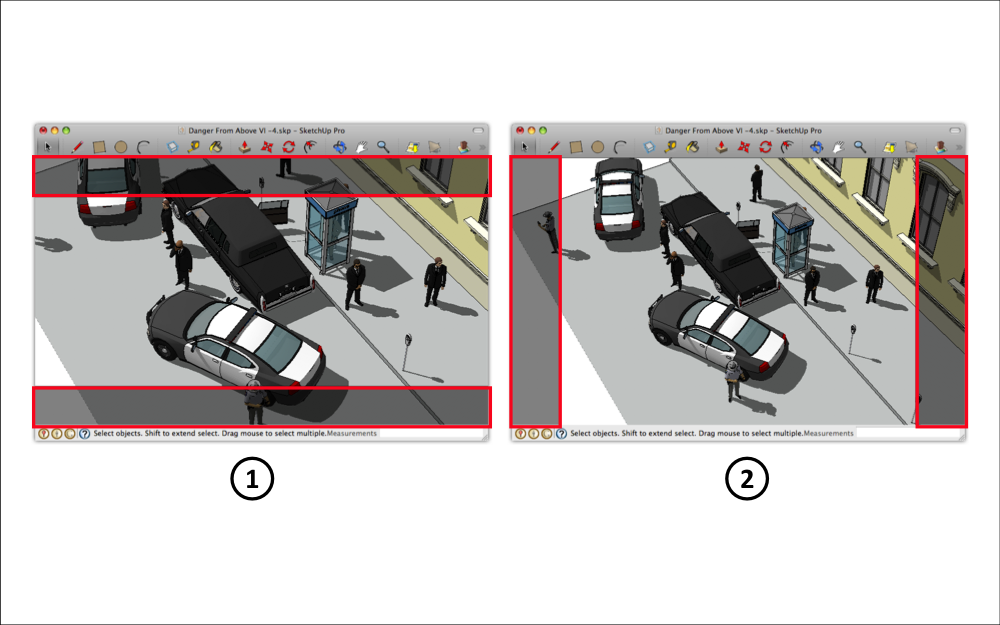
- Select Tools > Advanced Camera Tools > Select Camera Type > categories > camera. Shaded horizontal letterboxing (1) or vertical pillarboxing (2) bars appear if your camera has a different aspect ratio than SketchUp's drawing area. The area within the bars indicates the area viewable through the camera.
- Click Create Camera (
 ). The Camera Name dialog box appears.
 - Type a name of the camera in the Name field.
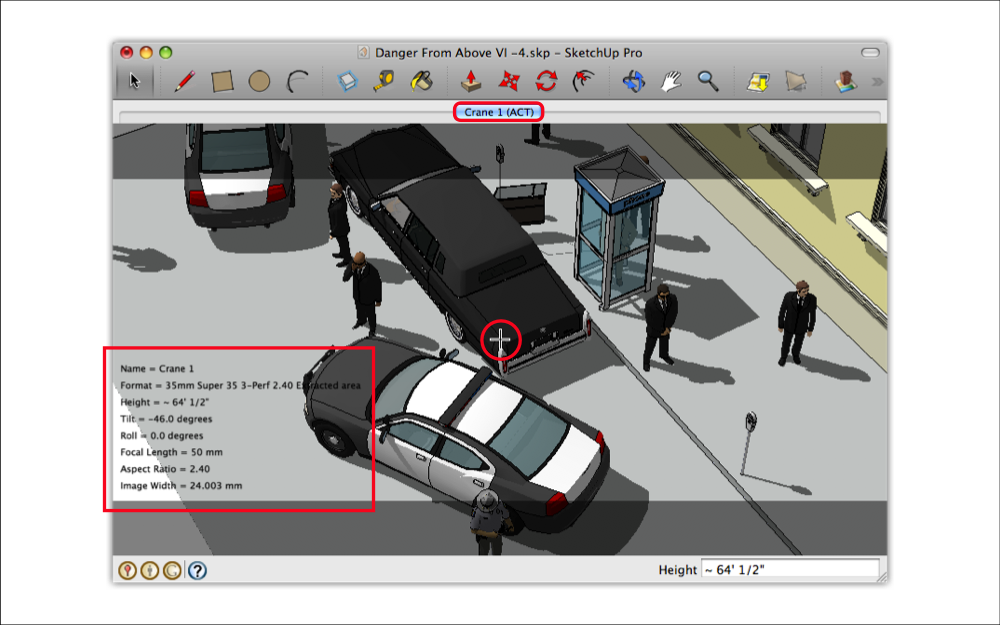
- Click Done. A physical camera model (group) is created and placed in your model. You are placed in camera view mode, where you are looking through the camera at your subject. A crosshair shows the middle of the camera. Camera properties appear in the lower-left corner of the model. A tab with the camera's name also appears. You can perform several functions on the camera, such as looking through the camera and editing camera properties in camera mode.
- (Optional) Use SketchUp's Orbit, Pan, and Zoom tools to physically reposition the camera in your model. Using the Zoom tool physically repositions the camera. See Repositioning an ACT camera for details.
- (Optional) Use the arrow keys to pan, tilt, dolly, truck, pedistal, roll, and adjust the focal length while looking through the ACT camera. Moving and Aiming an ACT Camera explains how these actions work in detail.
- After you adjust your camera, click Lock Camera (
 ). This option ensures that you don't move or alter the camera position or settings.
 - Context-click and select Done. You are finished creating your camera.