The default toolbar is designed to help you get started with LayOut. After you use LayOut for a while, you may want to customize the default toolbar or create your own toolbars to better match your workflows.
Customizing a Toolbar
Follow the instructions appropriate to your operating system to customize your toolbars.
Windows
Select View > Toolbars > Customize to open the Toolbars dialog box.

- Visible toolbars appear with a check next to them. If the toolbar you want to customize isn’t visible, click the box next to it to add the check and make it visible.
- Select the toolbar you want to customize.
- Click Commands to view a list of available tools and commands you can add to that toolbar.
- You can then customize your toolbars in the following ways:
- To add a tool to a toolbar, click and drag a tool from the list in Commands to the place you want it in that toolbar.
- To rearrange tools in a toolbar, click and drag a tool to a new location within the toolbar.
- To move tools from one toolbar to another, click and drag the tool you want to move from the first toolbar to the second.
- To undo any changes to a toolbar, select the toolbar under Toolbars and click Reset. To reset all changes to all toolbars, click Reset All.
MacOS
From the menu bar, select View > Customize Toolbar. The Customize dialog box appears.
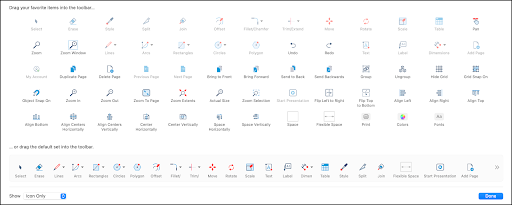
- You can then customize your toolbars in the following ways:
- To add a tool to a toolbar, click and drag the tool from the dialog box to the toolbar.
- To remove a tool, drag the tool off the toolbar.
- To move a tool click and drag any tool to a new location within the toolbar.
Drag tools you want to add to LayOuts default toolbar.
Creating a New Toolbar (Windows)
If you use LayOut for Windows, you can create your own toolbars by following these steps:
- From the menu bar, select View > Toolbars > Customize.
On the Toolbars tab, click the New button. The New Toolbar dialog box appears.
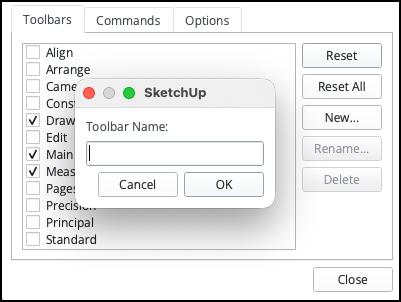
- Type a name for the toolbar and click OK. In the Customize dialog box, the new toolbar now appears in the list of toolbars on the Toolbars tab.
Using the Commands tab, click and drag tools from the list of commands to the new toolbar.
Tip: New toolbars without any commands in them may be hard to see when docked. Look for its small gray move handle ( ) on the left side of the toolbar. If you have trouble seeing the handle, you cursor will change to Move (
 ) mode when you hover over it.
After you create a toolbar, you can select it in the Customize dialog box's Toolbars tab and rename, delete, or reset it.
Toolbar Appearance
To change the appearance of your toolbars, follow the steps appropriate to your operating system.
Windows
- From the menu bar, select View > Toolbars > Customize.
Click Options.
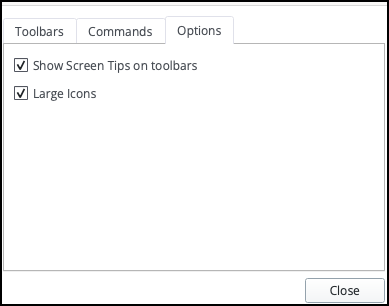
- Select Show Screen Tips on Toolbars to enable tips when you hover over a tool or command.
- Select Large Icons to enlarge the appearance of icons on your toolbars.
- When you're done, click Close.
MacOS
- Select View > Customize Toolbar.
- Use the dropdown to choose how you want tools to appear on your toolbars:
- Icon and Text
- Icon Only
- Text Only
- When you're finished, click Done.