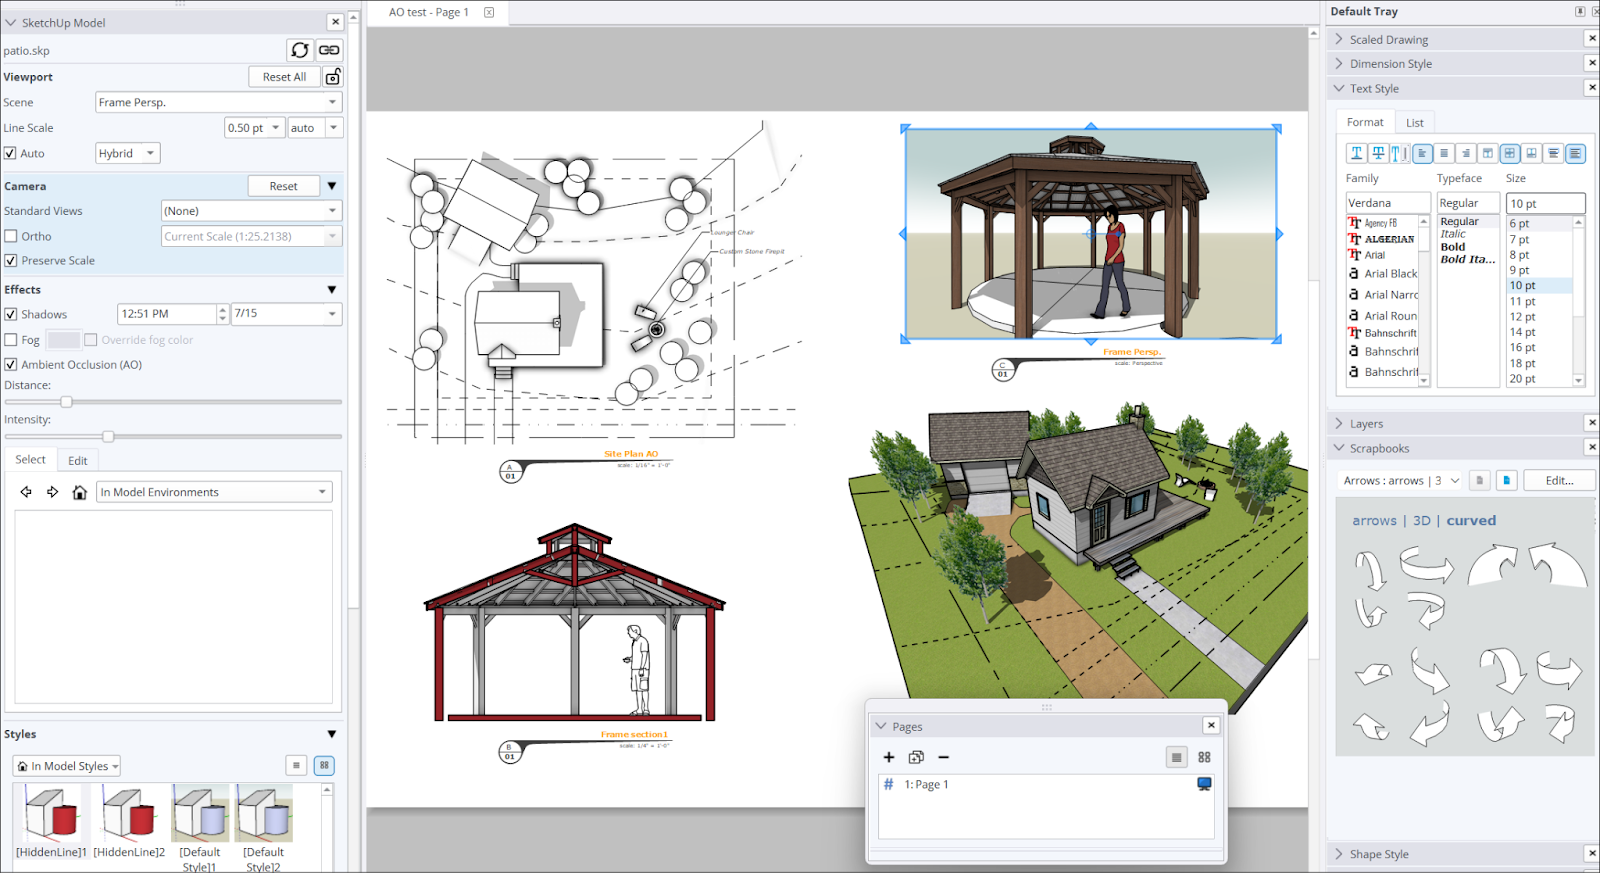
The LayOut interface contains the tools and features you need to create 2D documents and presentations from your 3D models. LayOut and SketchUp are made to work together. Many tools and features in LayOut work a lot like they do in SketchUp.

Each part of the LayOut interface provides a different set of options to help you with your documents.
The Menu and the Toolbar
![]()
The Menu bar appears at the top of the window and offers the following options:
- File – Basic file options where you can open and save your documents, adjust your document setup, export or print your documents, and import SketchUp models or CAD data into your document.
- Edit – The basic editing functions like Undo, Redo, Copy, Paste, and a few other variations. You can also create a clipping mask, group or ungroup entities, or adjust your preferences.
- View – Here you can adjust your toolbar visibility and settings, render models in your document, adjust the zoom settings, or enter presentation mode.
- Text – Home to all the options for inserting text in your document. For more information, see Adding Text, Labels, and Dimensions.
- Arrange - Settings to help arrange how entities in your document appear. For more information, see Arranging, Moving, Rotating, and Scaling Entities.
- Tools – An optional way to access LayOut’s toolset.
- Pages – Tools to manage the pages in your document. For more information, see Managing and Navigating Pages.
- Window – Options to manage the trays or modals that appear in LayOut. For details, see LayOut Panels and Trays.
- Help – A link to this Help Center along with options to return to the Welcome page, check for updates, and for signing out.
The default toolbar contains the most used tools in LayOut, along with a few other useful options. See LayOut Tools for details on what tools are available. To customize your toolbar, see Customizing Toolbars and Menus.
The Document Window and Panels

The document window is where you can add SketchUp models, images, text, or whatever meets your design needs. Within the document window you can also set up LayOut’s panels, each containing more features to help you fine tune your models. You can customize which panels appear and where they appear in your interface. To learn more about these features and how to customize them, see LayOut Panels.
Status and Measurements
![]()
The Status bar appears at the bottom of your window and lets you know what tool is active, and some tips on how to use that tool, including optional tool modes. On the left you’ll also see a measurements box where you can type in values to help when drawing or modifying your document. To the right, a zoom dropdown appears containing useful zoom options to adjust your document’s view.
LayOut Interface Navigation
LayOut supports using a three-button, one-button, or Apple Magic mouse, as well as trackpad for navigation.
| Action | Three-Button Mouse | One-Button Mouse/Trackpad | Magic Mouse |
|---|---|---|---|
| Click or Select | Press and release the left mouse button | Press and release the mouse | Press and release the mouse |
| Click and Drag | Press and hold down the left mouse button while moving | Press and hold the mouse button while dragging | Press and hold the mouse while dragging |
| Scroll | Roll the scroll wheel in the desired direction | Not available | Move your finger along the mouse in the desired direction |
| Context-click | Click the right mouse button | Press and hold the Alt or Option key while clicking | Perform the context click gesture on the mouse surface |
For more information on how to move around your LayOut documents, see Use the Zoom and Pan Tool to View Your Model.