Replacing Components
Replacing components
People like to see different options, and they change their minds all the time. When indecision strikes or your design just hasn't become clear to you yet, know that you can easily replace one component with another component. Here's how the process works:
- Add the new component to your model. If you don't have anywhere to put it, just place it in an empty area in your model by following the steps in the preceding section. Placing the component somewhere in your model ensures that the component appears in your In Model collection. (Even if you then delete the component for now, the component remains in your In Model collection until you purge unused components.)
- In the Components panel, click the In Model icon (
) to see your In Model collection.
Select the component or components that you want to replace.
Tip: To select all instances of a component, context-click the component in the Components panel and choose Select Instances, as shown in the figure.- 
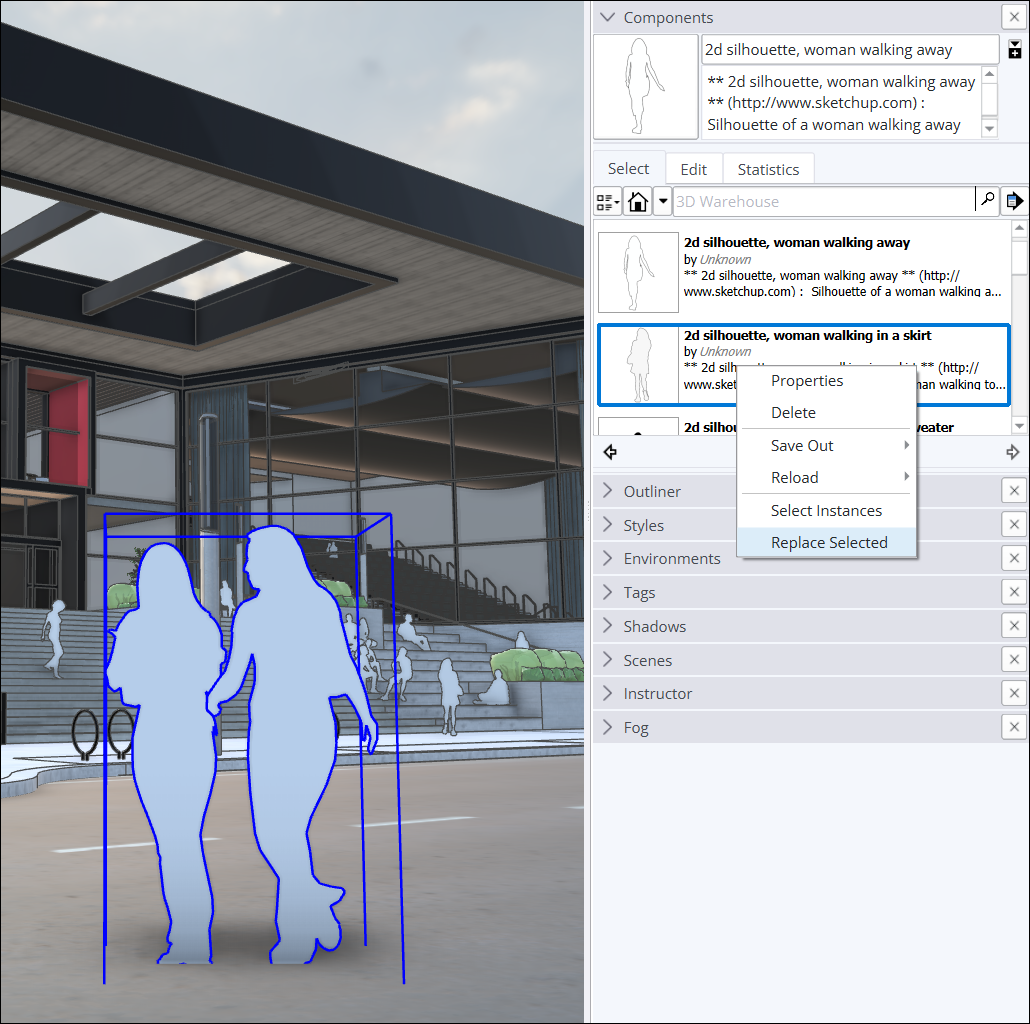
In the Components panel, context-click the component you want to use instead of the existing one and choose Replace Selected from the context menu. In this example, that's the Large Panel Door component. The old door is now replaced with the new door, as shown in the following figure.

Tip: SketchUp Pro users have an additional tool: the Swap Component command, which works with dynamic components.
To swap out a series of dynamic components in SketchUp Pro, follow these steps:
- Select the dynamic components you want to replace. The components are highlighted in the drawing window.
- Context-click one component, and select Dynamic Components > Swap Component. The Select a SKP dialog box is displayed.
- Select the SketchUp file containing the dynamic component that will replace the currently selected components.
- Click the Open button. The new dynamic component replaces the previously selected dynamic components.