Once you’ve created output using AI Render, you can choose to use it to create a new scene, save the generated output locally, or share it with others.
Add Scene
When you click or tap Add Scene, AI Render creates a new scene in your model. This new scene, using the generated image as your new viewport, appears with a few conditions:
- In SketchUp for iPad and SketchUp for Web, the generated image becomes a foreground image in the new scene. The foreground image created by AI Render only stays persistent when that specific scene is selected. Some actions, such as using the Orbit tool, will cause the Watermark to disappear.
- In SketchUp for Desktop, the generated image is overlaid as a Matched Photo in a new scene, preserving the camera angle of the original input. The image will appear both behind and projected on top of your model’s geometry. This behavior allows you to still visualize all the linework in your SketchUp model. The Parallel Projection and Two Point Perspective camera modes are not supported when using Add Scene in SketchUp for Desktop.
- Adding a scene using AI Render generates a new Style in SketchUp called AI Render Style. This style enables visibility of both the foreground and background image, a setting disabled in most styles. If you make any changes, AI Render creates a new Style.
Make sure to save your model after creating a scene containing a generated image.
Saving and Sharing
Depending on which version of SketchUp you are using, you will have the option to Save or Share your generated output. A saved or shared image uses the same resolution as the viewport.
SketchUp for Desktop
Clicking Save opens Windows Explorer in Microsoft Windows or the Finder on MacOS. Select a location and designate a name for your file. Your images are saved as .png files.
SketchUp for iPad

Tapping Share opens your iPad’s iOS share options.
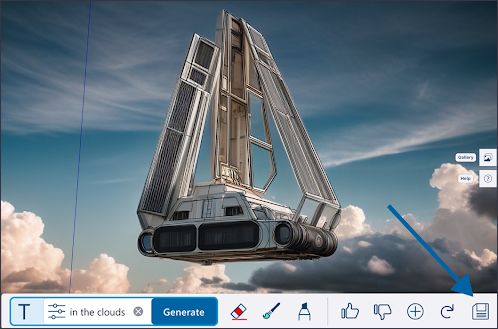
SketchUp for Web

Clicking Download Image (![]() ) opens up Windows Explorer in Microsoft Windows or the Finder in MacOS. Select a location and designate a name for your file. Your images are saved as .png files.
) opens up Windows Explorer in Microsoft Windows or the Finder in MacOS. Select a location and designate a name for your file. Your images are saved as .png files.