After you download and install SketchUp Desktop Viewer, you can open a SketchUp (.skp) file to view a model. Read on for details about opening a file, navigating the interface, and printing a model.
Table of Contents
Opening a model
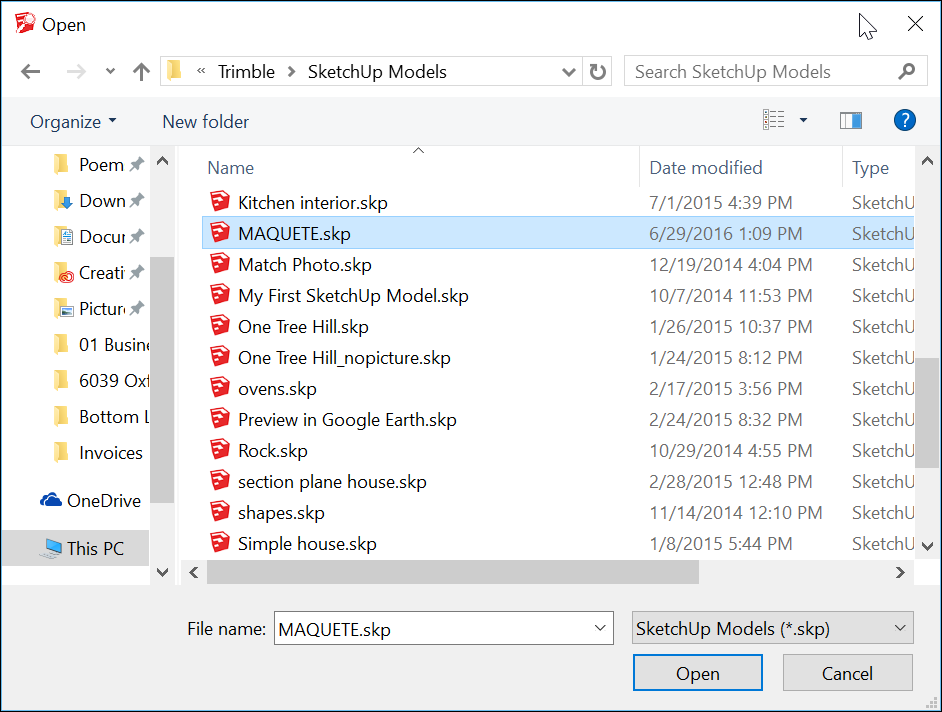
In SketchUp Desktop Viewer, to open a SketchUp (.skp) file that you’ve saved to your hard drive, follow these steps:
- Select File > Open.
- In the Open dialog box that appears, as shown in the following figure, navigate to the location where the
.skpfile is saved on your hard drive. - Select the file and click the Open button. The model appears in the viewer.
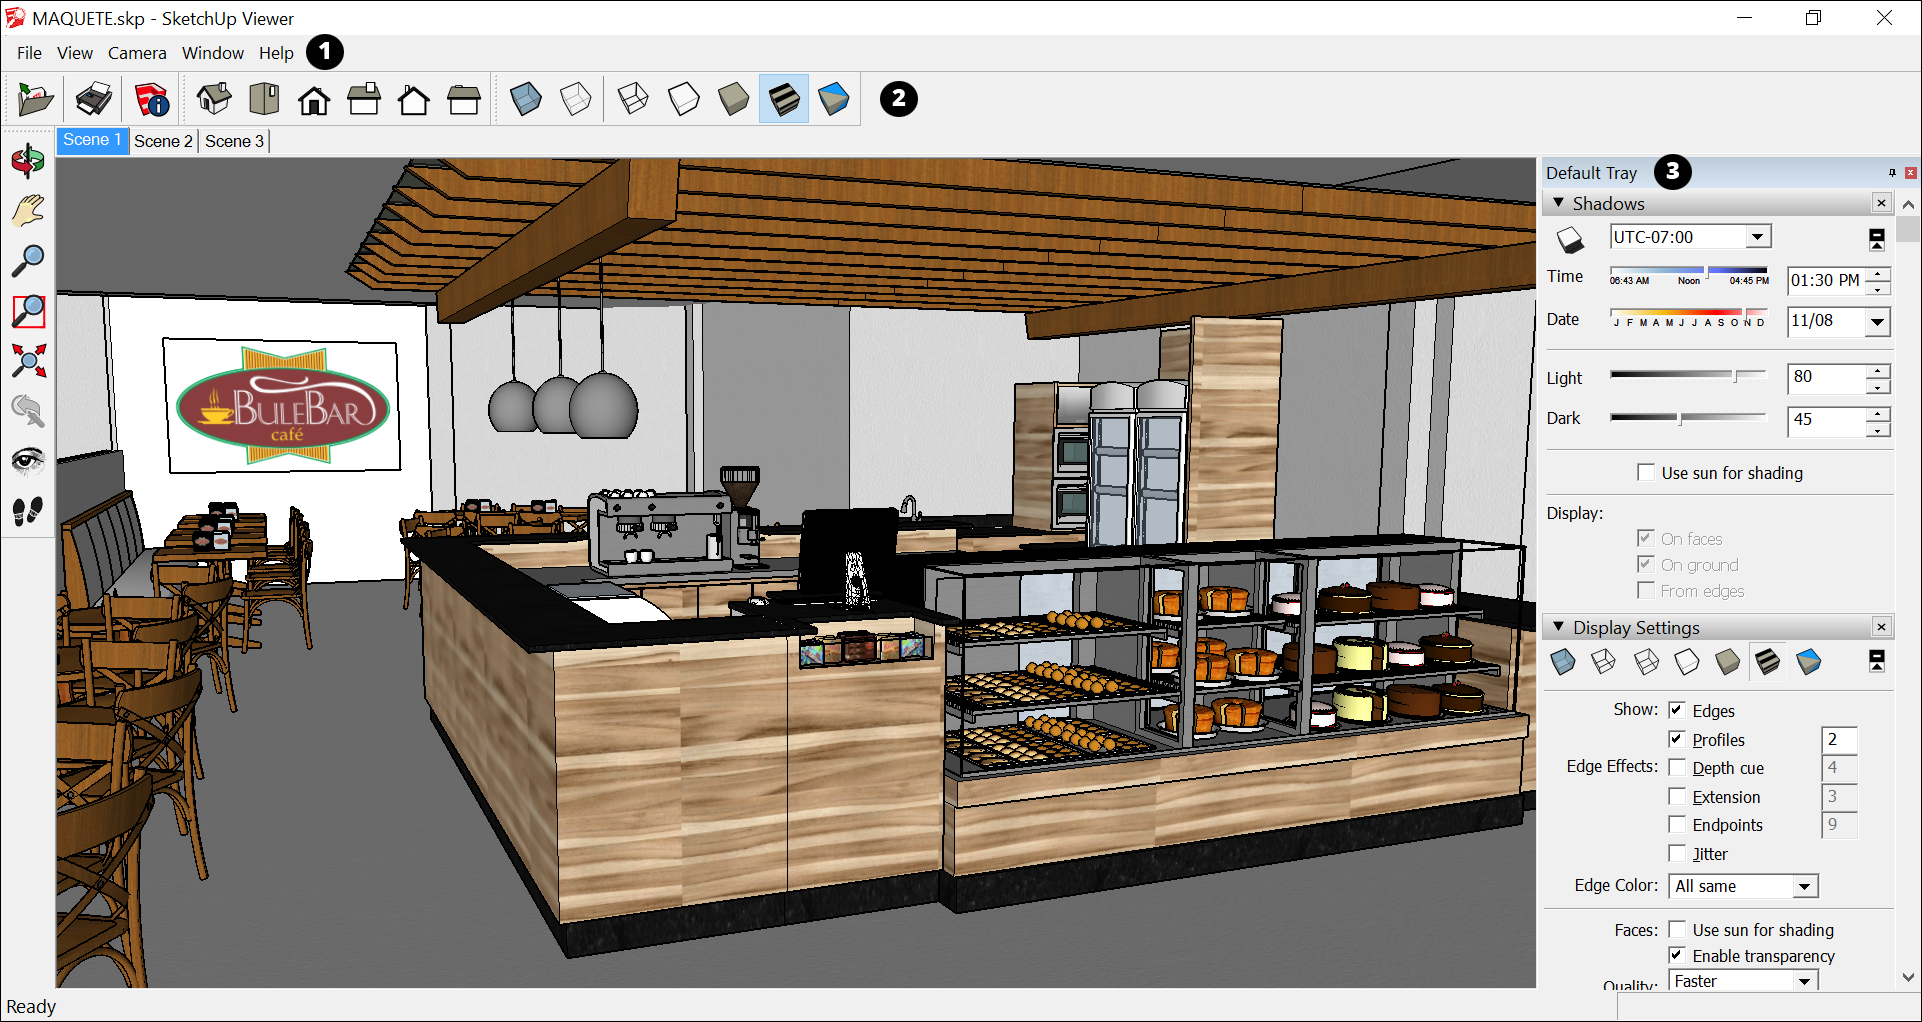
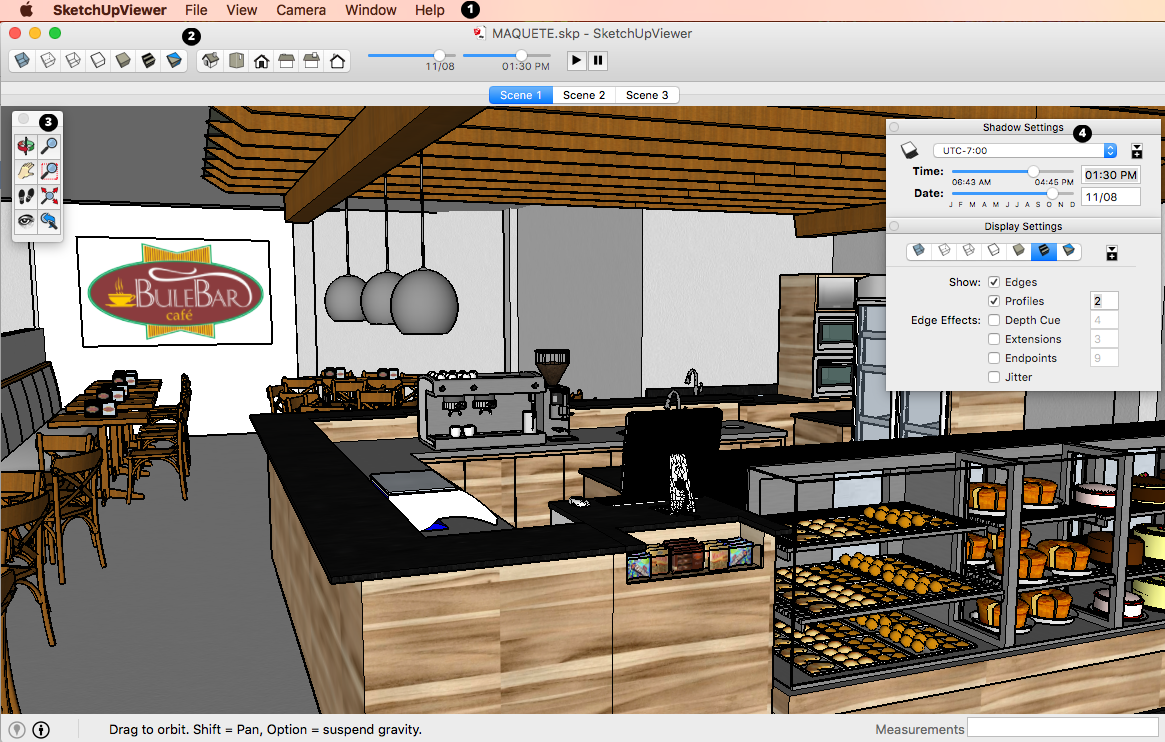
Touring the interface
After you open the model file, SketchUp Desktop Viewer offers menus, toolbars, and settings that enable you to explore the model in 3D. In this quick tour of the interface, the numbers in the following list correspond to the callouts in the following figure:
- Menu bar: Select a menu to see the options it offers.
- Toolbars: With the toolbars, you can access 3D viewing tools quickly and easily. To change what toolbars are available, select View > Toolbars and, on the submenu that appears, select a toolbar you want to see or deselect a toolbar you want to hide.
- Trays: The trays hold settings for viewing the sun and shadows and changing how the model’s edges and faces appear. To toggle the tray visibility, click the arrow to the left of the tray’s name. To hide the entire tray area, click the X in the upper-right corner of the Default Tray title bar. To see the trays again, select Window > Default Tray > Show Tray.
- Menu bar: Select a menu to see the options it offers.
- Toolbars: With the toolbars, you can access the display settings and the standard views quickly and easily. To change what tools are available, select View > Customize Toolbar. In the dialog box that appears, drag a tool you want to see onto a toolbar. Select View > Hide Toolbar to hide the tools.
- Tool palette: The palette contains handy camera tools. To toggle the palette’s visibility, select View > Tool Palette.
- Settings windows: These windows hold settings for viewing the sun and shadows and changing how the model’s edges and faces appear. To toggle the window visibility, select the window’s name from the Window menu.
Printing a model
When you print from SketchUp Desktop Viewer, the printout reflects the current view of a model. Before you print, you can use the viewing tools and the shadows and display settings to adjust the view. You find the print options on the File menu. When you’re ready to print, you can
- Set which printer, orientation, and paper you want to use.
- Choose printing options that SketchUp Desktop Viewer offers.
- Choose options specific to your printer.
The print options in SketchUp Desktop Viewer work the same way they do in SketchUp and may vary depending on your printer and operating system.