Interacting with a Model in Tabletop Mode
The two main viewing modes for working with models in Sketchup Viewer for VR are Tabletop mode and Immersive mode. When viewing a model in Tabletop mode, you’re able to treat your digital model as though it were a physical scale model. You can walk around your model viewing it from every side in full 3D, as if it were sitting in front of you, on a table top.
After you open and anchor a model, it appears in Tabletop mode by default. If you’re in Immersive mode, click the Tabletop icon ( ).
).
To interact with the model in Tabletop mode, follow these steps:
- Move your controller into view and direct your cursor over the model. You see the Toolbar icon, as shown in the following figure.
- Click the model. The Model Viewer toolbar appears, as shown in the following figure.
- Click the Move icon (
 ). Note: The Move tool is shown by default. If another transformation tool was most recently used, that tool will be visible in the toolbar instead.
 - Select an option to move, scale, rotate or re-anchor the model. The following list explains how each action works.

Here’s how the interactions work:
- Move: Click the Move icon (), and then you can click and drag the model to move it along its anchored surface. You can also manually move the model along each axis using the x, y, and z arrows.
- Scale: Click Scale (
 ), and you see a list of preset scale options. Use these commands to set a specific scale for your model. Select the Custom tab, and you can define a custom scale. Select the Manual tab to adjust the scale in each axis using the x, y, and z arrows.
 - Rotate: To spin the model around on its origin, click Rotate (
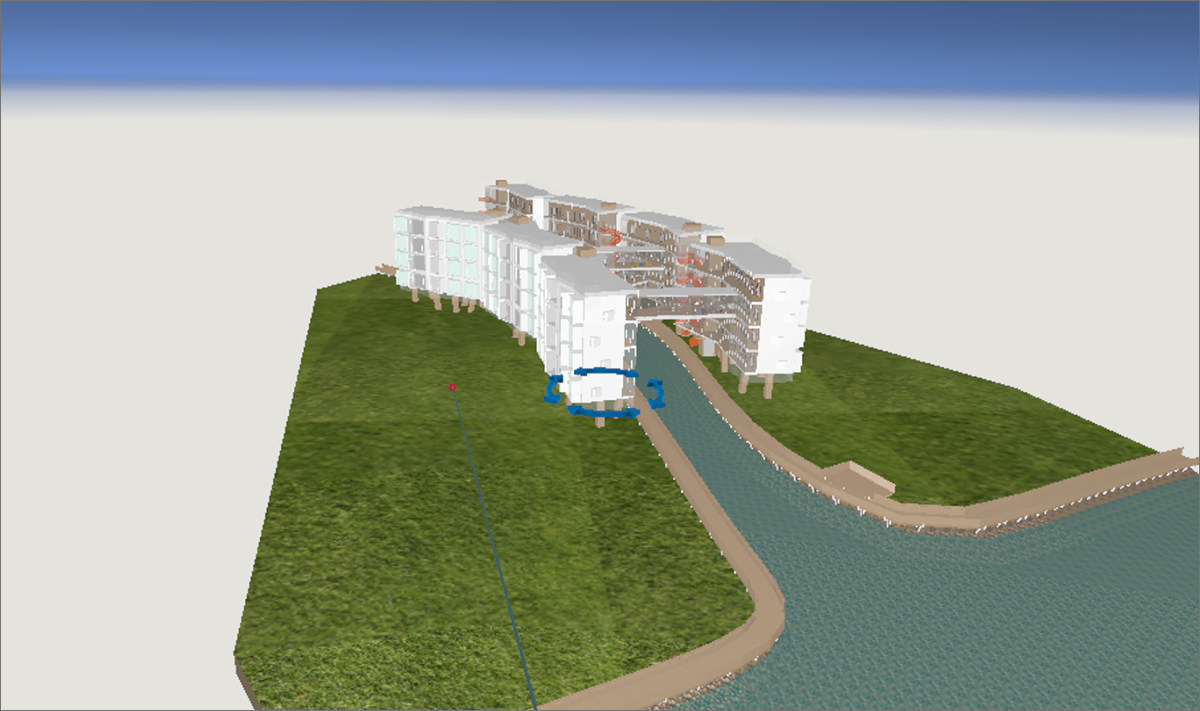
 ), and a blue rotation symbol appears, as shown in the following figure. Then, click and drag horizontally on your model to spin the model. You can also use the trackpad to rotate the model or, to control the rotation about each axis manually, use the x, y, and z arrows.
- Anchor: Click the Anchor option (
 ) to relocate the model origin. After you choose the Anchor command, the model attaches to your cursor. Move the cursor to a new location and click to place the model.
Tip: Alternately, while the Scale command is active, click and drag vertically on your model to manually define a nonstandard scale.
Tip: For details about the Tape Measure, see Measuring Dimensions. For help with the Collaboration option, see Collaborating within a Model.
Note: To see details about an entity in your model, click the Entity Information icon () and then click an item in your model. On the Information tab, shown in the following figure, you can toggle between viewing Entity Information and Entity Hierarchy.
) and then click an item in your model. On the Information tab, shown in the following figure, you can toggle between viewing Entity Information and Entity Hierarchy.