Exploring a Model in Immersive Mode
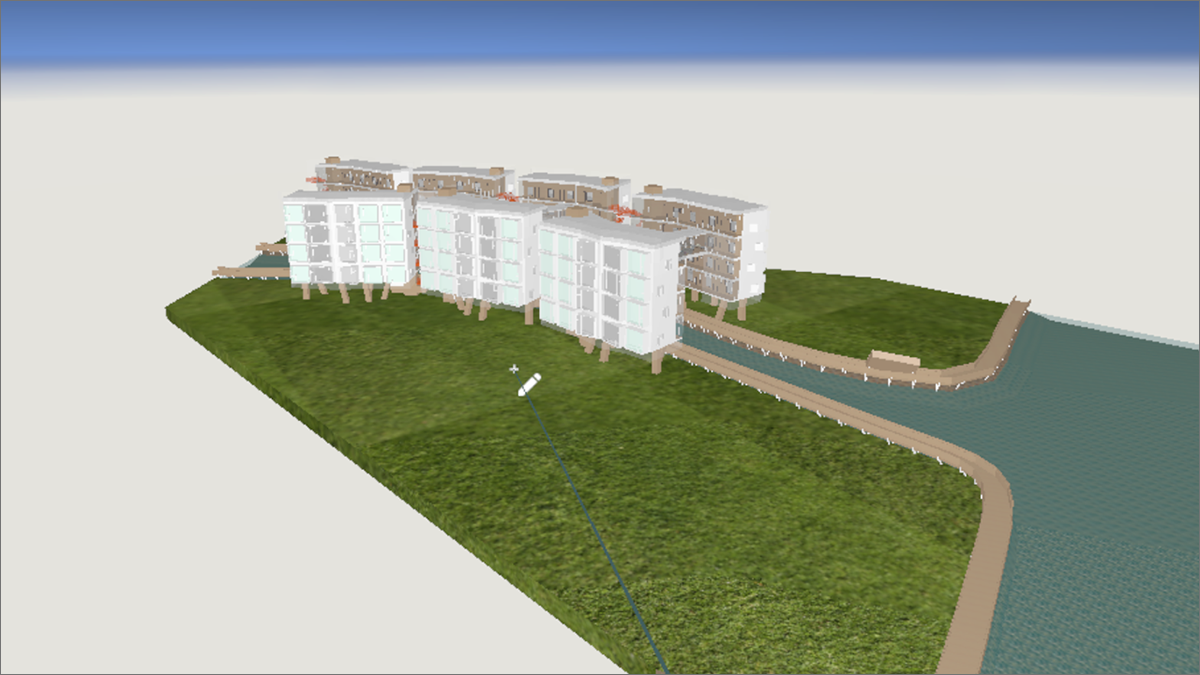
In Immersive mode, you step into your model at full, 1:1 scale, as shown in the following figure. Only moments after you create a model in SketchUp, you can experience what a space will really feel like!
The following sections include information to help you experience your project in Immersive mode.
Table of Contents
- Switching to Immersive Mode
- Navigating in Immersive Mode
- Setting Your Navigation Options
- Leaving Immersive Mode
Switching to Immersive Mode
After you open and place a model, it appears in Tabletop mode by default. From Tabletop, you can switch to Immersive mode by following these steps:
- Move your controller into view and direct the cursor over the model. You see the Toolbar icon, as shown in the following figure.
- Click the model. The Model Viewer toolbar appears.
- Click the Jump to Immersive icon (
 ).
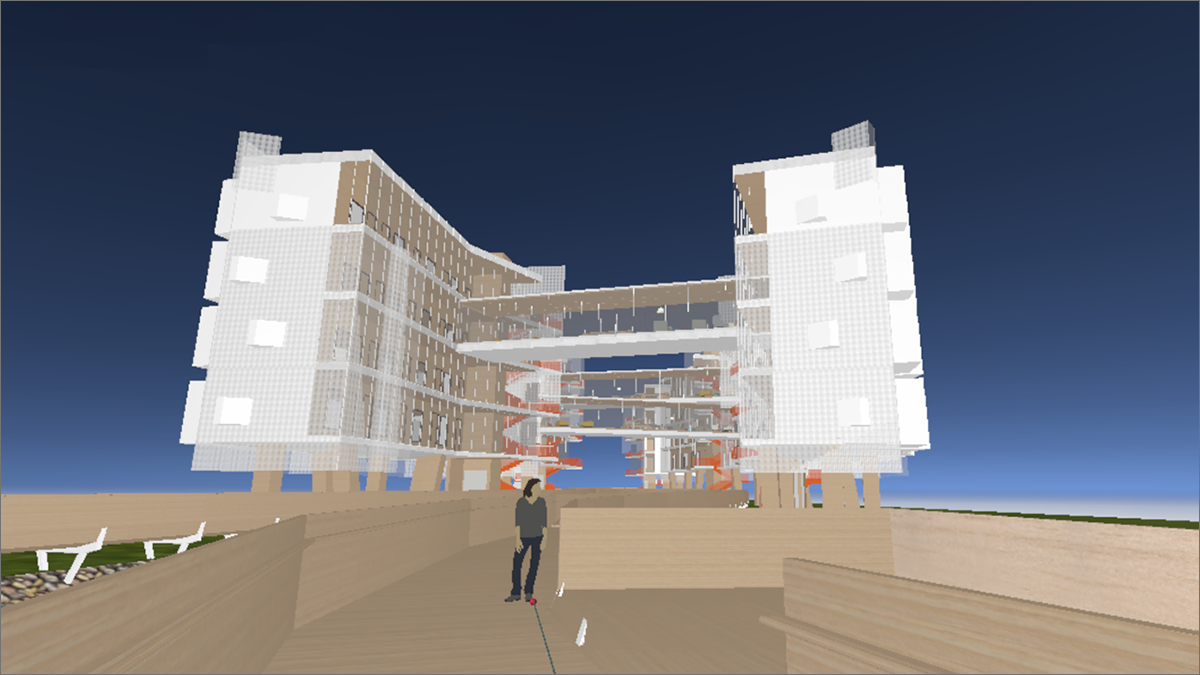
). - Click a surface on the model, and you jump to that point in Immersive mode. Now, you can move through your model in real space and view it in full 3D, as if you’re walking through it.
- To move forward through the model, press and hold the trigger. As long as you hold down the trigger, you move in the direction you're facing.
- To stop, simply release the trigger.
- To toggle between Walk or Jump, click Mode, as shown in the following figure.
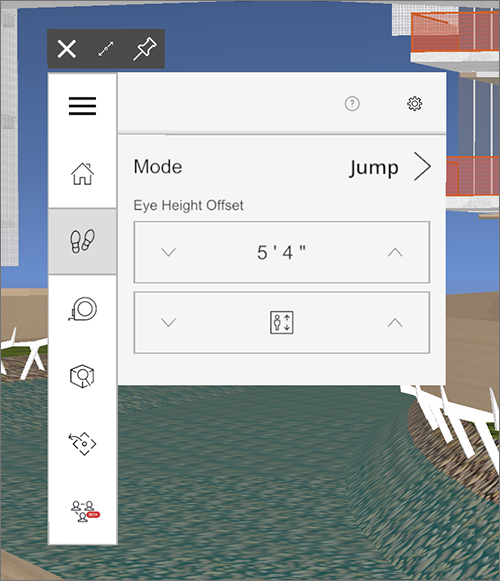
- To adjust your eye height, enter an offset relative to your own eye height. In VR, your virtual eye height is true to your own eye height. To set an offset, click the eye height value and enter an offset value. To change the eye height incrementally, click the arrows on either side of the offset value.
- The Elevator is ideal for moving vertically through a multistory structure. To jump vertically to the next horizontal surface, click the up or down arrows either side of the Elevator icon (
 ). You can also click the upper or lower area of the trackpad.
 - To change your navigation settings, click the Settings icon (
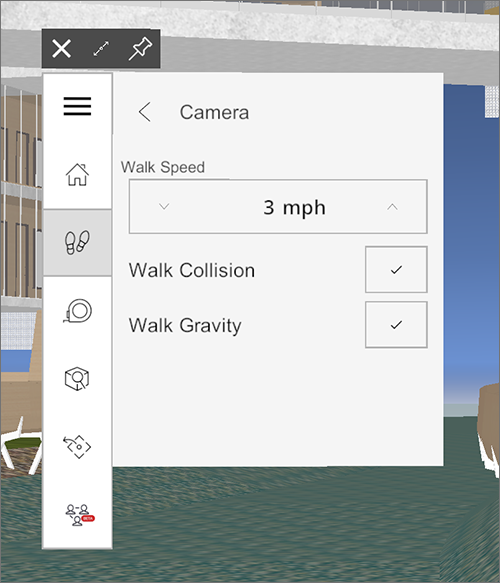
 ) in the upper-left corner of the navigation options panel. You can adjust the following settings, as shown in the following figure:
- Walk Speed: Click the up and down arrows to change the speed at which you move through the model. The default setting reflects the average walk speed for a human, which is 3 mph.
- Walk Collision: This setting controls whether you can walk through surfaces in the model. If you want to be able to walk through walls, click to clear the checkbox.
- Walk Gravity: This setting controls whether you fall to the ground after walking off a balcony (checkbox checked), or float like a butterfly (checkbox unchecked).
- To return to Tabletop Mode, click the Tabletop icon (
 ).
). - To return to the Home Screen and close the current model, click the Home icon (IMG).
- The Main Menu (
 ) at the top of the toolbar includes various panels for managing Layer visibility, Map View and the Scenes Panel.
Navigating in Immersive Mode
When you first enter Immersive view, you’re in Walk mode by default:
You can also navigate the model using the Jump tool, as discussed in the next section, Setting your navigation options. With Jump, your cursor changes to a scale figure, that you can place at a location in the model where you’d like to go next.
To jump, position the cursor somewhere in your model and then click. If you aim your cursor at a wall, you will jump to the floor at the base of that wall.
Setting Your Navigation Options
While you’re in Immersive mode, you can adjust your navigation options. Click the model to access the Model Viewer toolbar. Then click the Navigate icon ( ) to access the following options:
 ) and then click an item in your model. On the Information tab, you can toggle between viewing Entity Information and Entity Hierarchy.
Leaving Immersive Mode
When you’re ready to leave Immersive view, you have the following options: