Will this building need shading and if so, where?
Use this page to:
- Get an understanding of the orientations most likely to need shading
- Determine the shading solutions that are likely to be most useful in providing that shading
- Visualise how different shading concepts work when it comes to blocking detrimental sun
Related articles:

How to use this feature
The page is broken up into 4 broad sections. We'll explain each section separately to help you understand how to use this feature.
Orientation selector.

Use this menu to choose which facade orientation you want information about shading on. Although we have only provided 8 orientations here, choosing the orientation that is closest to the one you are interested in will generally be good enough for the purposes of understanding trends.
Overall Recommendation and Climate Summary
You're looking at a couple of things here:
- Headline recommendation about shading glass on this orientation
- Some information about different sun characteristics and their frequency
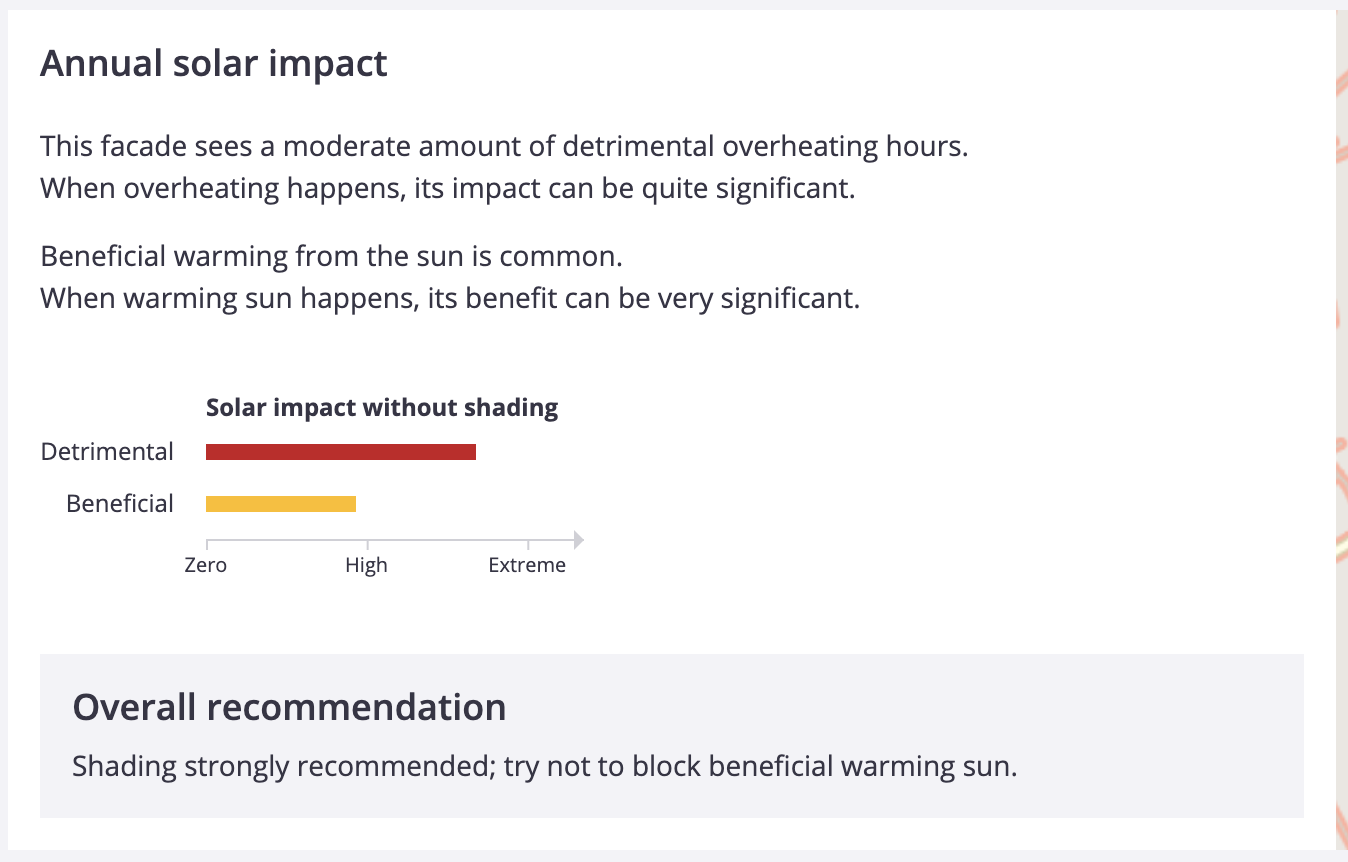
The headline recommendation offered relates to whether this facade orientation should include shading for glazed areas or not. In this statement, we've tried to capture the extent of the need, and also whether there is value in balancing the desire to block overheating sun vs letting in warming sun.
The information about different sun characteristics is there to help explain how different types of sun affect this orientation.
We talk regularly about 3 types of sky condition in PreDesign:
- Detrimental Overheating sun
- Beneficial Warming sun
- Benign skies (mainly cloud, sun passive)
Detrimental overheating sun happens when the sun shines on the glazing while it is warm enough outside for the building to not want that heat. This is described as "detrimental" because the effects are usually negative - extra cooling energy and/or reduced thermal comfort.
Beneficial warming sun happens when the sun shines on the glazing while it is cold enough outside that the building actually needs that heat. This is described as beneficial, because the effects are usually positive - less heating energy and improved thermal comfort.
Cool/Cloudy skies happen when it is cloudy or when the sun is simply not shining on that facade. This is described as benign, because during these times there is not much sunshine affecting the spaces at the facade.
Both the frequency (how often different conditions occur in hours per year) and the intensity (how hot the sun is and how hot or cold it is outside) are described.
This is our way of simplifying the state of the sun so that you can be better informed about whether shading will be useful or not.
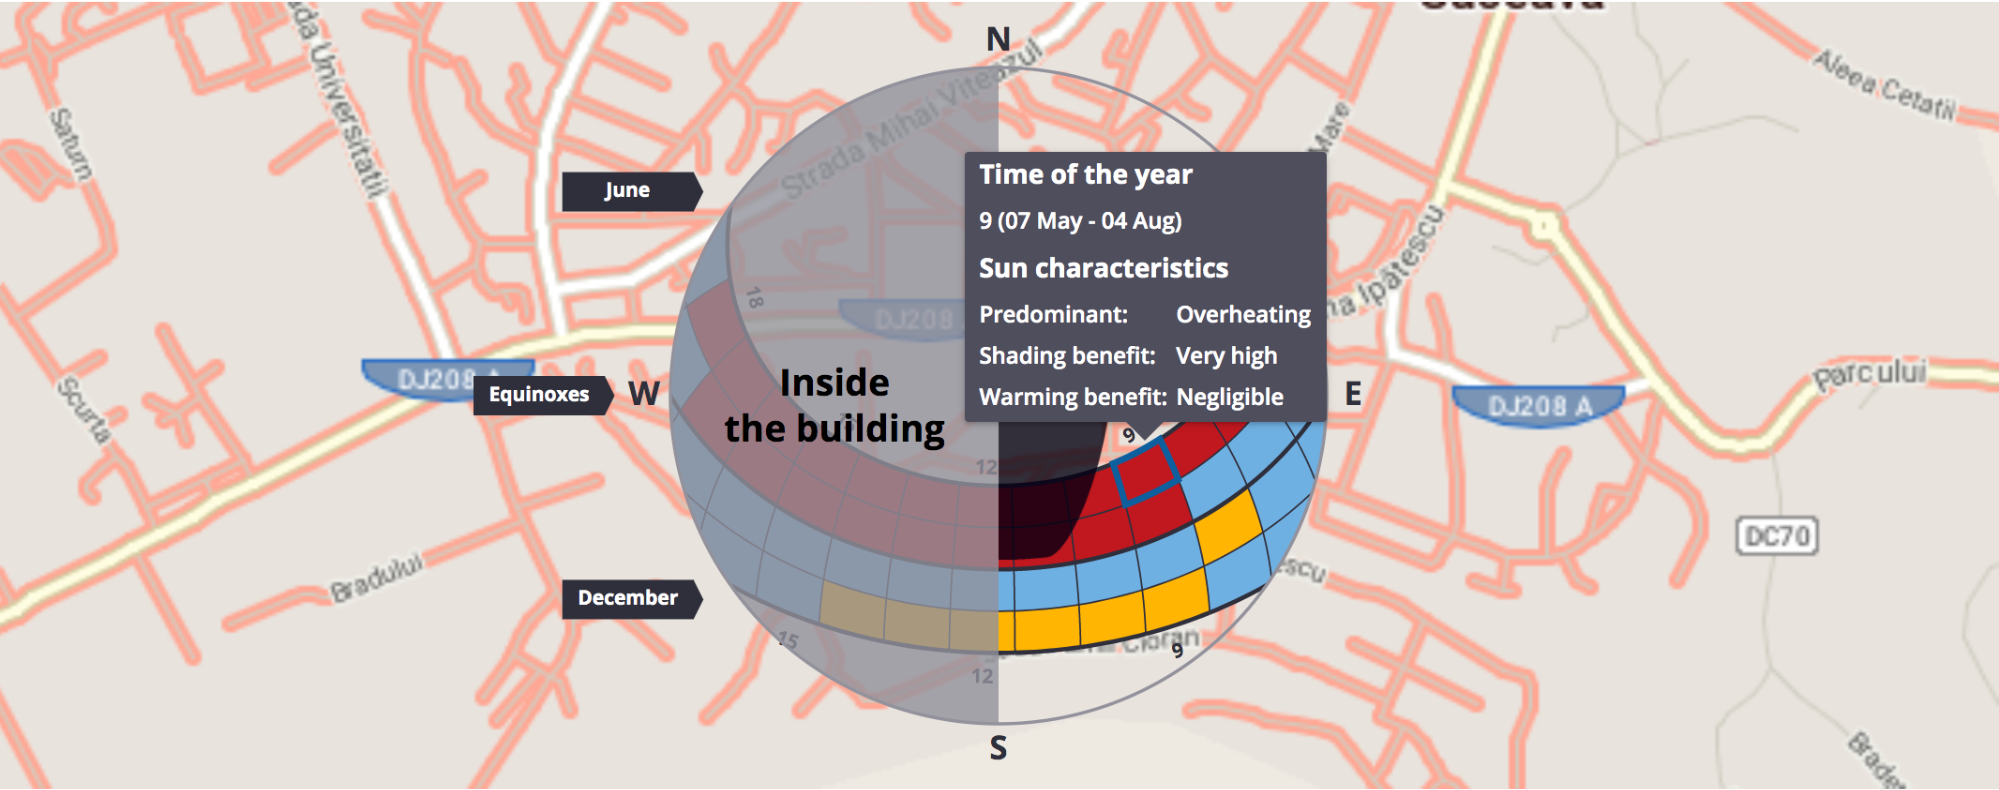
Sun Path Diagram
If you don't understand or can't remember what a sun path diagram is, check out this primer.
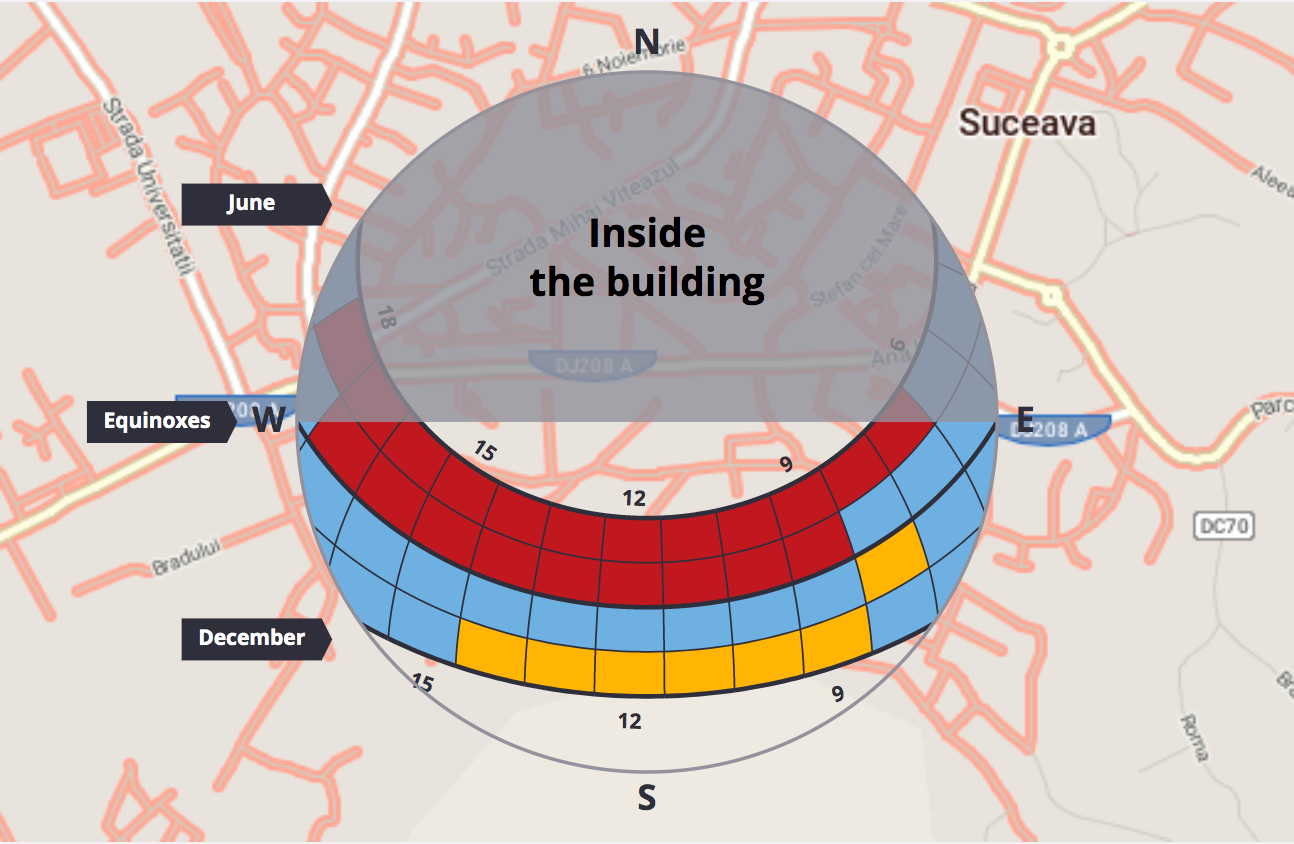
This diagram shows graphically which parts of the sky have the worst overheating sun. You can use this to help see why different shading options are effective and to get an idea of what kind of shading system is needed.
The diagram shows how the sun tracks across your site at different times of the year. To make it simple, we've divided it into patches and associated each patch with a set of dates and a single time of day. Imagine each patch is a part of the sky. The sun is in that part of the sky for those times of the year. It represents about 91 different hour-long periods over the year.
The patches are coloured based on the predominant conditions during the times that represent the patch. They are different for different building types. This is a characterisation to simplify the diagram based on historical weather.
Generally speaking:
- You would ideally design shading for the red patches (as seen on the rows between the June Solstice and the Equinox above)
- You probably don't want to shade the yellow patches or the blue patches (especially the yellow ones).
You can see more on this when you click on a shading strategy card.
Shading Strategy cards
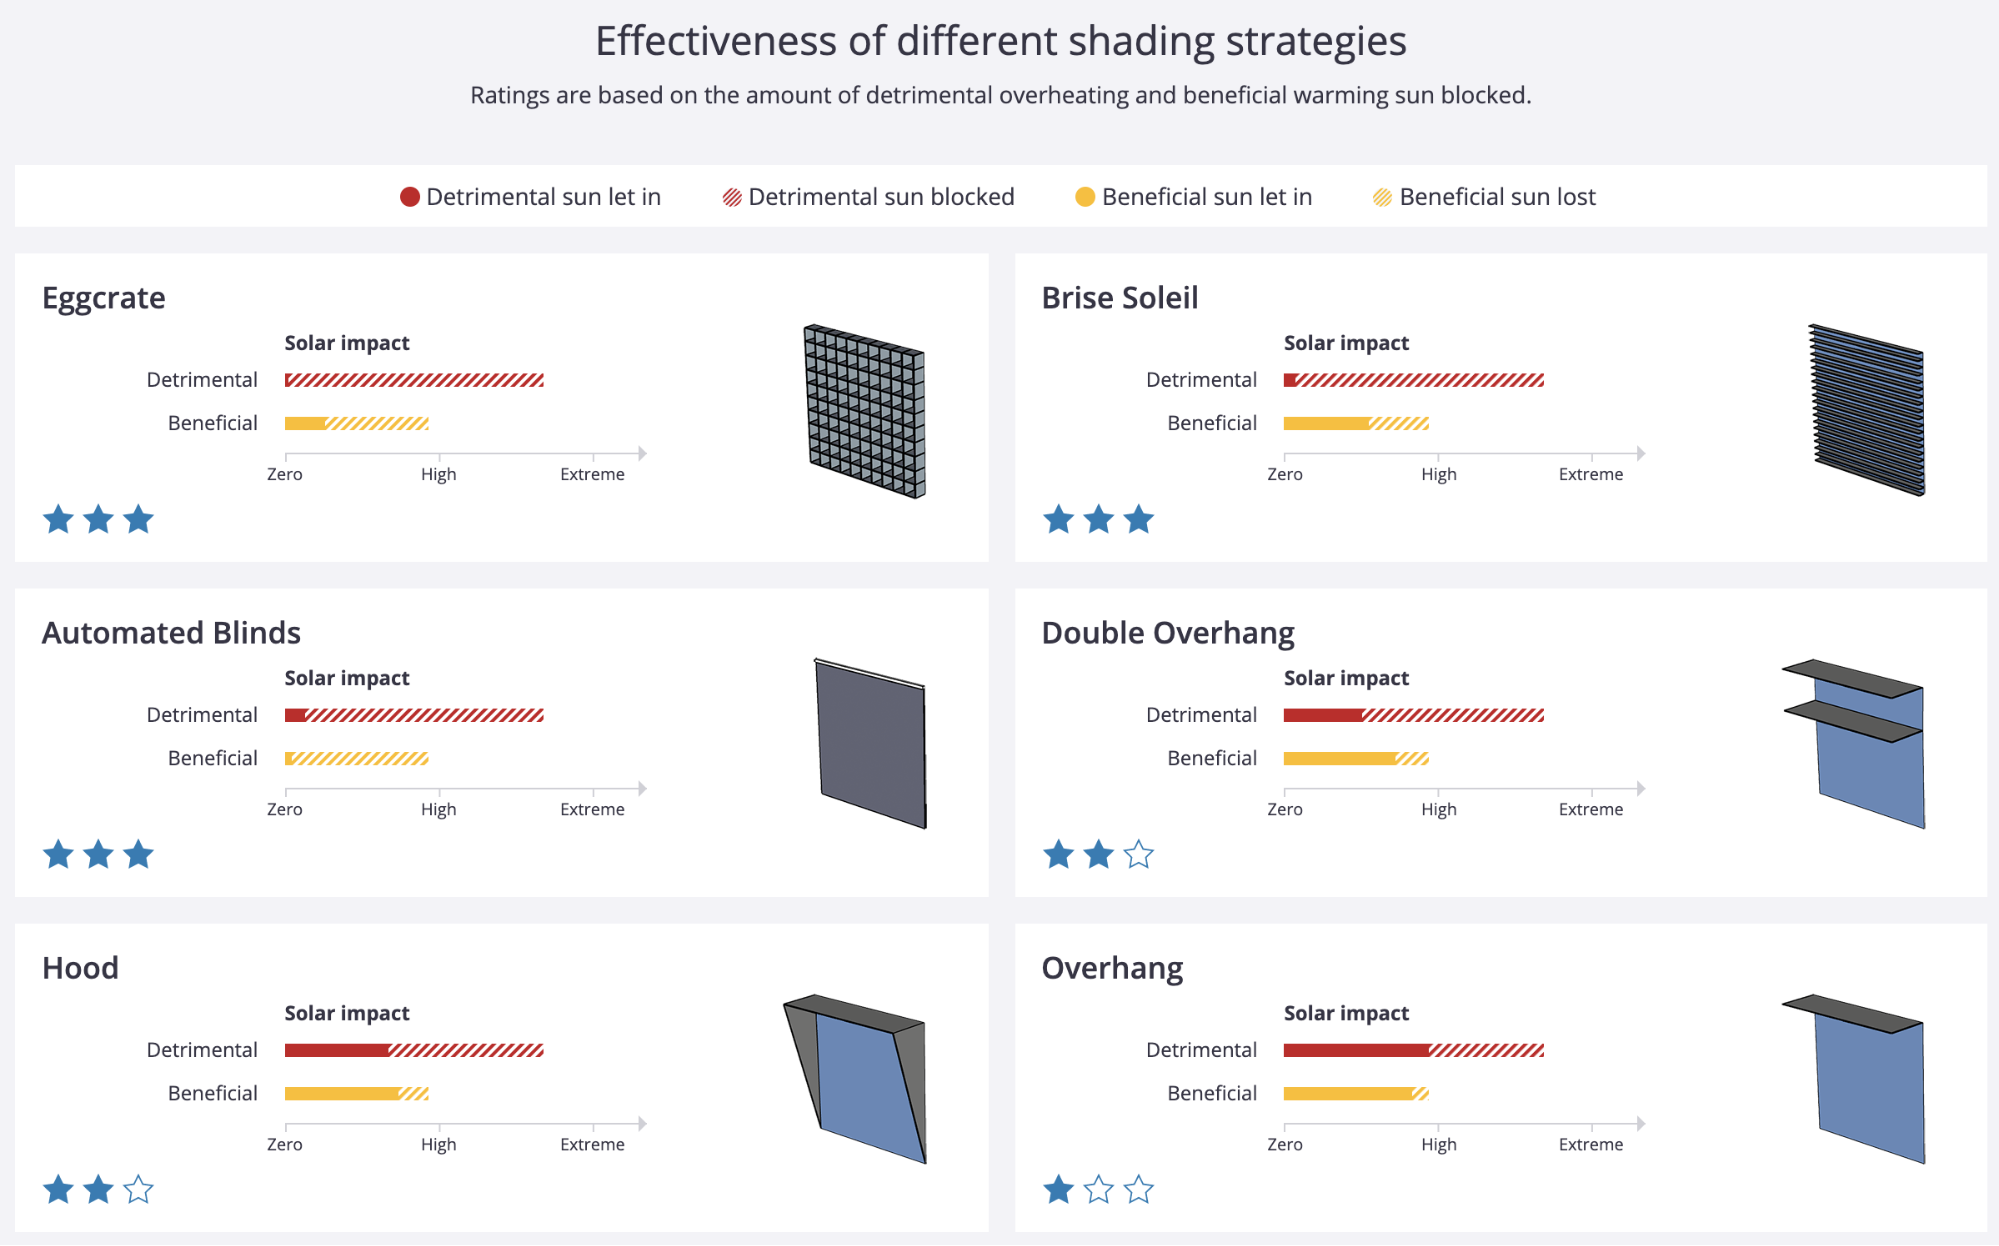
This section is aimed at steering you in the right direction for shading strategies. We try to show which strategies will work best on an unobstructed facade, based on a typical size and configuration.
Each card represents a different approach to shading the facade. On the card we offer a star rating which can loosely be interpreted as follows:
- Three stars = Blocks a very high proportion of detrimental sun, with the actual amount blocked also being substantial.
- Two stars = Blocks a high proportion of detrimental sun, with the actual amount blocked also being substantial.
- One star = Blocks a reasonable proportion of detrimental sun, with the actual amount blocked also being meaningful.
- Zero stars = Does not block a meaningful amount of detrimental sun.
Facades that are in cooler climates may not show any 3-star options, even for strategies that appear to block all overheating sun. This can happen when there is not enough detrimental sun to block a "substantial" amount.
The effect of beneficial warming sun can modify the star rating by up to half a star. The more a shading option blocks beneficial sun, the lower we score it, but the overriding goal is to rank options by how well they manage detrimental sun.
Shading Details
When you click on one of the shading strategies, you'll get a bit more detail about the strategy, in this overlay.
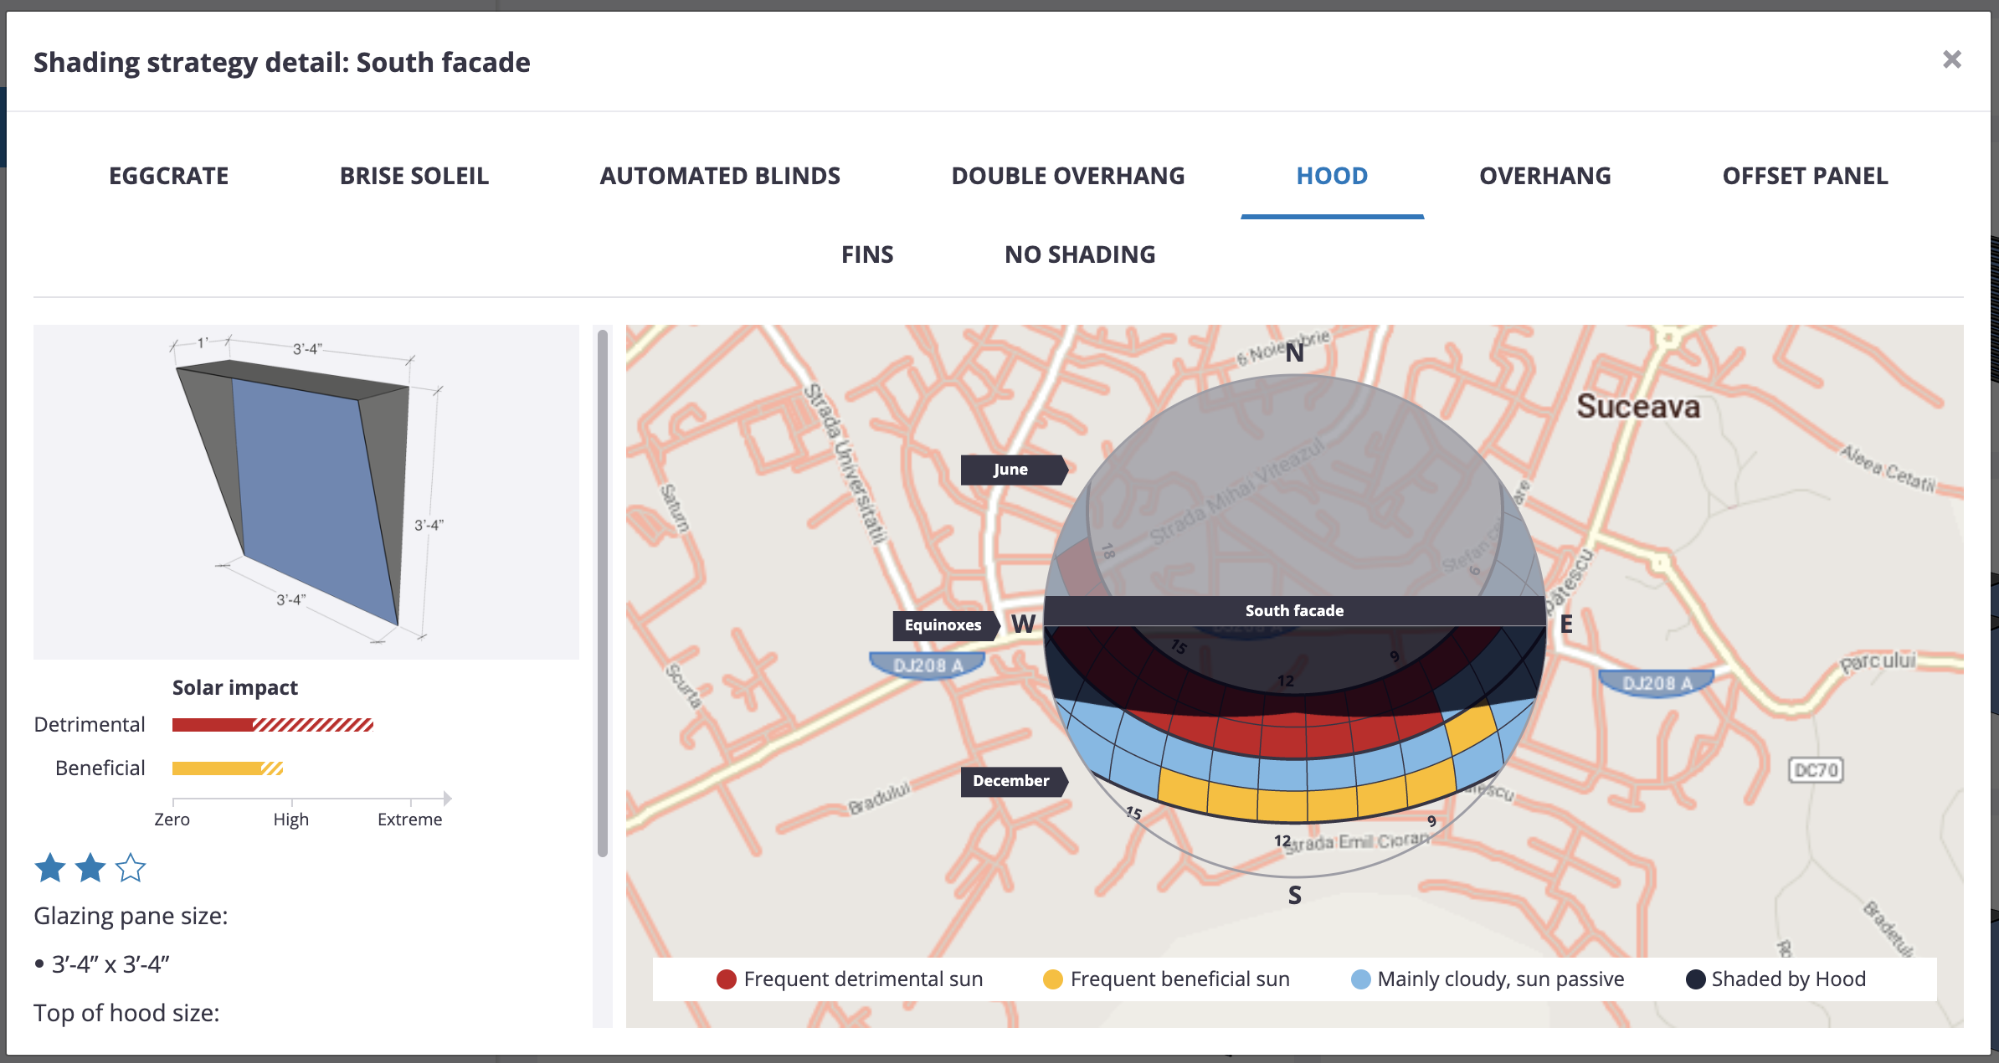
Here you can find out a bit more about what the assumed dimensions of the shading are, and see which bits of the sun path the shading blocks. (note "blocking" means that at least half the glass is shaded by the shading device).
For example, the red segments here need to be shaded the most because they overheat your building during the warm times while not really helping during the cooler times. Clicking on the segments will give you an idea of what happens during these blocks of time and what to do with them.
Navigation at the top of the overlay window allows you to scroll between options to see how different designs compare. You can use this to better understand why some options work better than others and to explain to other people in your team why particular solutions are useful. The options are ranked best to worst from left to right.