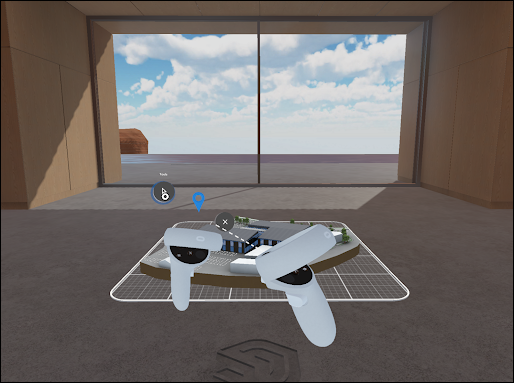
You can view the available SketchUp Viewer tools in the Tools menu (![]() ). You can open the Tools menu using the summon menu (AB or XY buttons) or the shortcut menu on your left controller (
). You can open the Tools menu using the summon menu (AB or XY buttons) or the shortcut menu on your left controller (![]() ). What appears in the Tools menu depends on if you are in Tabletop or Immersive mode.
). What appears in the Tools menu depends on if you are in Tabletop or Immersive mode.

Tabletop Mode Tools
Transform
In the Transform (![]() ) panel you can:
) panel you can:
- Control the rotation of models on the table.
- Control the height of the table.
- Toggle table visibility.
- Reset your model to its original position.
Tape Measure
The Tape Measure (![]() ) tool helps demonstrate the size of things in your model. You can measure the distances between the points, edges, and faces that make up your SketchUp model.
) tool helps demonstrate the size of things in your model. You can measure the distances between the points, edges, and faces that make up your SketchUp model.
You control the Tape Measure tool with the controller that activates it. When activated, the Tape Measure tool will create a dashed ray extending from your controller and an inference to a point, edge, or face.
Note: The Tape Measure tool remains active even while navigating or otherwise manipulating your model. That means you can start measuring, teleport to a different location or move your model, and then click a point to complete a measurement.
You can adjust how the Tape Measure tool works in the Tape Measure panel:
- Units of Measurement - The unit of measurement you see with the Tape Measure tool corresponds to the unit setting of the current model. You can change the unit of measurement using Unit Preferences in the Tape Measure tool panel.
- Visibility - You can toggle the visibility of measurements you've made or even delete them from your model.
Any measurements you make will not be saved to your model. Measurements taken in Tabletop mode are not visible in Immersive mode.
Immersive Mode Tools
Navigation Options
Exclusive to Immersive mode, use the Jump panel (![]() ) to:
) to:
- Set Eye Height using the up/down arrows.
- Navigate vertically through multi-level structures with Elevator.
- Jump to another location in your model, up to 50 feet or about 15 meters.
Using the Scenes Panel
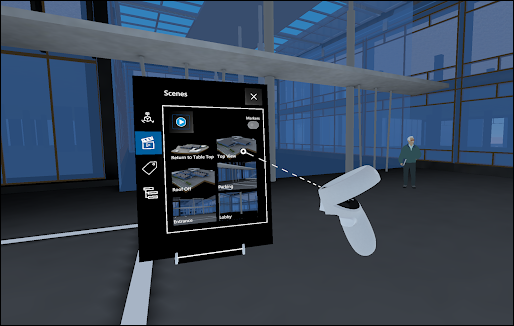
If your model contains scenes that were created in SketchUp you will have the option to navigate to those scenes in SketchUp Viewer for Quest using the Scenes panel (![]() ).
).

You can jump to any scene in your model by clicking on its thumbnail. All scenes are viewed in Immersive mode by default.
You can also access Presentation Mode and toggle the visibility of Markers.
Presentation Mode
You can activate Presentation Mode (![]() ) from the Scenes panel. Presentation Mode helps you show off your designs using a simple interface.
) from the Scenes panel. Presentation Mode helps you show off your designs using a simple interface.

A carousel containing a thumbnail representing each scene in your model appears when you activate Presentation mode. Clicking on a thumbnail changes the view to that scene. Up to five scenes appear in the carousel at a time. If you have more than five scenes use the arrows to the left and right of the carousel to navigate to your additional scenes. If your SketchUp model does not contain any scenes a "No Scenes Available" message will appear instead.
With Presentation Mode you can present one scene or a series of scenes using the following tools:
- The Lock Screen (
 ) option disables all navigation and removes most UI elements. Use this mode when you want to avoid someone viewing your model clicking on the wrong button. You can still use your controller to move between scenes by tilting the thumbstick sideways.
 - The VCR controls (
 ,
,  ) help you navigate between scenes. These controls require at least one scene to work, but work best when you have two or more.
 - Help appears at the left end of the context menu and provides a cheat sheet with all available Presentation Mode navigation controls.
- Use the X at the right end of the context menu to close Presentation mode. When closing Presentation Mode, the current view of your model is maintained and the regular UI re-appears. When exiting the Presentation Mode you will be placed in Immersive mode, even if you were in Tabletop mode before entering Presentation Mode.
Using the Tags Panel
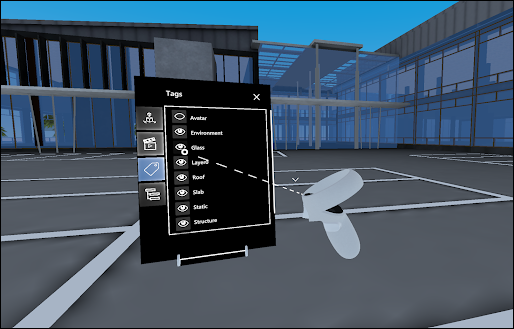
The Tags panel appears in both Tabletop and Immersive mode. If your SketchUp model contains Tags you can view them in the Tags panel.

Toggle visibility in the Tags panel by pointing the ray of either controller and pressing the trigger. You can scroll through the list of Tags and layers using the up and down arrows on the right of the panel.
For more information about Tags see Controlling Visibility with Tags.
Using the Outliner Panel
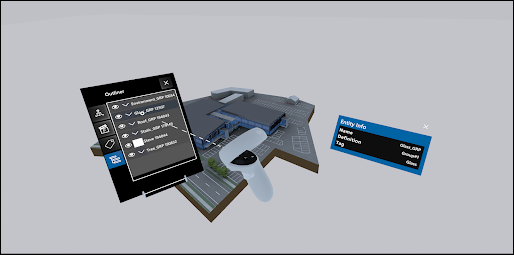
The Outliner panel appears in both Tabletop and Immersive mode. The Outliner panel contains a hierarchical view of all the groups and components in a SketchUp model.

You can scroll through the list using your controller. If an item on the list contains multiple objects you can point the ray from your controller on the arrow next to it and press the trigger to expand it.
You can also toggle the visibility of each item listed in the Outliner panel using the icons to the left of each entry.
When you select the name of an object in the Outliner panel, a bounding box appears around that object in your model to help you locate it. You can also view the Entity Info panel for that object.