SketchUp for Desktop, SketchUp for iPad, and SketchUp for Web all offer AI Render. How you access and use AI Render depends on the version of SketchUp you are using. In all versions of AI Render, image generation can take between 13 and 20 seconds. Processing time may vary based on the speed of your internet connection and the amount of available cloud computing resources. To create new images, change your prompt if necessary and click Generate again.
SketchUp for Desktop
You can find AI Render (![]() ) in your Extensions menu. Once you download the extension, the AI Render toolbar will be available. In Windows you can add the toolbar to your existing one, and in MacOS you can add AI Render through your customization options.
) in your Extensions menu. Once you download the extension, the AI Render toolbar will be available. In Windows you can add the toolbar to your existing one, and in MacOS you can add AI Render through your customization options.
Activating AI Render opens up its own window. This window can be moved to anywhere in the drawing area or even outside of the main SketchUp window. The size of the AI Render window determines the quality of the rendered image. That means a larger window will generate higher quality output. Resizing the AI Render window will not alter your model’s aspect ratio.
When you first open the AI Render window, a snapshot of your model appears along with the AI Render Toolbar and the Gallery. Changing your camera angle or the aspect ratio of the SketchUp model viewport adjusts the snapshot of your model inside the AI Render dialog.

The AI Render Toolbar features four generative tools to help you create AI Render output:
- Text Prompt (
 ) – A text field where you can add in text prompts that represent your desired output. You can also use one of SketchUp’s Style Presets that include both regular and negative prompts.
 - Erase (
 ) – Use this tool to select an area in a generated image and erase unwanted artifacts by imitating the area around them.
 - Paint (
 ) – Activating this tool allows you to select an area and generate an additional prompt to just the selected area.
 - Sketch (
 ) – Combine a text prompt with a sketch you create to add specific elements to a generated image.
For more information on how to use these tools, see Generating Output with AI Render.
The toolbar also features some additional options that help you interact with generated images:
- Add Scene (
 ) – Click to add the current generated image as a scene in your model. For more information on how this works, see Saving and Sharing AI Render Output.
 - Refresh (
 ) – Updates what you see in the AI Render window to match what’s in your main SketchUp window. Click Refresh if you have made changes to your model and want to generate another image using AI Render that includes those changes.
 - Save (
 ) – Saves your generated image on your device.
When you use any of the generative tools, generated output saves to the Gallery. Your Gallery contains all images generated by AI Render in the current session as well as any images generated in the last 30 days. For more information, see AI Render Gallery.
SketchUp for iPad
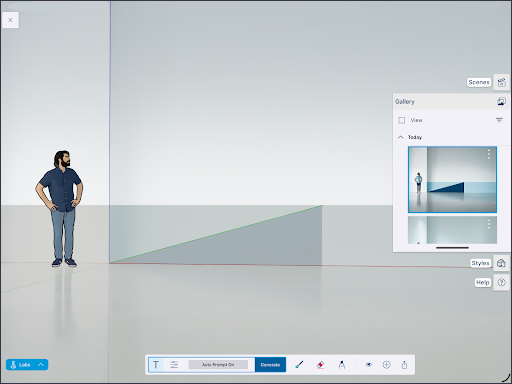
Clicking AI Render (![]() ) from the expanded toolset opens AI Render in full-screen mode. When you first open AI Render, your model view remains and the AI Render Toolbar and the Gallery appear. The Scenes, Styles, and Help panels will also remain available. You can still orbit, navigate around your model, and change model styles before generating images.
) from the expanded toolset opens AI Render in full-screen mode. When you first open AI Render, your model view remains and the AI Render Toolbar and the Gallery appear. The Scenes, Styles, and Help panels will also remain available. You can still orbit, navigate around your model, and change model styles before generating images.
AI Render in iPad contains a few more options than the desktop version:
- Opacity (
 ) - Controls the opacity of the generated image displayed on screen, allowing you to blend your AI Render generated image with your SketchUp model behind it.
 - Share (
 ) - Opens the native iOS sharing options, allowing you to send or save the current on screen AI Render.
To exit, click the X in the upper left corner.
SketchUp for Web
Similar to iPad, you’ll find AI Render in the Expanded Toolset in SketchUp for Web. SketchUp for Web’s interface looks a lot like what you see in iPad, but also includes camera tools like Rotate, Pan, and Zoom on the left side.
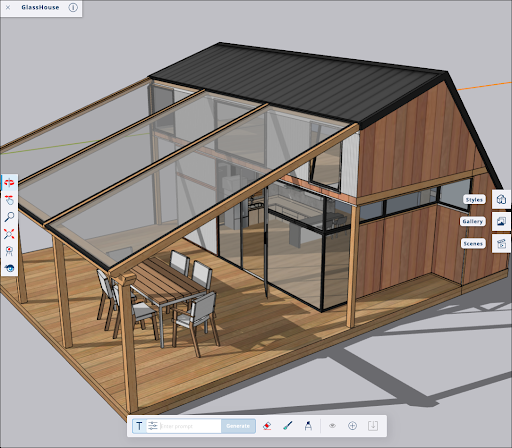
To exit, click X in the upper left corner next to your model’s name, or press ESC on your keyboard.