In LayOut's 2D paper space, you have the most control of the quality and styling of the linework in your SketchUp model.
To get the most out of your model in LayOut, you'll want to set up scenes that capture model views and styling, and also assign tags to objects whose lines you want to style distinctly. For instance, the image below is one model viewport pointing to an orthographic scene created in SketchUp where separate tags were applied to Walls, Windows, Doors, and Furniture.

This article covers the basics of setting up a SketchUp model viewport to get the linework you want out of LayOut.
Table of Contents
- Set the viewport line scale
- Choosing a rendering mode
- Style linework for an individual tag
- How tag overrides in LayOut work
Set the viewport line scale

To control the style of linework for a model viewport inserted into SketchUp, first select an inserted SketchUp model, then open the SketchUp Model panel. (Window & SketchUp Model). This utility is where you control how your viewport displays in 2D.
To control the styling of linework in your model, start by setting the Line Scale in the Viewport section at the top of the panel.
For the entire viewport, Line Scale defines the stroke width of lines and also the dashes scale of patterns you've assigned in SketchUp. If you want to give all the lines in your viewport the same weight, you can use the stroke width dropdown.
If you want some lines to have one weight and others to have different weights, skip ahead to "Style linework for an individual tag".
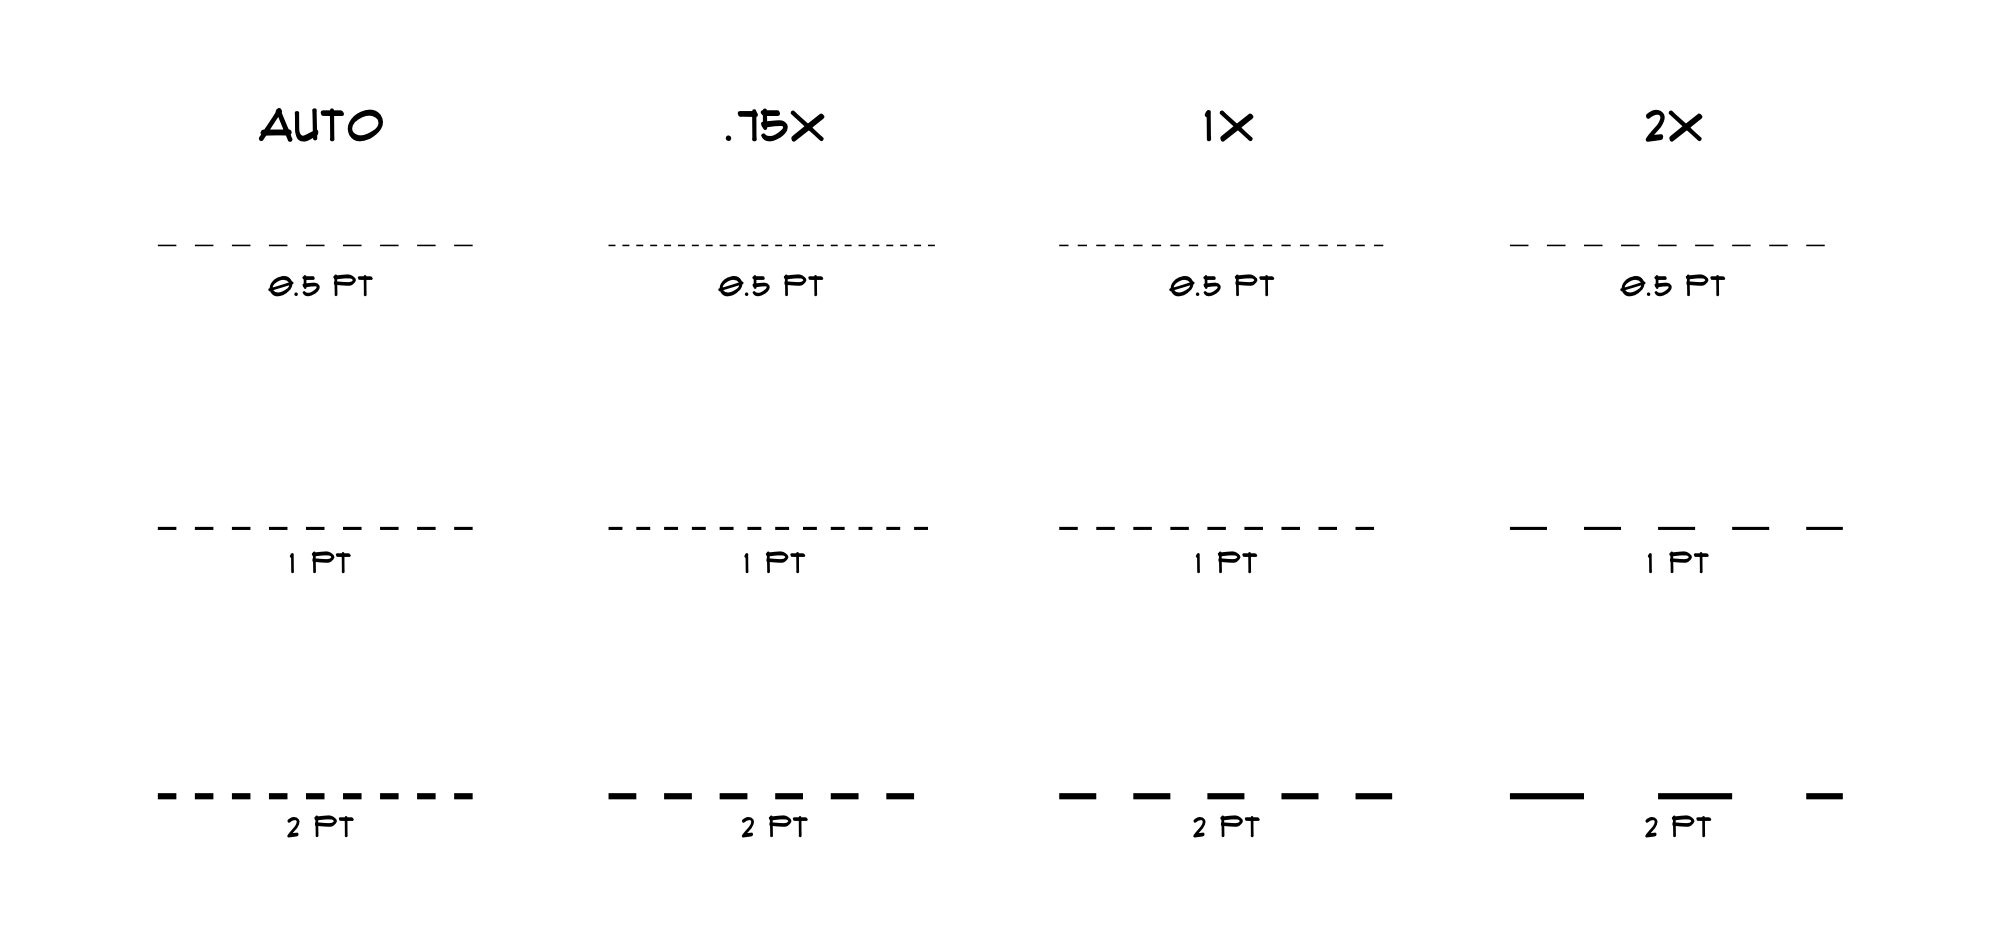
By default, viewports are assigned a .5 pt stroke width and the 'auto' dash scale. If you have applied a dash pattern in SketchUp, the auto dash scale will preserve the scale of the pattern as you increase or decrease stroke width.
Choosing a rendering mode
Rendering mode is another important option in the Viewport section of the SketchUp Model panel.
LayOut has three rendering modes for viewing SketchUp models inserted into a document. Here's how each mode affect the styling of your viewport:
- Vector and Hybrid: These modes generate crisp, vector linework from the edges in your model. Vector is ideal and efficient for clean line drawings that do not feature image textures. Hybrid renders image textures, transparency, shadows, and crisp edges, but generally takes longer to re-render as you work.
- Raster: In this mode, lines are less crisp, but you can take advantage of additional display possibilities and rendering styles such as sketchy edge styles, back edges, fog, and depth que. Transparent faces tend to render best in Raster mode.
Style linework for an individual tag
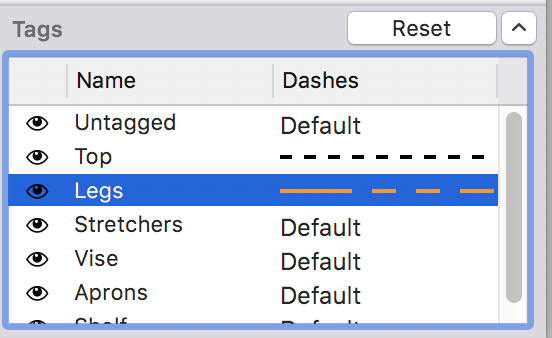
Assigning tags to objects is what enables you to control their line styling distinctly in LayOut. Open the Tags section of the SketchUp Model panel to start styling the lines associated the each tag in your model.
To edit a tag's line style, click on the pattern next to its name. If no pattern has been assigned in SketchUp, click on the word 'Default' to pull up the tag's line styling dialog. When a tag is set to Default, the geometry on that tag will render according to the viewport Line Scale (see above).
In tag's line styling dialog, you can set the following style properties:
- Dashes: This dropdown applies a pattern to the linework of the tag. If you assigned a dash pattern in SketchUp, you'll see it here in LayOut. If you have not assigned a pattern, you'll need to at least assign your tag a solid line pattern (the first option in the list) to edit other properties.
- Color: Use the color picker to assign a color to tag linework.
- Scale: Set to 'auto' by default, this scale affects the rendering of the dash pattern you've chosen. The 'auto' setting preserves the scale of the pattern as you change edge width, but you can loosen the pattern by increasing the scale, or tighten it by decreasing the scale.
- Edge width: This field assigns a line weight to the tag linework.
When you are done changing properties, click OK to commit your changes and re-render your viewport. If you turned off Auto rendering, you'll need to click the 'Render' button at the top of the SketchUp Model panel.
How tag overrides work
When you make a change to the visibility or style settings that are also controlled in SketchUp - like shadow or fog settings, tag visibility, or line style -- that change is treated as an override on your viewport.
When you create a tag override by editing one of your tags in a viewport, you can update your SketchUp model and preserve the styling change of your override. Your tag styling change will even persist in any other viewport using the same model throughout your document. If you want to revert back to settings assigned in your SketchUp model, use the Reset option in the drop-down menu at the top of the Tags panel.
For line dashes, you can discreetly override your tag settings, allowing you to only change the line dash settings for that tag in that specific viewport. For example, if you wanted a wall in your model to have a solid line in one viewport, but line dashes in another, you can use a discrete override to do so. When you override a line dash, you can revert it at any time using Reset Dashes from the drop-down menu in the Tags panel.
You may also use the Reset All button at the very top of the panel to reset your viewport to its original state.
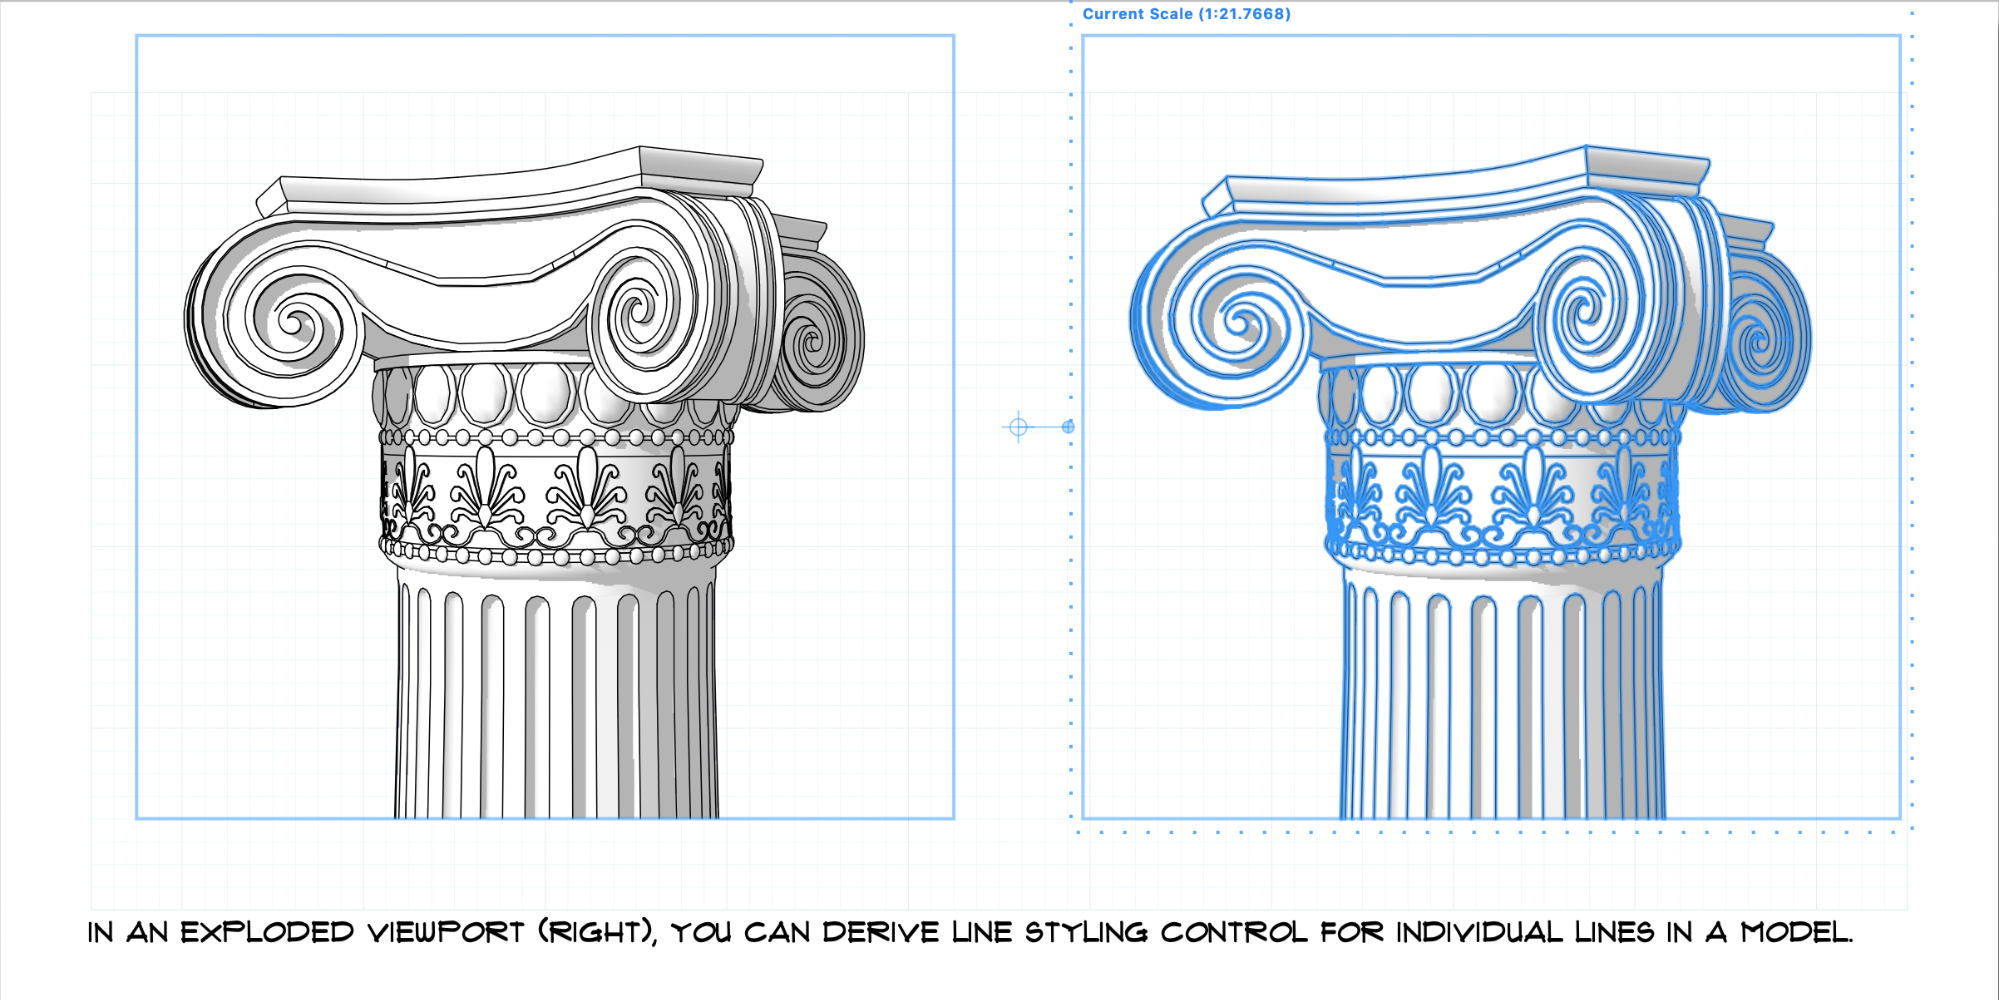
Explode a viewport to control individual lines
Alternatively, you can convert a SketchUp model viewport into an editable vector drawing and adjust the line widths and styles of individual edges using the Stroke settings in LayOut. To do that, follow these steps:
- Select the viewport you want to explode.Select Vector or Hybride from the rendering mode drop-down list.
- If the viewport needs to be re-rendered, click the Render button that appears.
- Context-click the SketchUp viewport and select Explode. Lines from the SketchUp model viewport become vector shapes.
- Edit the dashed lines via the Shape Style panel.