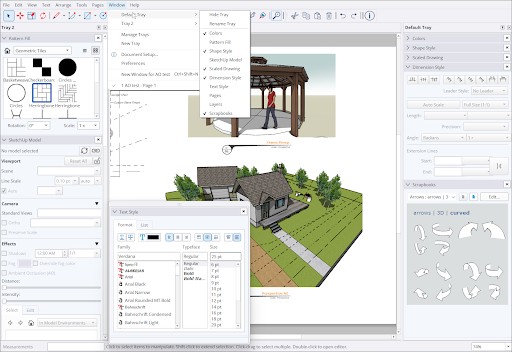
LayOut’s panels contain a wide range of features and options to help you create and fine tune your documents. The following panels are available:
- The Colors panel offers several ways to choose and organize the colors for your LayOut document. For more information see Choosing Colors.
- The Pattern Fill panel is where you can view and manage the patterns you can apply to shapes in your document. For more information see Filling Shapes with Colors and Patterns.
- The Shape Style panel provides options for choosing the colors, patterns, and line widths for shapes in your document. For more information see Filling Shapes with Colors and Patterns and Customizing Line Widths and Styles.
- The SketchUp Model panel contains all the options you’ll need to manage SketchUp models in your document. For more information, see SketchUp Models in LayOut.
- The Scaled Drawing panel helps you apply a scale to all geometry in your document. For more information, see Creating a Scaled Drawing.
- The Dimension Style panel helps you format how dimensions appear in your document. For more information, see Marking Dimensions.
- The Text Style panel provides a full range of options for formatting text in your document. For more information, see Formatting Text.
- The Pages panel contains options to help manage and create pages in your document. For more information, see Managing and Navigating Pages.
- The Layers panel is where you can create, navigate, and manage the layers of your document. For more information, see Using Layers.
- The Scrapbook panel is where you’ll find your scrapbooks containing visual elements you can use in your documents. For more information, see Working with Scrapbooks of Reusable Entities.
Each panel can be its own window, or you can organize your panels into trays. You can then customize which trays appear and how they appear in your workspace. All panel and tray options appear in the Window menu.
To customize your panels and trays, follow the instructions appropriate for your operating system.
Windows
To create a custom panel tray, follow these steps:
Select Window > New Tray. A dialog with tray options appears.
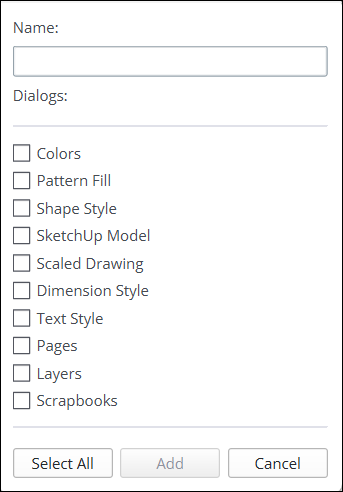
- Type a name for the tray.
- Select each panel that you want to include in the tray. Clicking Select All selects all trays.
- After making your selections, click Add. Your new tray will appear in the Window menu.
New trays appear as a tab at the bottom of the existing tray window. Each tray has its own tab. Click those tabs to switch between trays. You can also click and drag a tab out of the window to create a new, separate tray.
You can also drag and arrange your trays anywhere, even outside the LayOut window. When you drag a tray, you’ll see positioning icons in the workspace. Use those icons to snap your tray to the position shown on that icon.
MacOS
LayOut on MacOS doesn’t use trays the same way as Windows. Each panel is its own window. If you have multiple panels open, you can create a tray by sticking panels together:
- Click Window and select the panel you want to open. A check mark means that panel is already open. A dash means the panel is hidden. No mark indicates the panel is closed.
- If at least two panels are open, click and drag one panel’s title bar to the bottom of another panel. The bottom panel will stick to the top one.
- Repeat this process until you create the stack of panels you want to use.
- To create a stack of all available panels, click Window > Arrange Panels.

After creating a stack you can:
- Open or hide a panel by clicking its title bar.
- Click Close in the upper left of a panel to remove it from the stack and screen.
- Click and drag a panel’s title bar to separate it from the stack.