For SketchUp Studio subscribers using Microsoft Windows, our Revit Importer makes it easy to import your Revit project into a SketchUp model.
The Revit Importer is available when downloading SketchUp on Windows or Extension Warehouse and includes:
- Compatibility with all supported versions of SketchUp.
- The ability to import a file without a current Revit installation or a Revit license.
- Compatibility with .rvt files created using versions of Revit starting with 2011 and up to the current version available when we update SketchUp.
When you use the Revit Importer to incorporate a .rvt file into your SketchUp model, SketchUp automatically creates the following:
- SketchUp Components - Converts all Revit families into components, converts identical Revit objects to identical components, and names components using the Revit family name/family type.
- SketchUp Tags - All Revit families receive tags named after their equivalent Revit categories.
- SketchUp Sections - Sections are created from Revit Levels, point downward, and placed 4' above Revit levels.
- SketchUp Materials - Revit Materials become SketchUp Materials and appear as if rendered using the Consistent Colors option in Revit. Transparent Materials are also supported.
- Geometry Optimization - SketchUp optimizes redundant triangulation and lowers the segment count on curves in imported Revit projects.
- 3D Views Dialog - The importer includes a dialog displaying all available 3D views in your .rvt file. With this dialog, you can import a specific view, including that view’s 3D element visibility. 2D elements are not supported.
- Data Preservation – The importer preserves critical data embedded in .rvt files to accurately identify IFC classes.
- Outliner-Based Components – SketchUp uses the hierarchy of levels in your .rvt file to create components in Outliner.
- Revit Links Support - When an imported Revit project contains one or more linked .rvt projects, the importer creates a proxy object for each. These proxy objects appear with the <Revit Missing Link> tag. For more information, see the Revit Links Support workflows we’ve listed below..
Import Options
The Revit Importer offers two ways to bring your Revit projects into SketchUp, from a local drive or from Trimble connect.
Importing From a Local Drive
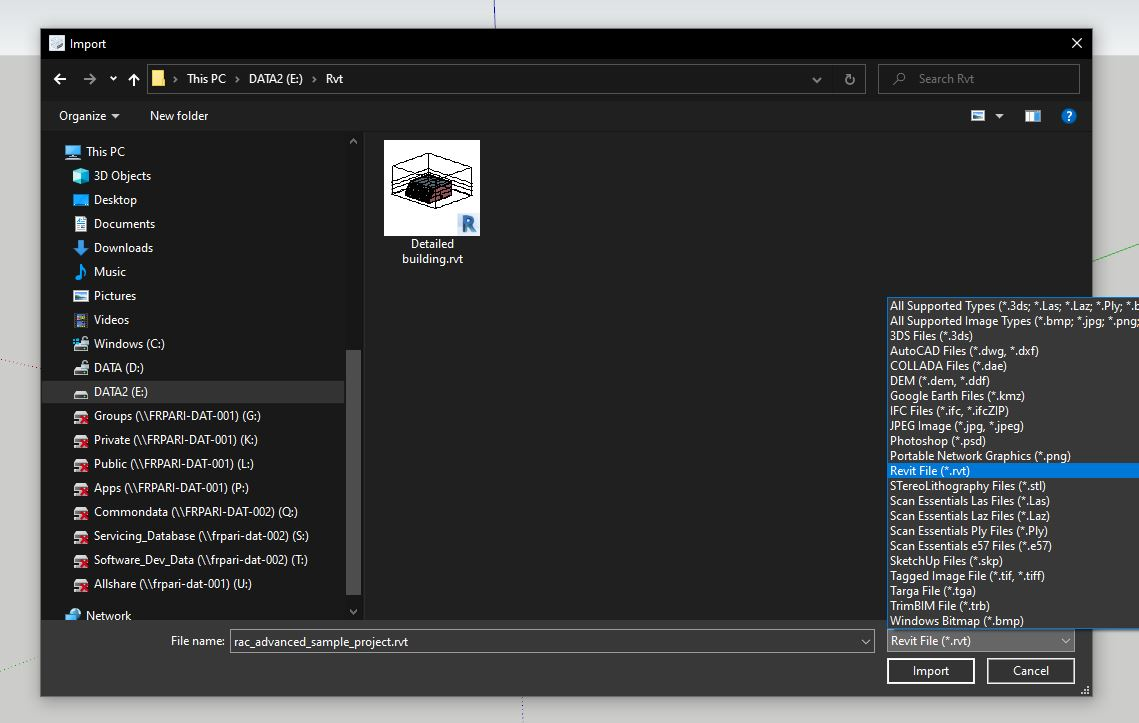
If your .rvt file is saved locally, import the file in SketchUp by clicking File > Import. In the File Manager you will see Revit File (*.rvt) listed as an option in the list of supported files. Select a file and click Import.
Importing From Trimble Connect
If you have uploaded a .rvt file to a project in Trimble Connect, click File > Trimble Connect > Import File or Import Visual Reference.
If you have the Trimble Connect toolbar in SketchUp, use Import File or Import Reference Model. The interface may vary depending on which version of SketchUp you are using.
After the Trimble Connect window appears, locate your published .rvt file and click Import.
Revit Links Support
When an imported Revit project contains one or more linked .rvt projects, the Revit Importer creates a proxy object for each in SketchUp. These proxy objects appear with the <Revit Missing Link> tag. There are three ways you can add these linked projects to SketchUp.
Option 1 - Any Revit Projects
- Import the main Revit project using the Revit Importer.
- Open a new, empty, SketchUp model and import the linked project. Save and close that model.
- Return to your main SketchUp model, locate the <Revit Missing Links> tag and make sure that tag is visible.
- Select and double-click the component associated with the imported Revit project.
- In that component's details find and select the proxy component.
- Right click the linked project's component and click Reload.
- Select the new model you created in step 2 and click Open.
- The proxy component is now replaced by the SketchUp model you made for the linked Revit project.
Option 2 - Any Revit Projects
- Import the main Revit project using the Revit Importer.
- Import the linked Revit project into the same model.
- Delete the component corresponding to the linked Revit project you just imported.
- Locate the <Revit Missing Links> Tag in the Tags panel and make it visible.
- Double-click the component associated with the imported Revit project
- Find and select the proxy component representing the linked Revit project.
- In the Components panel right click the imported linked Revit project and click Replace Selection.
- The proxy component is now replaced by the imported linked Revit project.
Option 3 - For Use With Revit Projects Sharing a Coordinate System
Import the main Revit project using the Revit Importer.
- Import the linked Revit project into the same model.
- Because the two projects share a coordinate system, the linked model replaces the proxy component.